
What You Will Build: AI-Generated Ads as Editable Layers
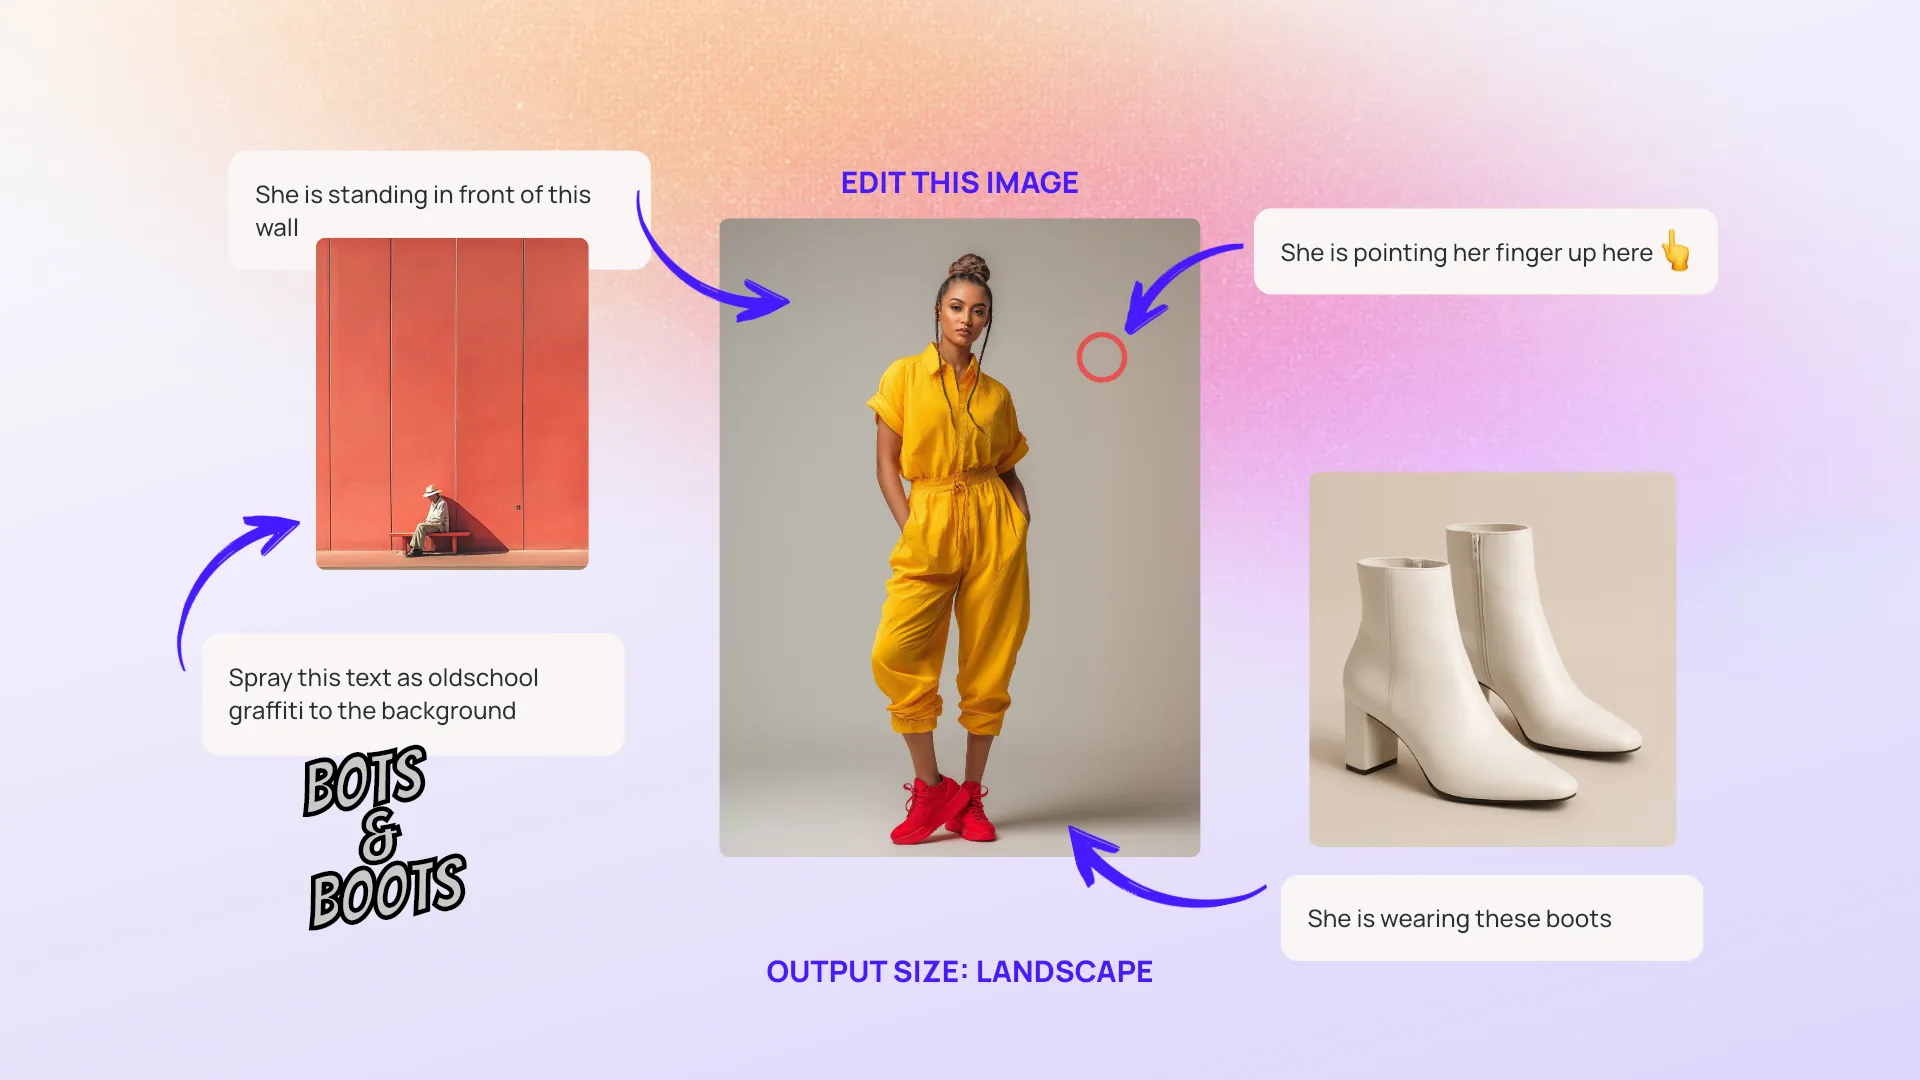
This guide will show you how to create layered images with a web app that turns a single prompt into an ad made of four separate layers. You’ll have a generated background, a product cutout, a real text headline, and a locked logo.
In the app, you can retype the headline, drag the product, swap the logo for another approved version, and resize the ad to the ratio you’re after, like 1:1, 9:16 or 16:9. The surprise is that none of that needs another generation call. When the background isn’t quite right, the app regenerates only that layer and leaves the rest alone.
Demo: labs.imgly.dev/p/r24dbfde_editable-ai-ads
Repository: github.com/imgly/editable-ai-ads
This article is for anyone that builds their own marketing tools, or who are adding AI image generation to their apps and SaaS platforms. If you already have image generation in place but are tired of generating entire images when all you need is a few tweaks here and there then you’ve come to the right place.
Why “Regenerate With a Better Prompt” Is the Wrong Answer for Marketers
An image model generally gives you one flat picture with a single layer, which means that the headline, product, logo and backdrop are all pixels in the same bitmap. Making small changes with regular image generation tools means you roll the dice and hope that the next image makes the right changes without flipping the script and changing everything else.
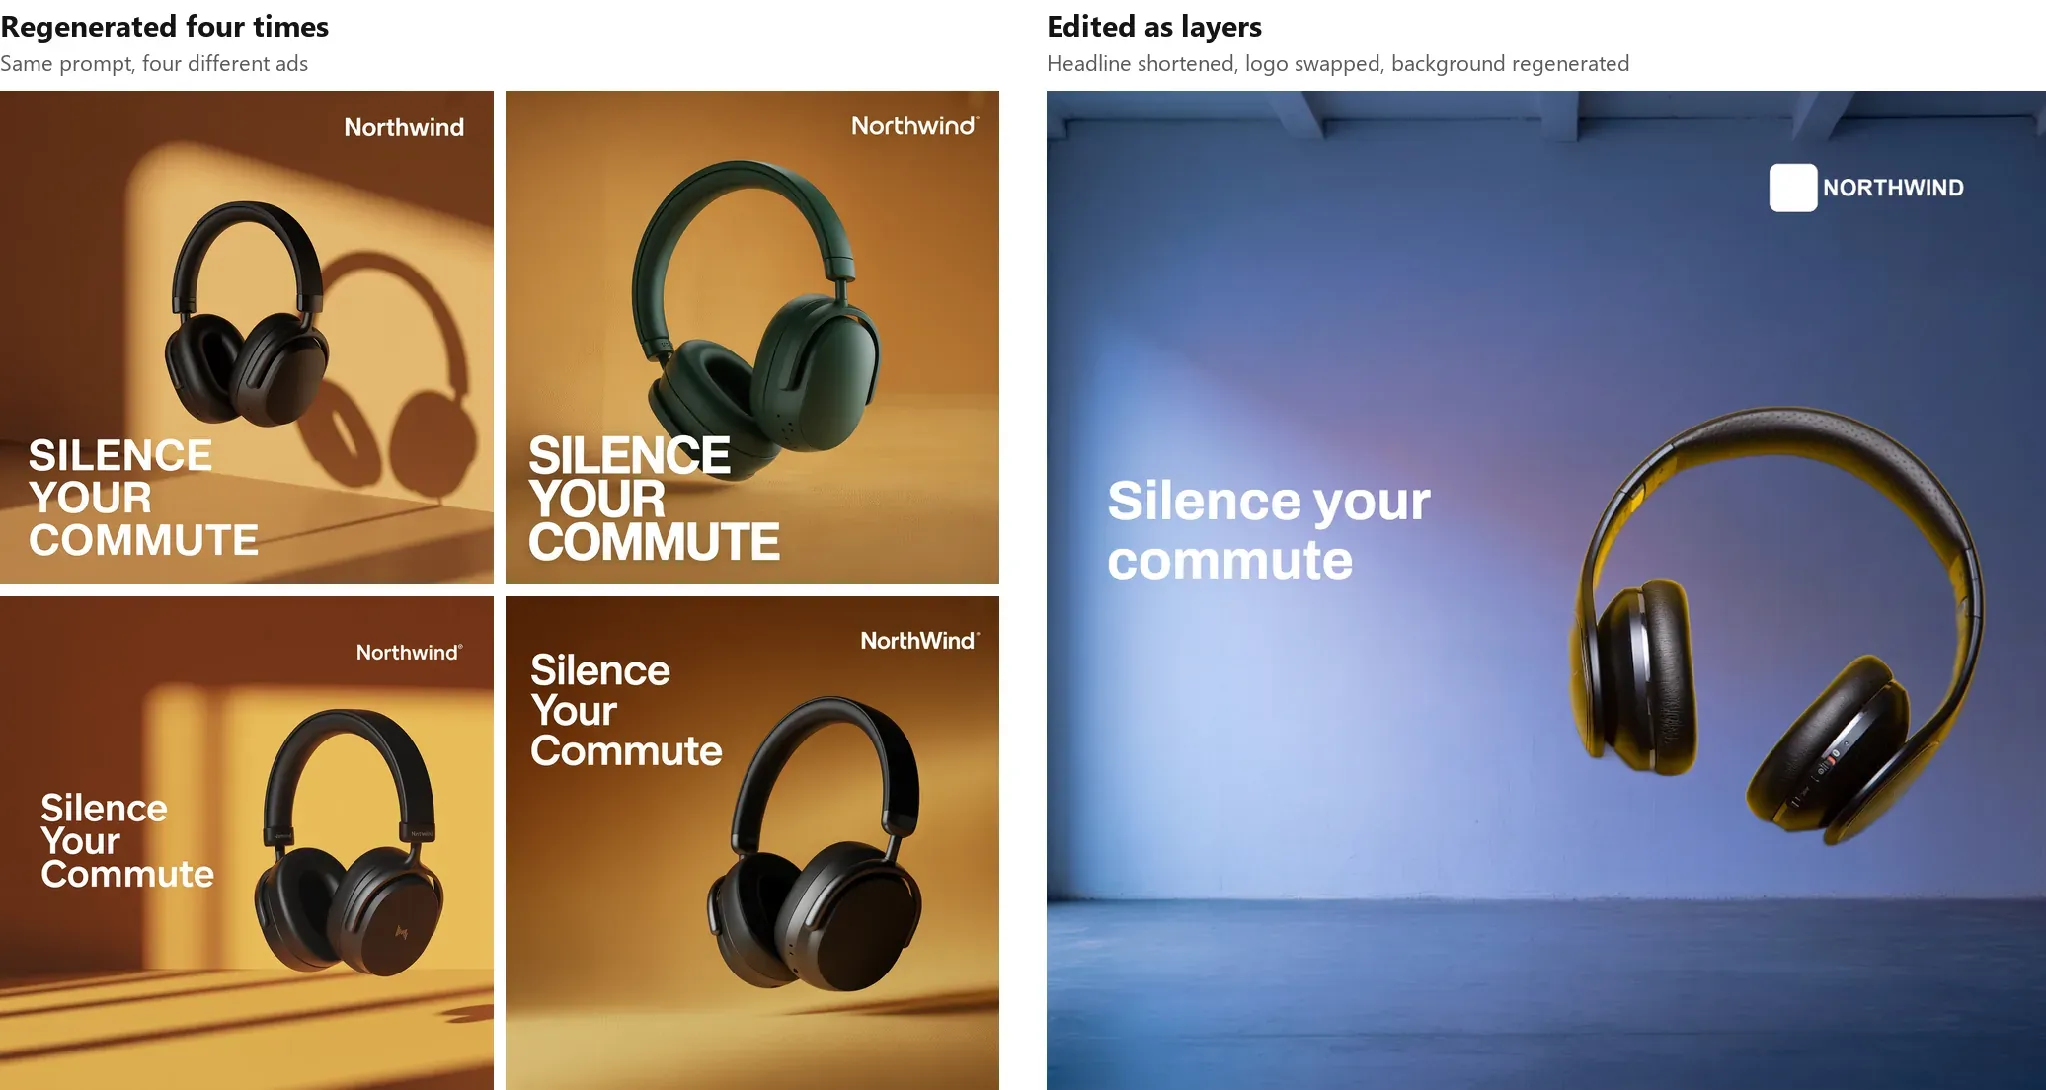
For this article, the same full-ad prompt went to Ideogram V3 four times. This is a useful way to explore designs in parallel, letting you focus on your initial idea until you find the perfect starting point. From here, what you really want is to be able to edit your idea and tweak it, not get a completely different picture. Using the demo app, you can move the headline or change a word while keeping everything else exactly as it was.
The first round of generation produces layers, so the user can change specific elements of the design piece by piece, and the export keeps everything else exactly as it was except for the edit.
Editing AI Output: Regenerate, Inpaint, or Generate Layers Into a Scene
The table below shows you all of the generation options for your next ad, and how it all fits together.
| Property | Regenerate the whole image | Inpaint a region | Generate layers into a scene |
|---|---|---|---|
| Cost per iteration (model calls) | 1 per attempt | 1 per attempt | 0 for text, layout, logo and size changes; 1 to regenerate one layer |
| Time per iteration | 22 to 26 s per attempt in the test run | Not tested with a mask; one image-to-image edit of the flat ad took 21 s | Milliseconds for layout, logo and size changes; 26 to 38 s to regenerate one layer |
| Brand consistency across iterations | Low: product, logo and layout changed between attempts | Medium: pixels outside the mask are kept, pixels inside are redrawn | High: layers you do not edit do not change |
| Text stays real text | No, it is pixels | No, it is pixels | Yes, it is a text block |
| User can move and resize elements | No | No | Yes, block by block |
| One-click resize to other formats | No, one generation per format | No, one generation per format | Yes, the layout runs again on the same blocks |
| Logo stays exact | No, the model draws it | Only if the mask leaves it out | Yes, it is a file from the brand kit |
| Works with any image model | Yes | Only models that support inpainting | Any text-to-image model to generate; an image-to-image model to regenerate a layer |
| What you have to build | A prompt form | A prompt form and a masking tool | A generation step, a scene composer and an editor |
The first two approaches spend a model call on every change, which is perfect for prototyping your ideas until you find the design that you are looking for. They don’t keep the logo or the layout the same, so you will get variations until you’re happy with the general look and feel. The cool feature is that layers only use model calls where new pixels are needed, and every other change is an ordinary edit that only changes when you decide.
Step 1: Generate the Parts, Not the Picture
generateParts in src/generate.ts asks for four parts instead of one ad. Each of these parts comes from a different source, but the three that take time run in parallel. Instead of waiting for three separate generations, it only takes as long as the slowest render.
// src/generate.ts
export async function generateParts(
  client: GatewayClient,
  brief: AdBrief
): Promise<AdParts> {
  // The three sources are independent, so they run at the same time.
  const [background, headline, product] = await Promise.all([
    generateBackground(client, brief.backgroundPrompt),
    generateHeadline(client, brief),
    cutOutProduct(brief.productImage),
  ]);

  return { background, product, headline, logo: BRAND.logo };
}
The background is one text-to-image call through IMG.LY’s AI gateway, and the demo uses the Ideogram V3 model. The buildInput helper in src/gateway.ts reads the model’s input schema and passes only the fields that model accepts, so a different model ID doesn’t break the call.
// src/generate.ts
export async function generateBackground(
  client: GatewayClient,
  prompt: string
): Promise<ImagePart> {
  // Ideogram V3 takes `format` (1:1, 4:3, 16:9, 3:4, 9:16) and a `style`.
  const input = await buildInput(client, MODELS.text2image, {
    prompt,
    format: '1:1',
    style: 'REALISTIC',
  });
  const uri = await client.generate(MODELS.text2image, input, {});
  return measureImage(await persistImage(uri));
}
The headline comes from a separate text model, and as you would expect, arrives as a string. It only becomes pixels at export, which is why we can edit the headline and tweak it as its own property.
// src/generate.ts
const prompt =
  `Write one advertising headline for ${brief.productName}. ` +
  `Audience: ${brief.audience}. ` +
  'At most six words. No quotation marks. No punctuation at the end. ' +
  'Reply with the headline only.';

const input = { messages: [{ role: 'user', content: prompt }] };

let text = '';
for await (const chunk of client.generateStream(MODELS.text2text, input, {})) {
  text = chunk;
}
The product doesn’t need a model call. @imgly/background-removal cuts it out in the browser, and a short canvas step trims the transparent edges so the block is the size of the product instead of the original photo.
// src/generate.ts
export async function cutOutProduct(image: Blob | string): Promise<ImagePart> {
  const cutout = await removeBackground(image);
  const trimmed = await cropToContent(cutout);
  return measureImage(URL.createObjectURL(trimmed));
}
But what about the logo? Well, the logo isn’t generated at all. It comes from the brand kit in src/brand.ts, so it’s the same file every time without any surprises.
In the test run, the parts took 52 seconds and two model calls. The text model returned “Silence Your Commute With Northwind Headphones”. If you aren’t happy with that then you could shorten it in step 3.
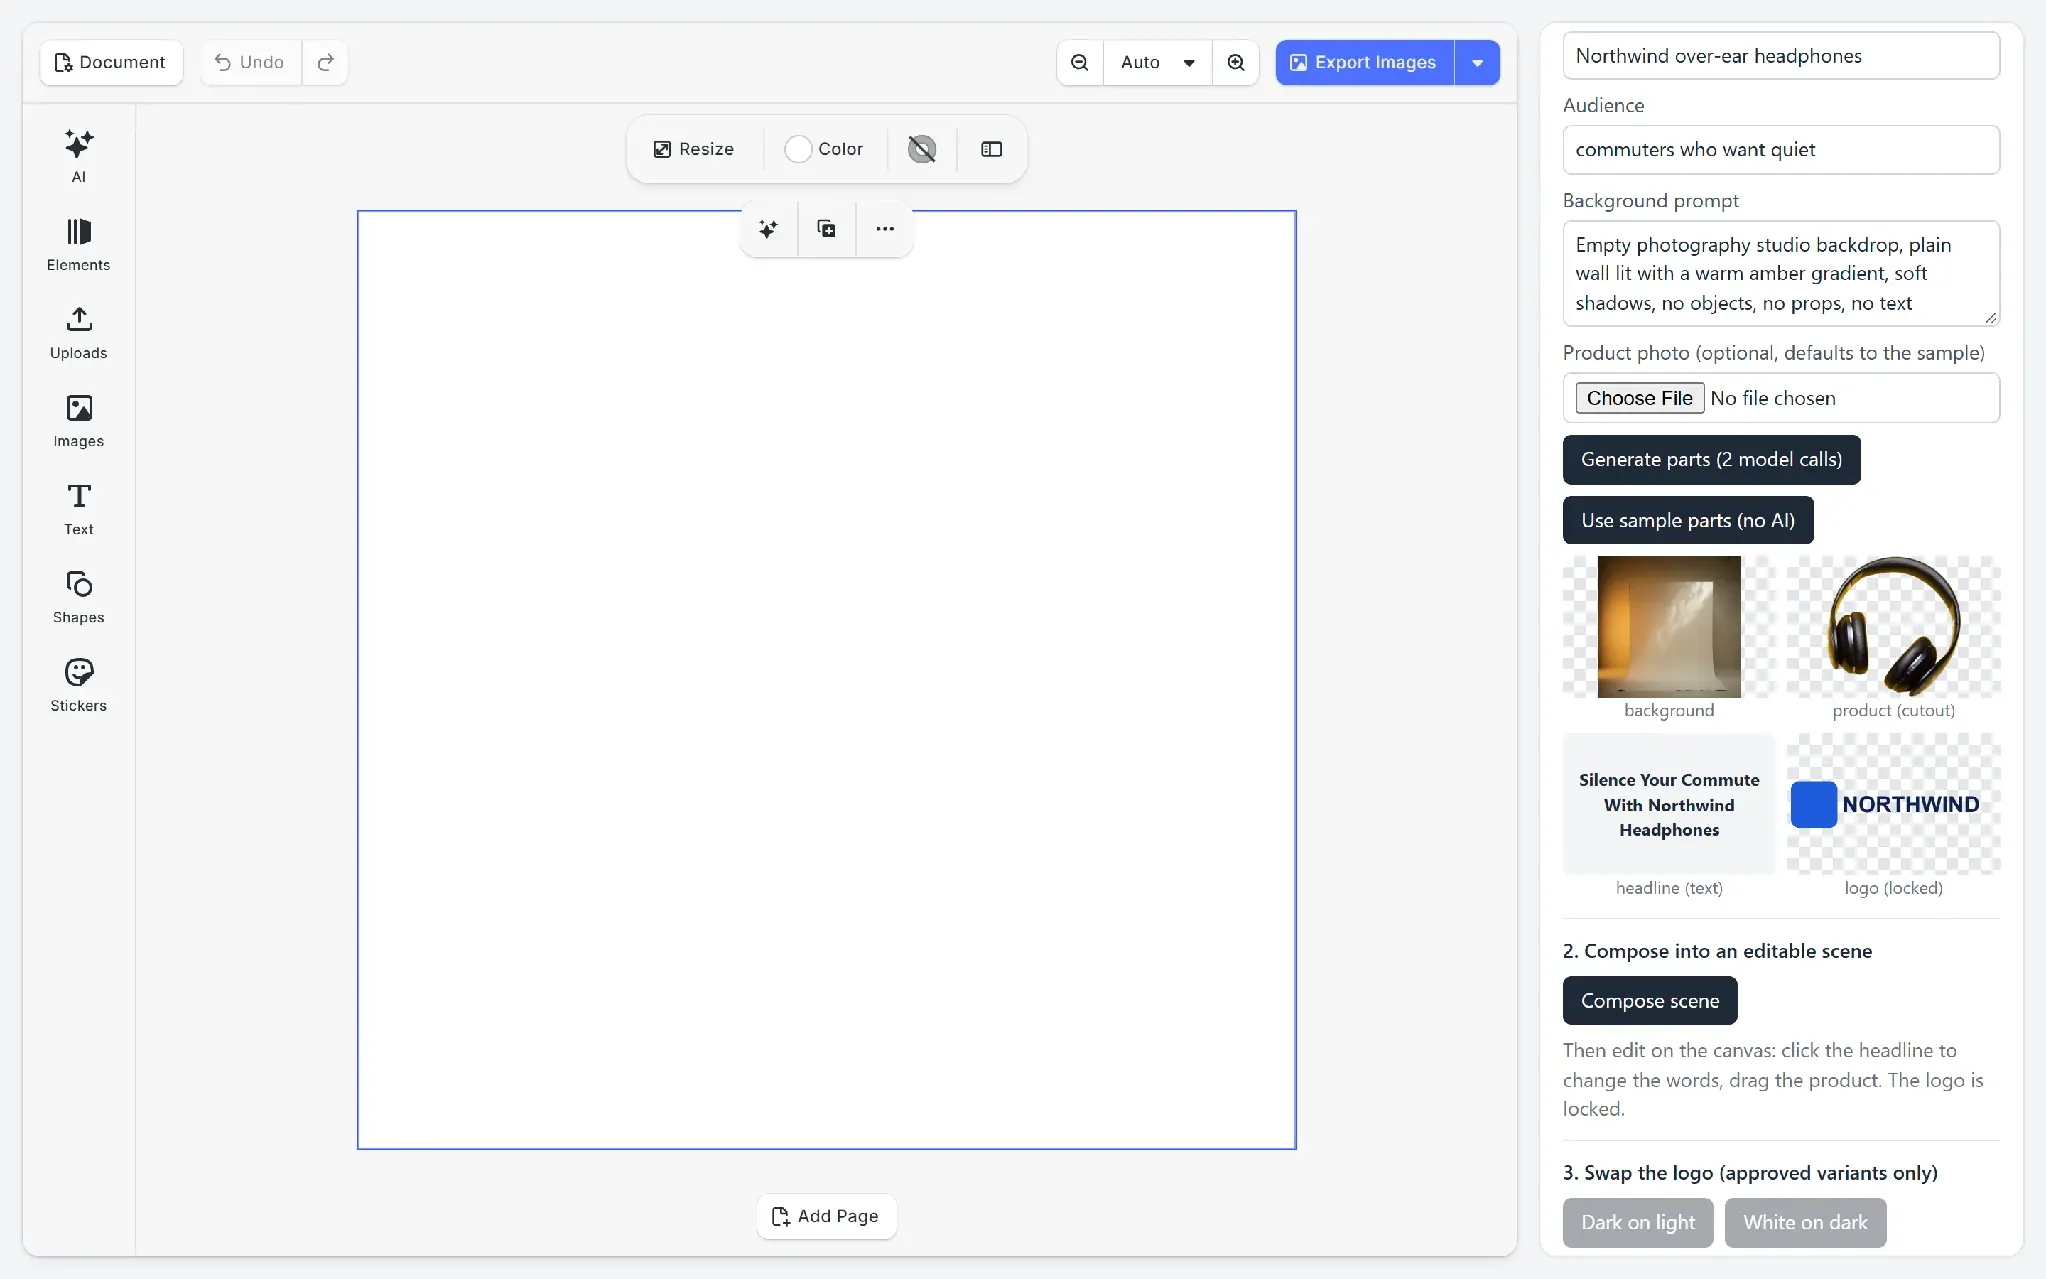
To customize this even more, you can change the model IDs in MODELS and load the brand kit from your customer’s settings instead.
Step 2: Compose the Parts Into an Editable Scene
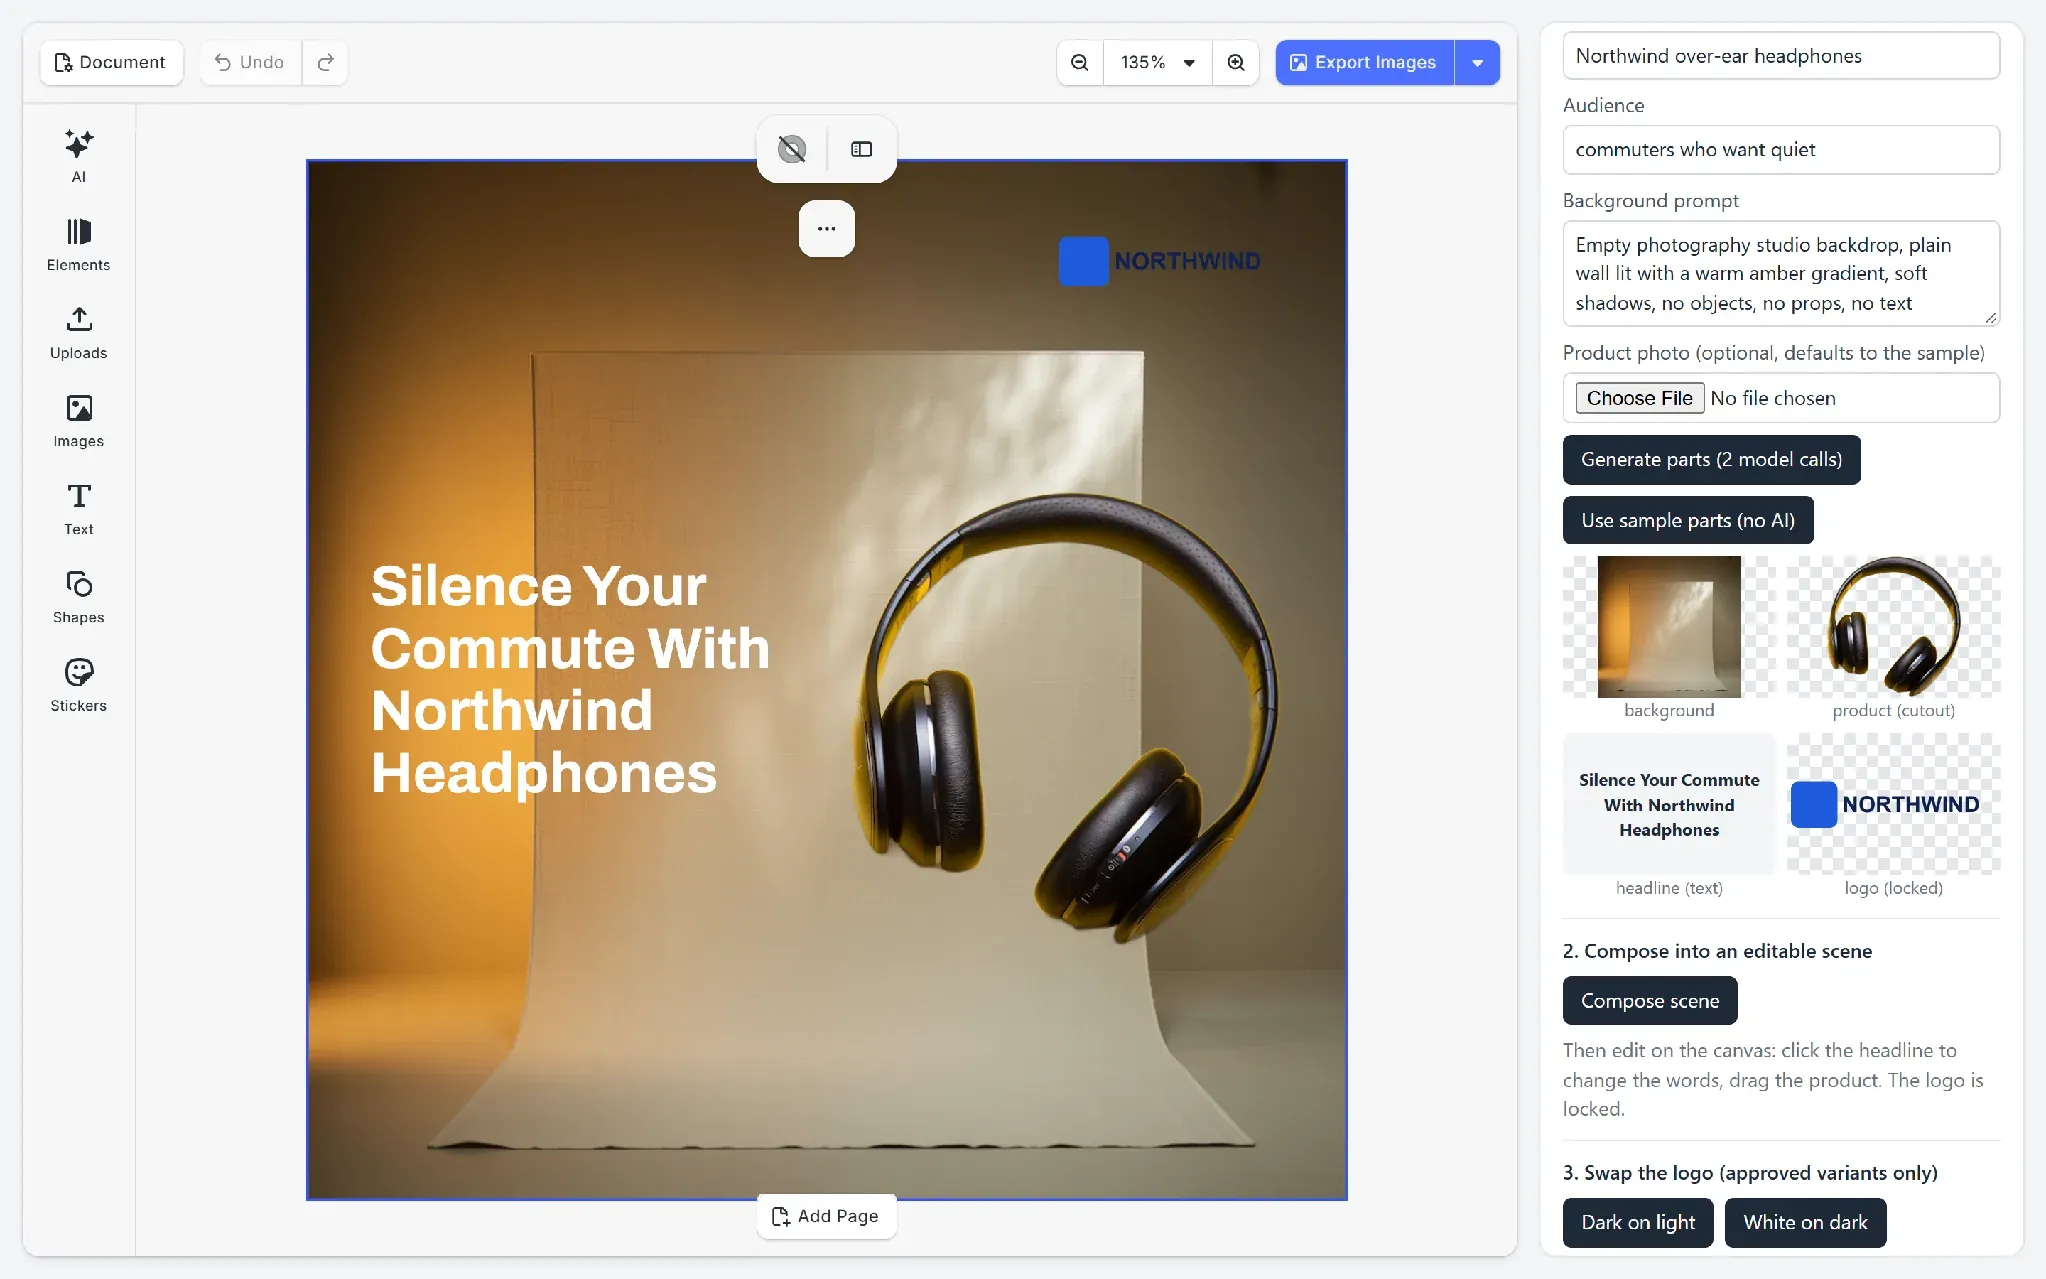
Let’s recap. composeScene in src/scene.ts creates a page and turns each part into a block. The background and the product become graphic blocks with image fills, and the headline becomes a text block in the specified brand typeface and color. The logo is a third image block, and every block gets a name, so future steps can find it without tracking IDs.
// src/scene.ts
const background = addImageBlock(
  engine,
  page,
  parts.background,
  LAYER.background
);
engine.block.setContentFillMode(background, 'Cover');

const product = addImageBlock(engine, page, parts.product, LAYER.product);
engine.block.setContentFillMode(product, 'Contain');

const headline = engine.block.create('text');
engine.block.setName(headline, LAYER.headline);
engine.block.replaceText(headline, parts.headline);
engine.block.setFont(headline, BRAND.headline.fontUri, BRAND.headline.typeface);
engine.block.setTextColor(headline, BRAND.headline.color);
engine.block.setWidthMode(headline, 'Absolute');
engine.block.setHeightMode(headline, 'Auto');
engine.block.appendChild(page, headline);

const logo = addImageBlock(engine, page, parts.logo, LAYER.logo);
engine.block.setContentFillMode(logo, 'Contain');
Image blocks carry the image’s width and height in their fill’s source set, so the engine can lay out the block before the image has loaded.
// src/scene.ts
function addImageBlock(
  engine: CreativeEngine,
  page: number,
  image: ImagePart,
  name: string
): number {
  const block = engine.block.create('graphic');
  engine.block.setShape(block, engine.block.createShape('rect'));

  const fill = engine.block.createFill('image');
  engine.block.setSourceSet(fill, 'fill/image/sourceSet', [toSource(image)]);
  engine.block.setFill(block, fill);

  engine.block.setName(block, name);
  engine.block.appendChild(page, block);
  return block;
}
A source entry takes exactly three fields, uri, width and height; the engine rejects an entry with anything else. Brand kit logos also carry an ID and a label, so the toSource helper in src/scene.ts strips those out before they reach the engine.
The composition step took under half a second and no model calls, which is pretty quick if you ask me.
Step 3: Let Users Edit Text, Position and Images
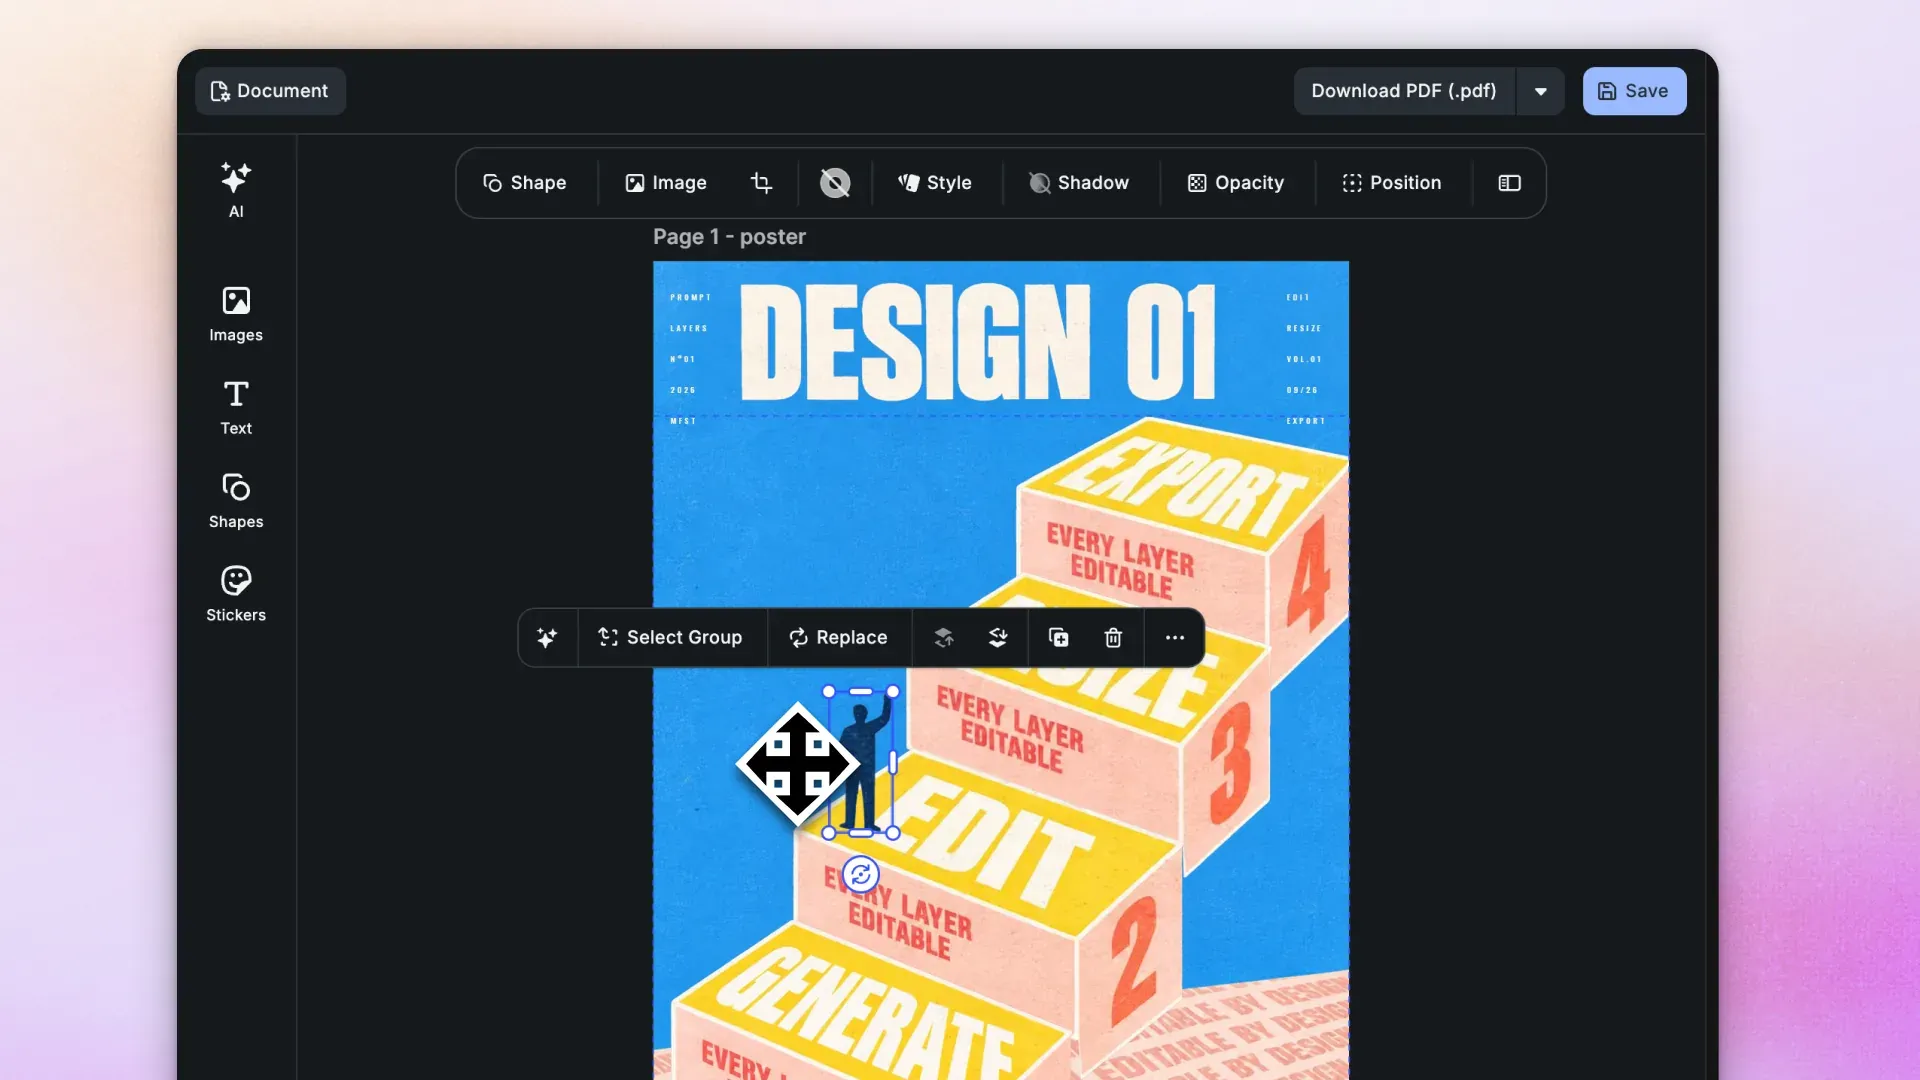
CE.SDK controls what a user can change by using scopes. Each scope covers one action, like moving a block, replacing its image, or deleting it. setEditable sets each scope to defer to the block, then turns it on or off for that block.
// src/scene.ts
const EDIT_SCOPES = [
  'layer/move',
  'layer/resize',
  'layer/rotate',
  'layer/crop',
  'fill/change',
  'fill/changeType',
  'lifecycle/destroy',
  'lifecycle/duplicate',
] as const;

export function setEditable(
  engine: CreativeEngine,
  block: number,
  editable: boolean
): void {
  for (const scope of EDIT_SCOPES) {
    engine.editor.setGlobalScope(scope, 'Defer');
    engine.block.setScopeEnabled(block, scope, editable);
  }
}
composeScene makes the background, product and headline all editable, except for the logo. The demo calls it for every block, and once a scope defers to blocks, a block with no setting of its own is locked.
In the editor, the user clicks the headline and types exactly what they want and the product can be dragged and resized. At this stage the logo can’t be moved, resized, replaced or deleted.
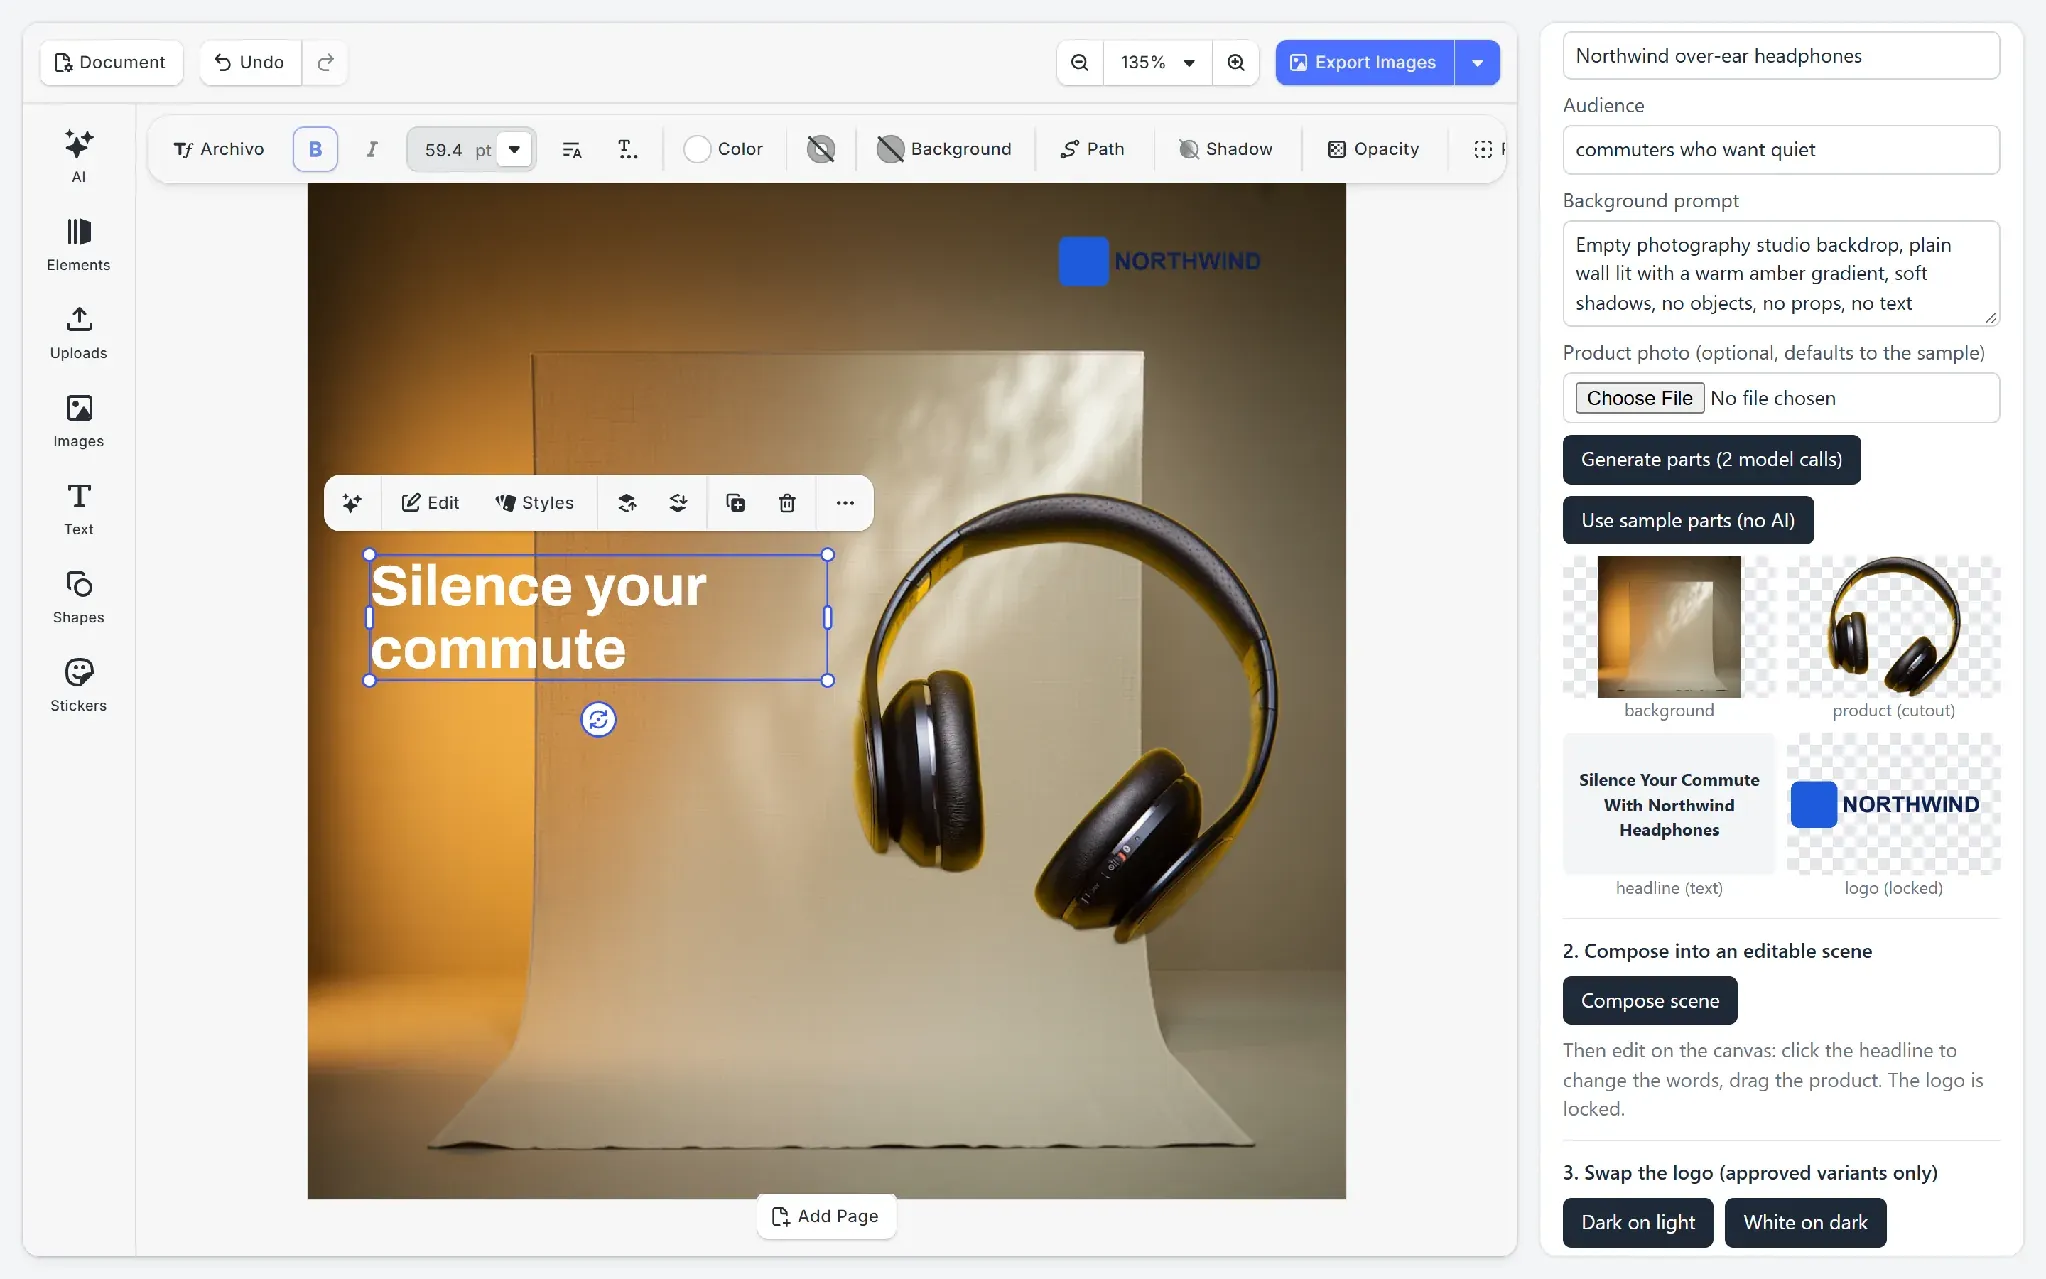
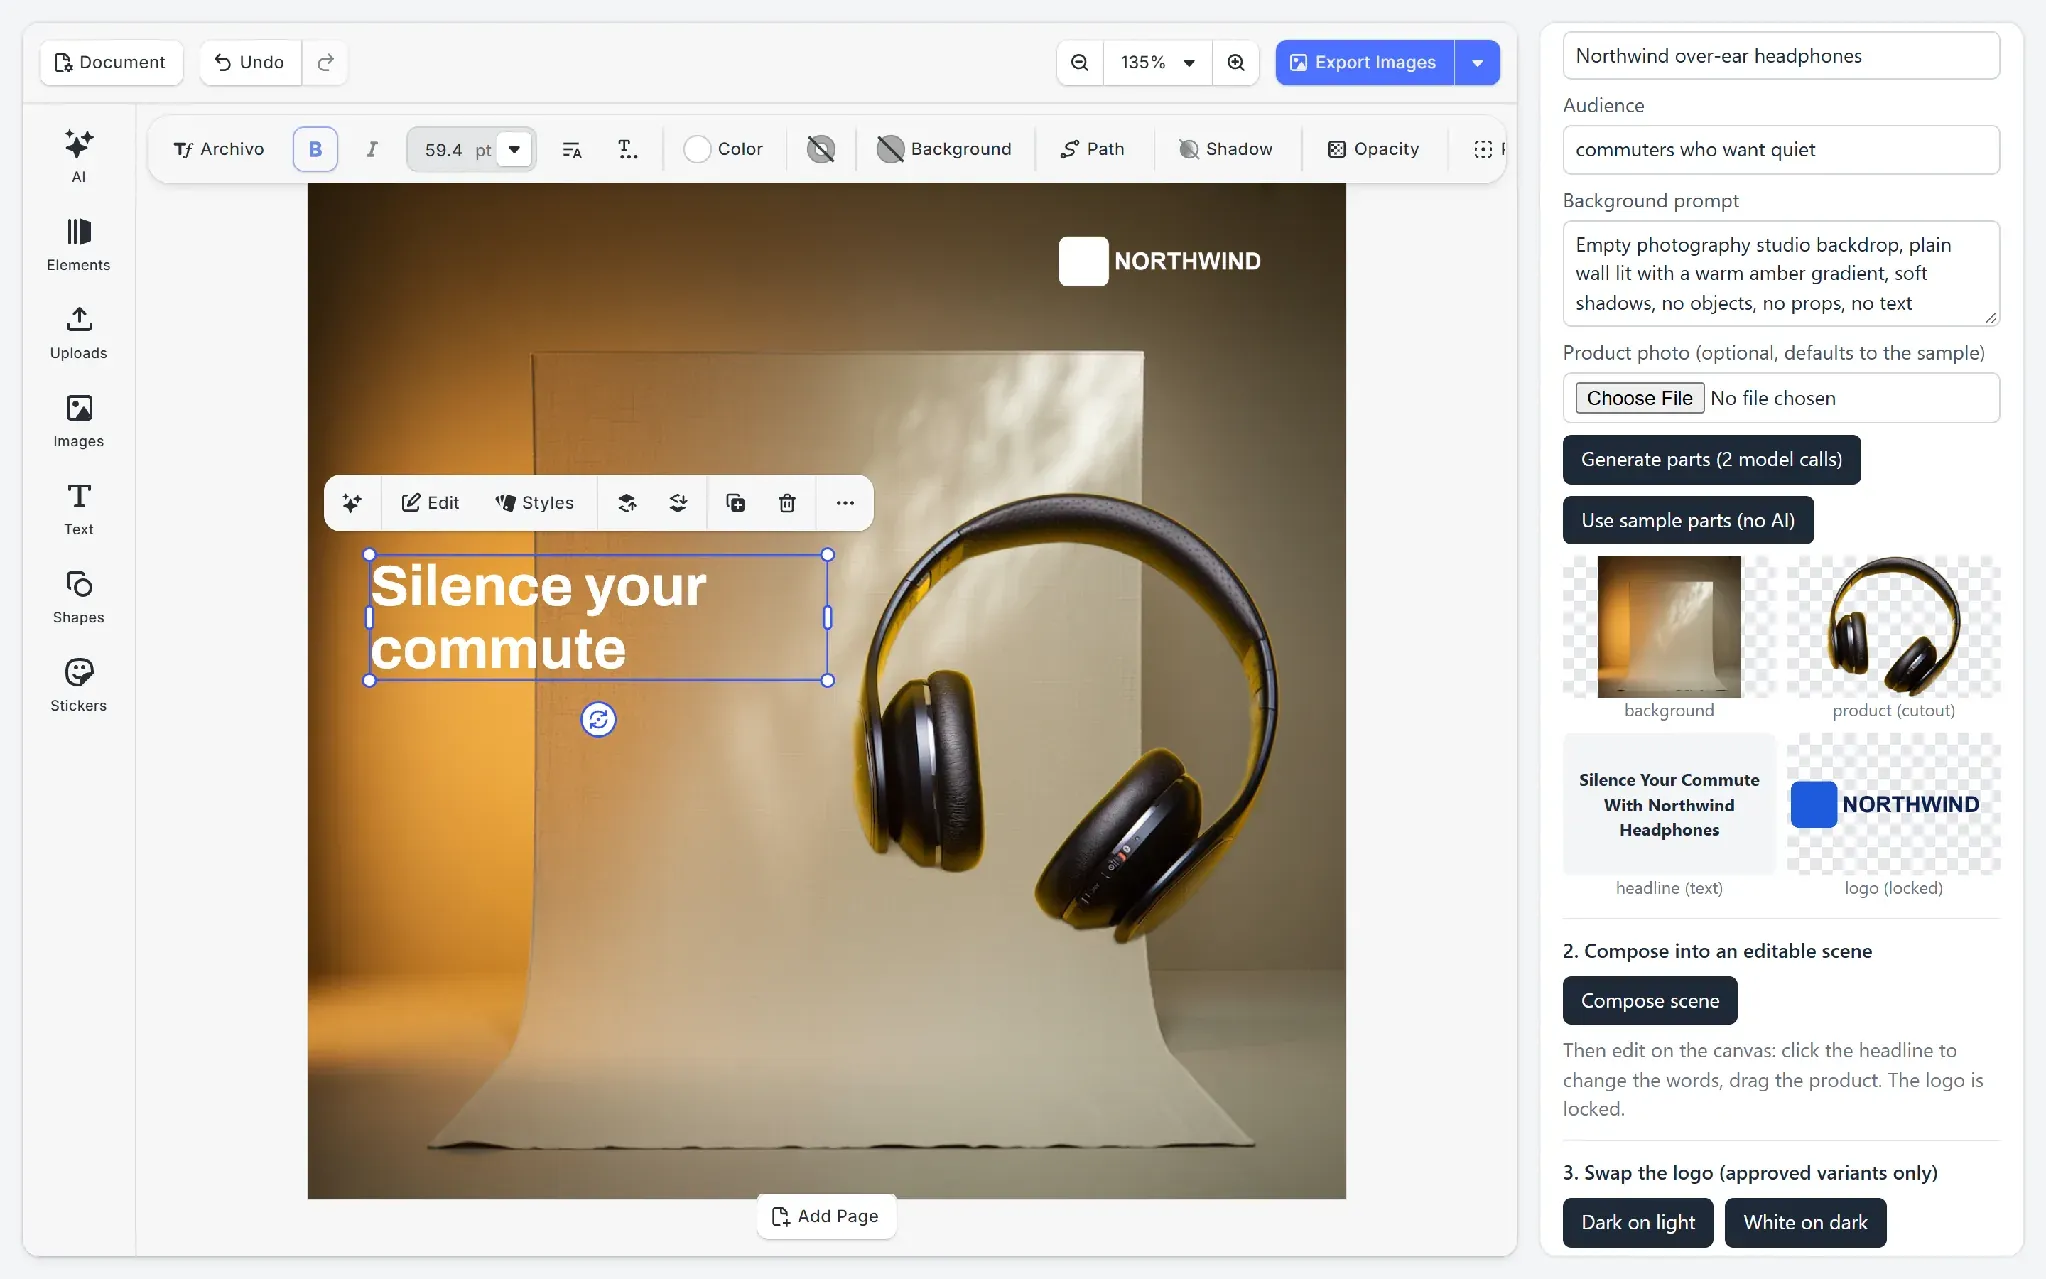
The brand kit has two approved logo versions, one dark and one white. The user can’t put a different image into the logo block, but the app can switch between the approved versions. In the example test run, the swap worked while the logo’s scopes were still off.
// src/scene.ts
export function swapLogo(engine: CreativeEngine, variant: LogoVariant): void {
  const logo = findLayer(engine, LAYER.logo);
  const fill = engine.block.getFill(logo);
  engine.block.setSourceSet(fill, 'fill/image/sourceSet', [toSource(variant)]);
}
Step 4: Regenerate One Layer Only With Image-to-Image
If you aren’t happy with the backdrop, you can change it. regenerateBackground in src/regenerate-layer.ts exports the background block as a PNG, uploads it to the gateway, and sends it to an image-to-image model with a new prompt. The output from that call replaces the image in that block’s fill, and the block keeps its position, size and place in the stack. The other three blocks aren’t touched by this step, so they stay the same.
// src/regenerate-layer.ts
const background = findLayer(engine, LAYER.background);

const current = await engine.block.export(background, {
  mimeType: 'image/png',
});
const upload = await client.upload(current, 'image/png');

const input = await buildInput(client, MODELS.image2image, {
  prompt,
  image_urls: [upload.asset_url],
  format: 'auto',
});
const uri = await client.generate(MODELS.image2image, input, {});

const image = await measureImage(await persistImage(uri));
const fill = engine.block.getFill(background);
engine.block.setSourceSet(fill, 'fill/image/sourceSet', [image]);
The demo uses NanoBanana Pro Edit. In the test run, the prompt “Same backdrop, cooler blue tones, evening light” turned the amber studio blue in 38 seconds and only used one model call. The headline, product, and the logo stayed exactly as they were.
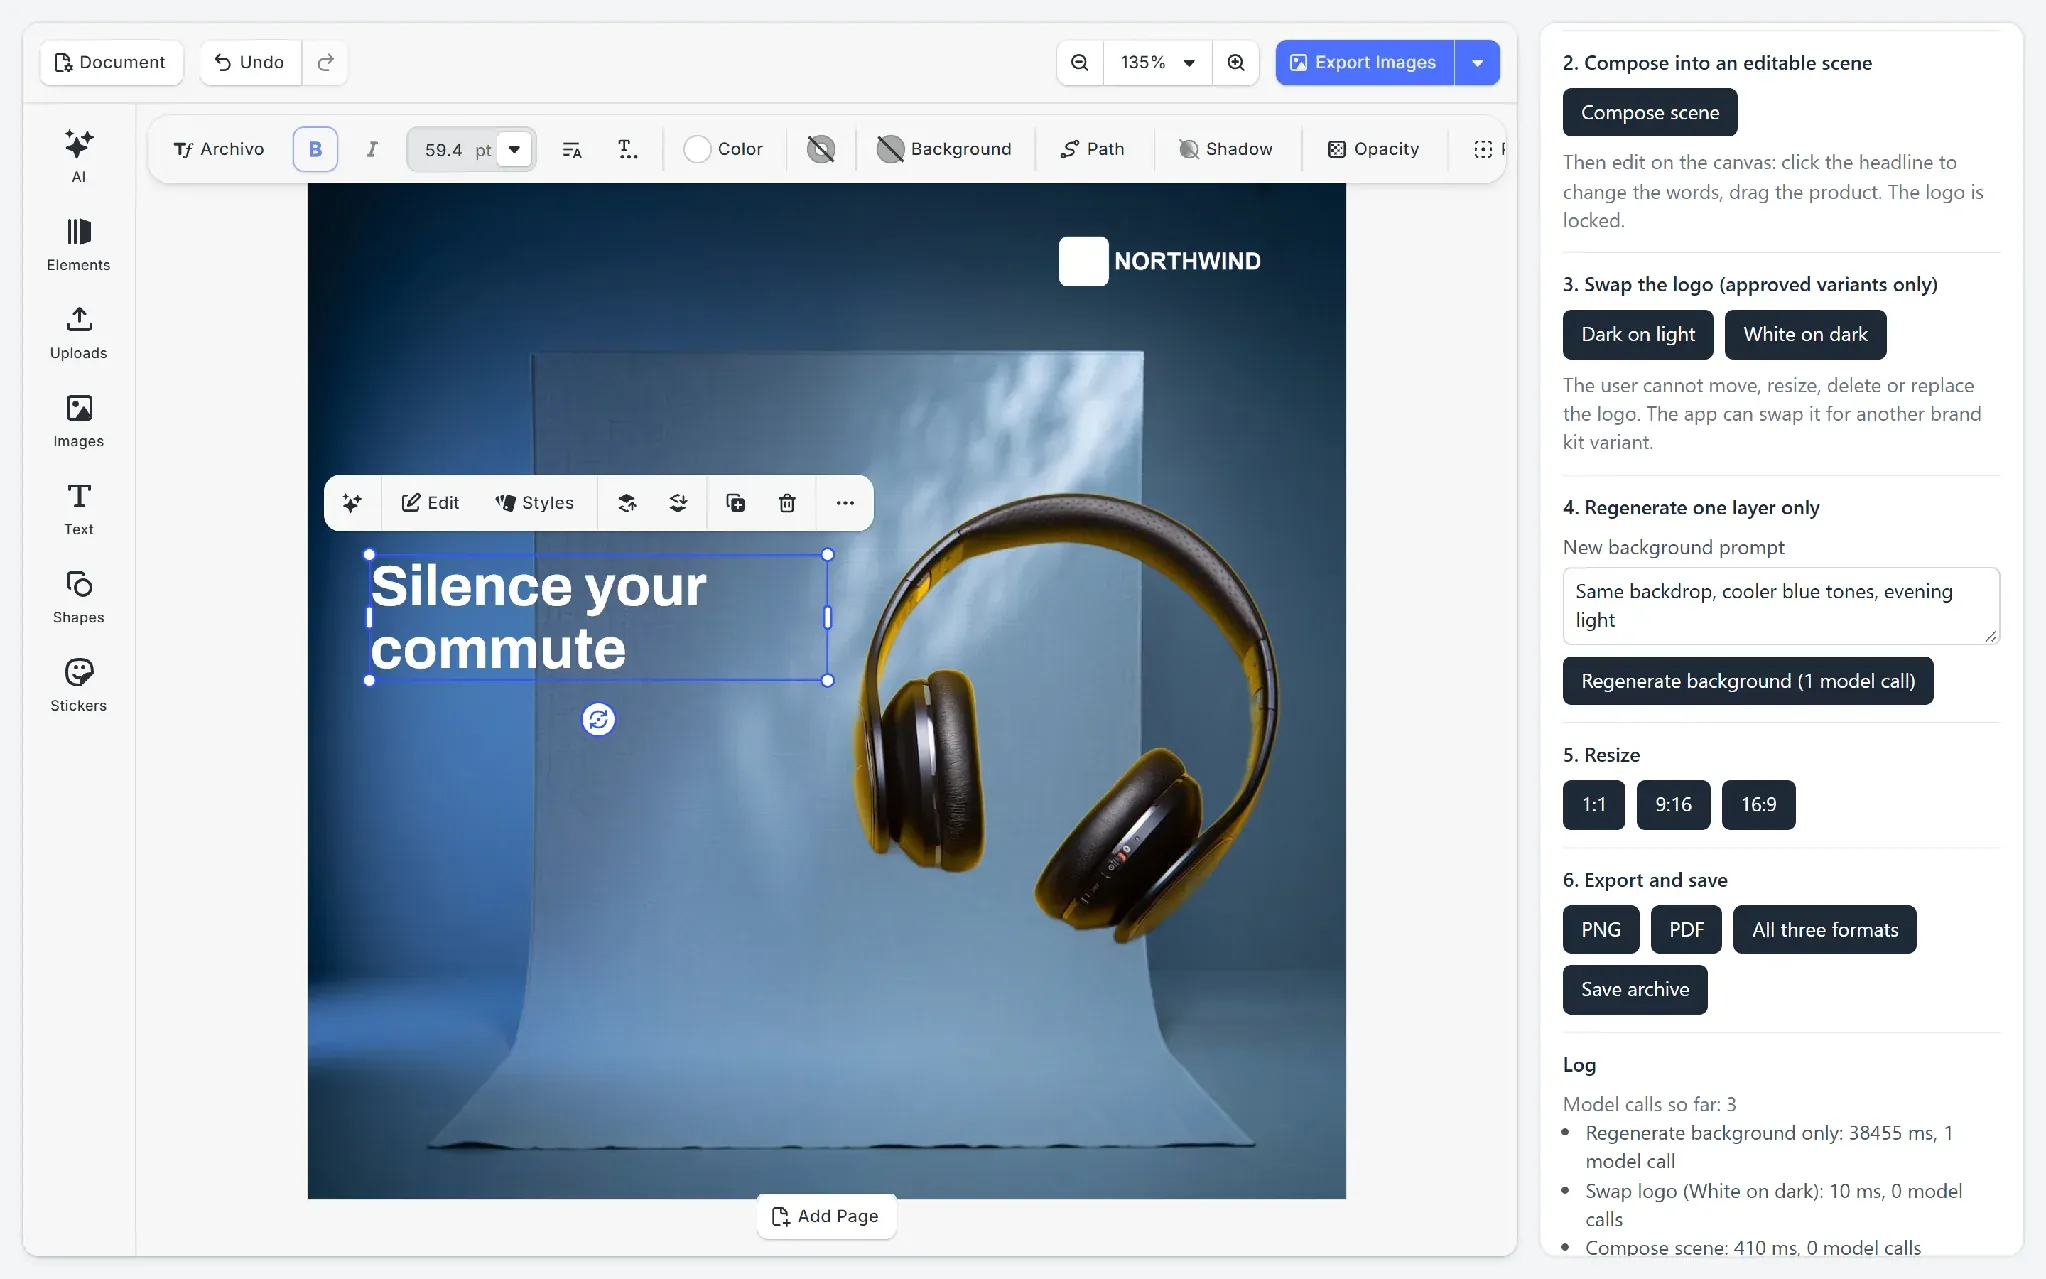
Sending only the background matters for the overall look and feel of your image. If the same model and prompt were run on one of the flat ads from the regeneration test, it would keep the layout, but possibly add unwanted effects like the headphones picking up the blue tint along with the wall. With layers, the product isn’t in the image that the model sees, so it can’t interfere with it.
Step 5: Resize the Same Design to 1:1, 9:16 and 16:9
resizeTo in src/resize.ts changes the page size and runs the layout again on the same blocks, and nothing is regenerated. The headline wraps to the new width because it’s text, and layoutPage in src/scene.ts stacks the headline above the product on tall pages and places them side by side on wide ones.
// src/resize.ts
export async function resizeTo(
  cesdk: CreativeEditorSDK,
  format: AdFormat
): Promise<void> {
  const engine = cesdk.engine;
  const page = currentPage(engine);

  engine.block.setWidth(page, format.width);
  engine.block.setHeight(page, format.height);
  layoutPage(engine, page);

  void engine.scene.zoomToBlock(page, { padding: 40, animate: false });
}
Each resize took 2 milliseconds in the test run.
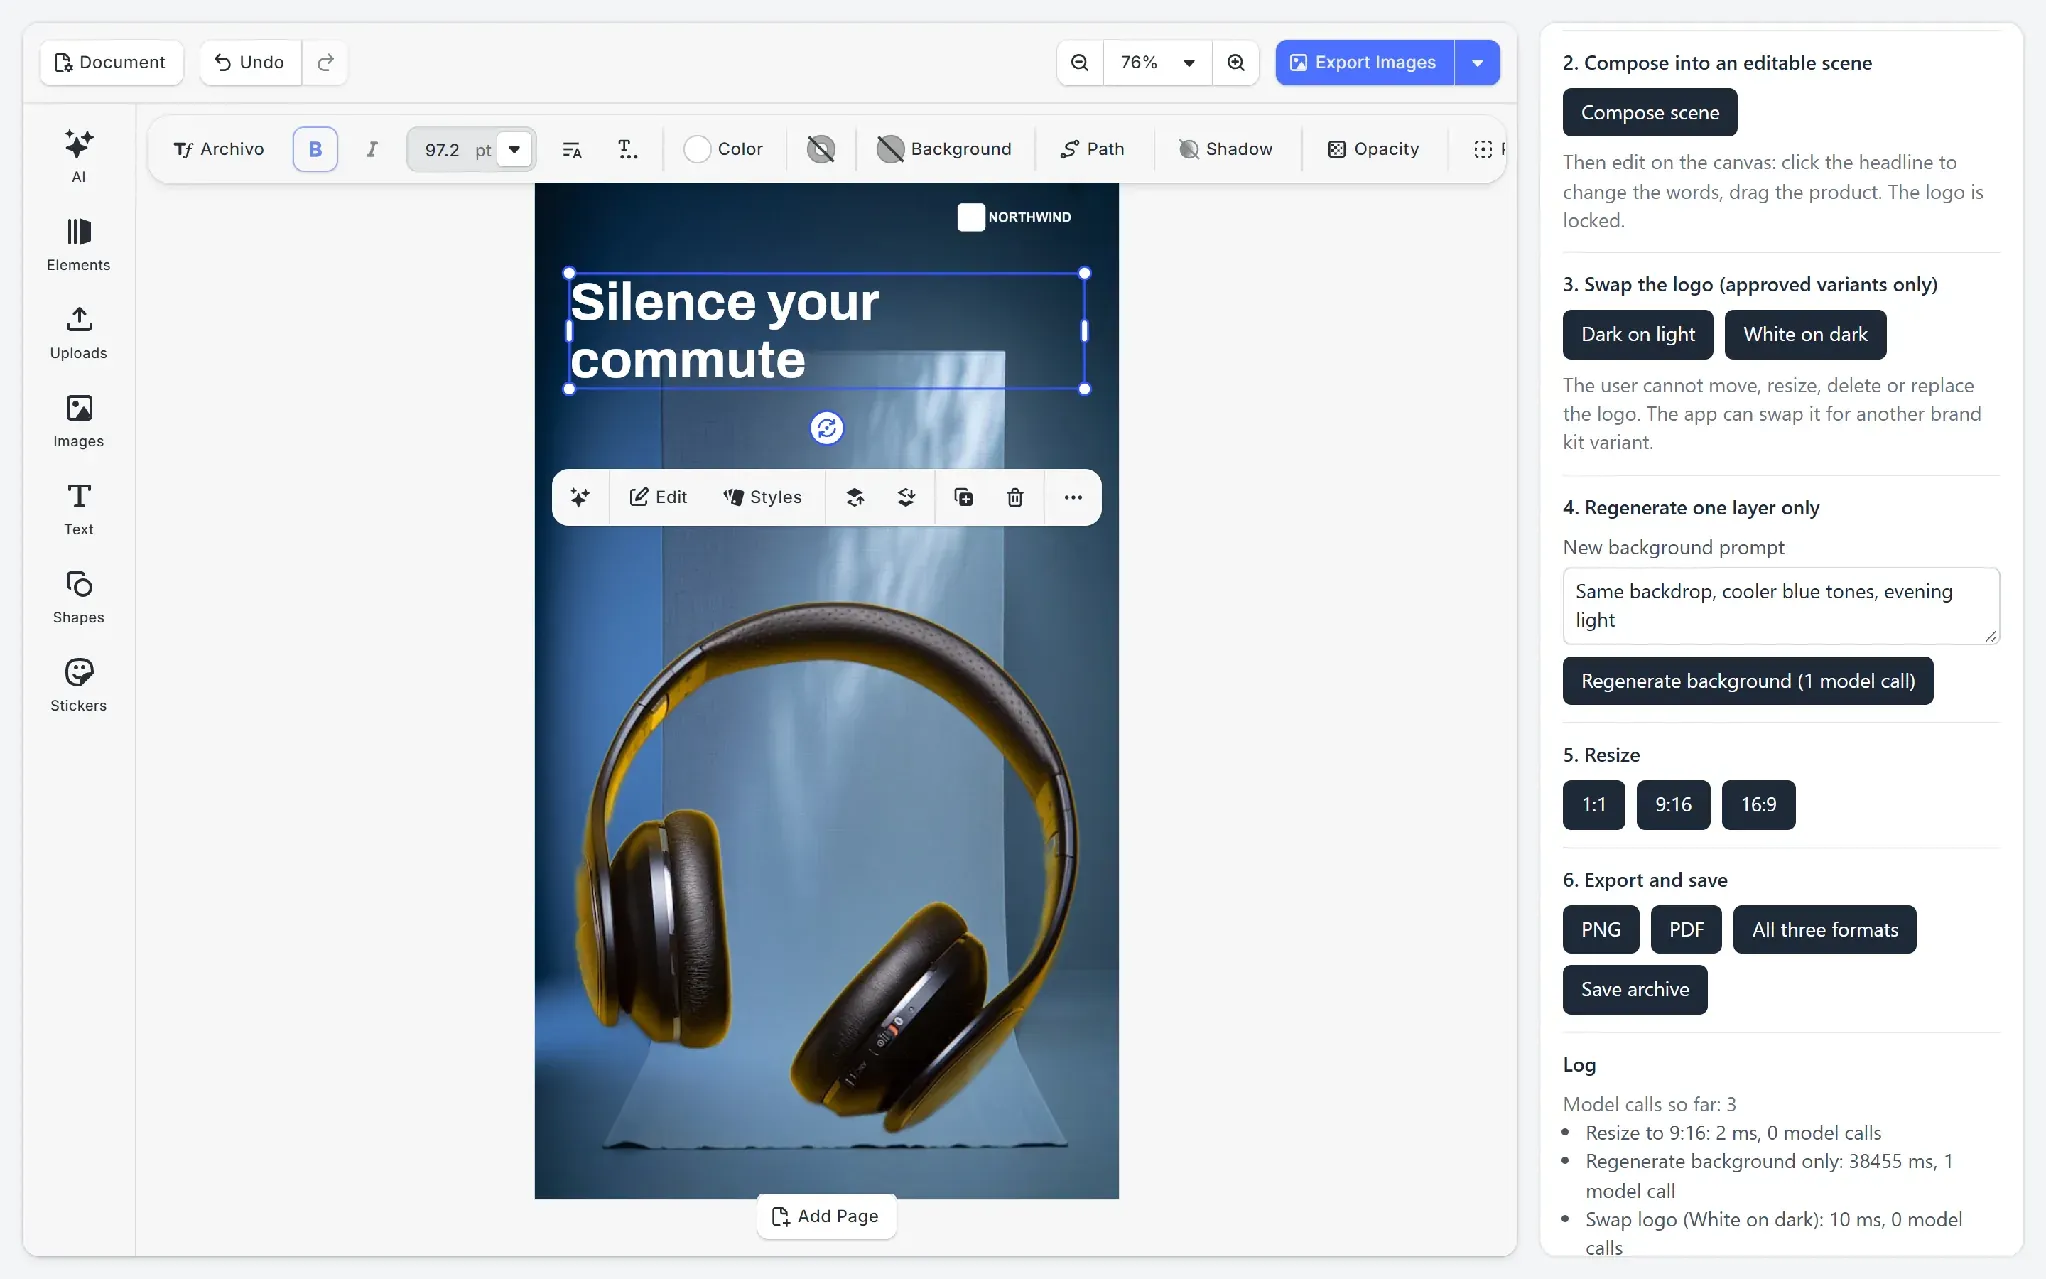
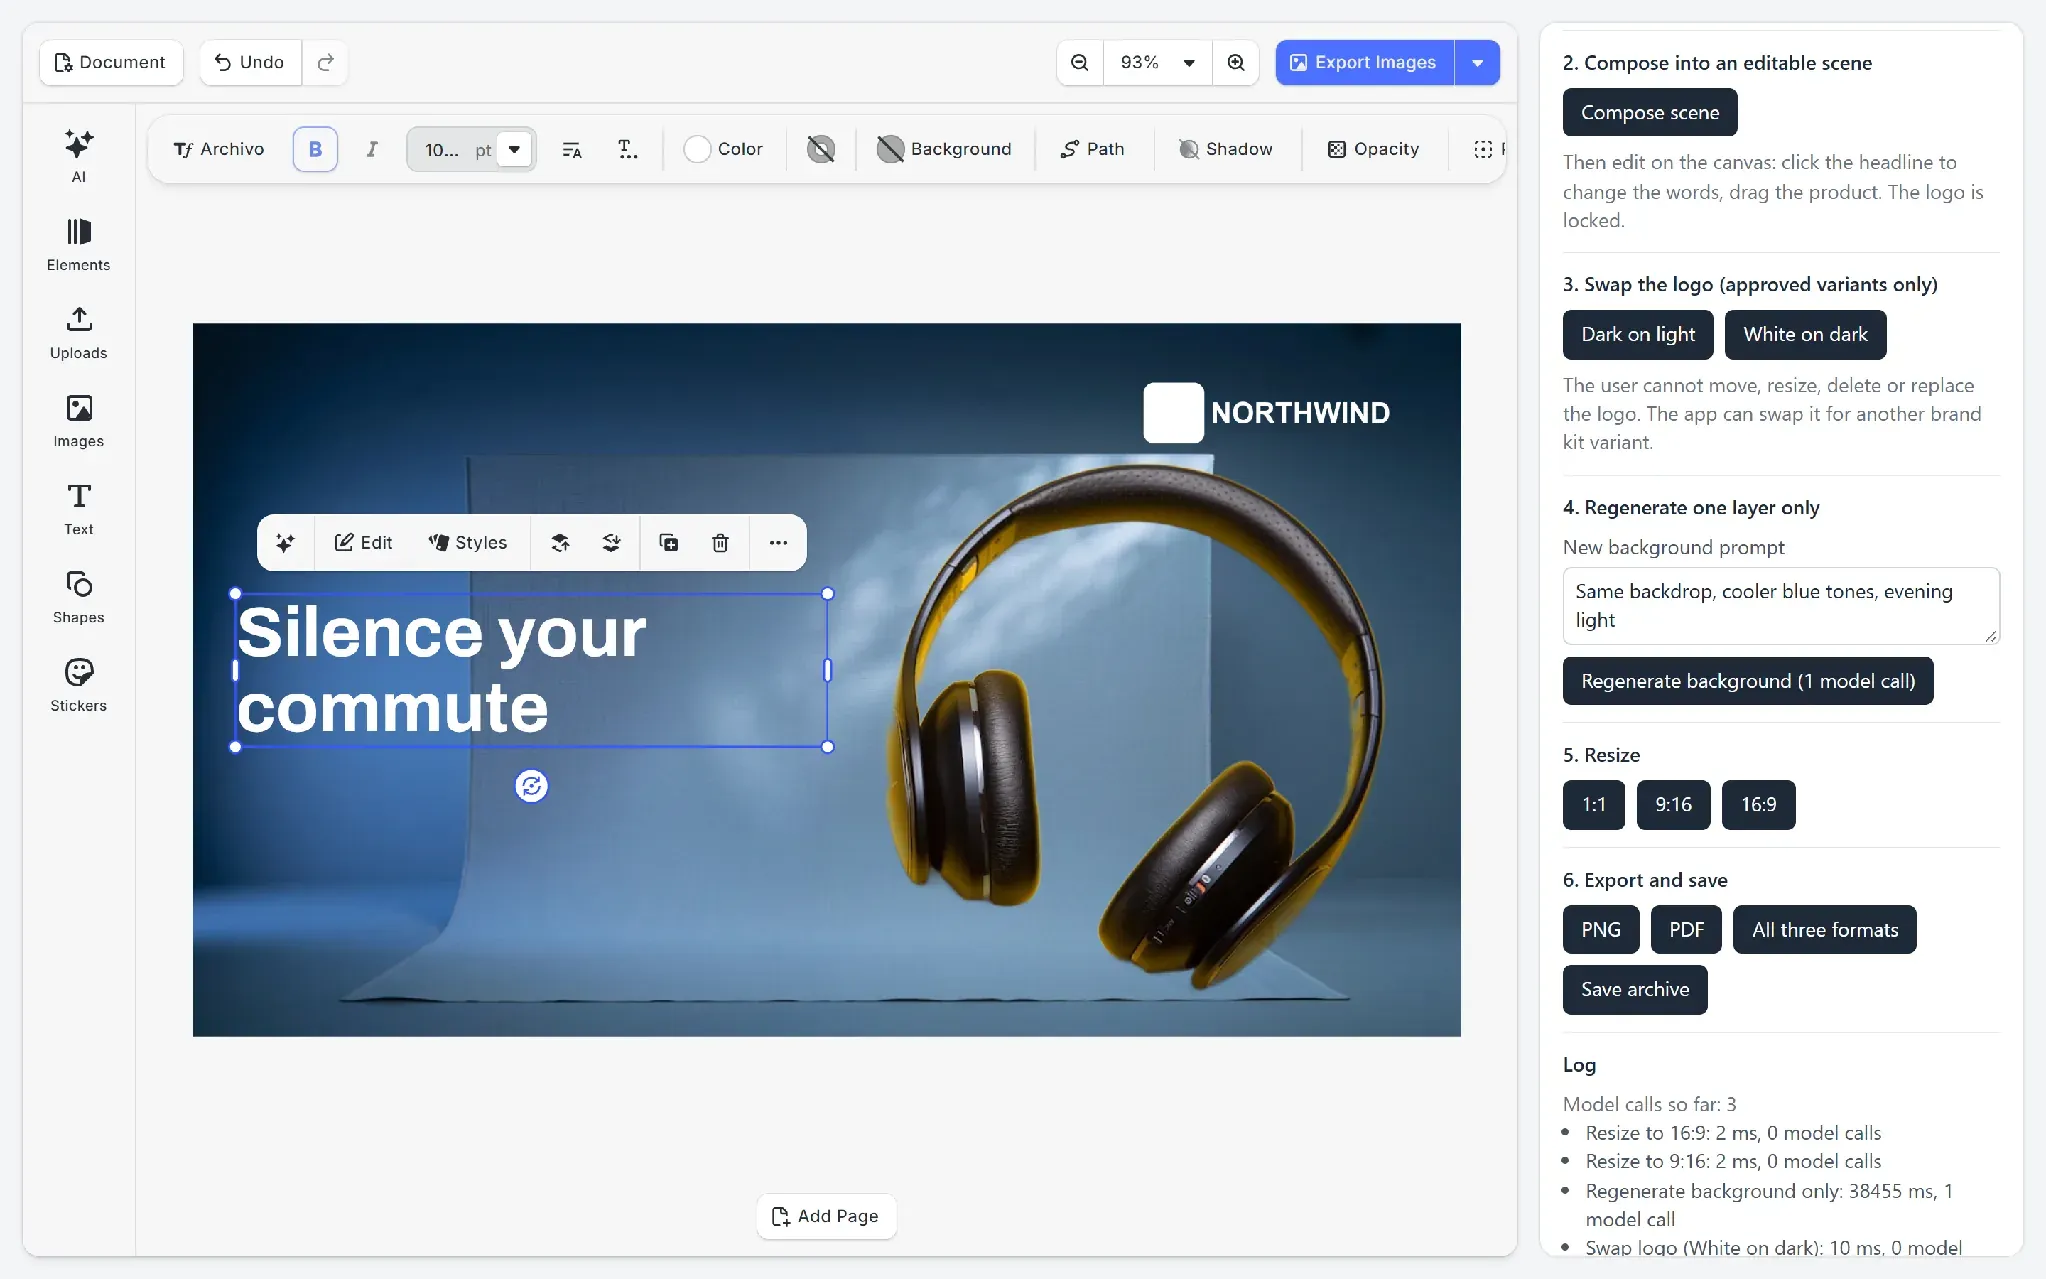
The layout rules in the demo are fractions of the page. For your own ads, replace layoutPage with rules that match your templates.
Step 6: Export and Save for Later Edits
src/export.ts renders the current page to PNG or the whole scene to PDF. The exportAllFormats function resizes to each format, renders it, and returns the page to the size the user wants. saveScene turns the scene into a string, and saveArchive writes the same scene as a zip with the images inside it. Either one lets the user reopen the ad and edit the same blocks. Exporting all three formats took 3.1 seconds.
// src/export.ts
export async function exportAllFormats(
  cesdk: CreativeEditorSDK
): Promise<Record<AdFormatId, Blob>> {
  const before: AdFormat = currentFormat(cesdk.engine) ?? FORMATS.square;
  const output = {} as Record<AdFormatId, Blob>;

  for (const format of Object.values(FORMATS)) {
    await resizeTo(cesdk, format);
    output[format.id] = await exportPng(cesdk);
  }

  await resizeTo(cesdk, before);
  return output;
}

export function saveScene(cesdk: CreativeEditorSDK): Promise<string> {
  return cesdk.engine.scene.saveToString();
}

export function saveArchive(cesdk: CreativeEditorSDK): Promise<Blob> {
  return cesdk.engine.scene.saveToArchive();
}
A saved scene points to where its images are instead of holding them itself, and that’s important for generated images. The gateway returns short-lived URLs, and in the test run they were redirected to signed storage links that expired after an hour. persistImage downloads each generated image before it goes into a block.
// src/generate.ts
export async function persistImage(uri: string): Promise<string> {
  const response = await fetch(uri);
  if (!response.ok) {
    throw new Error(`Could not download generated image (${response.status})`);
  }
  return URL.createObjectURL(await response.blob());
}
The demo keeps the download as a local object URL, which lasts only as long as the browser tab stays open. The reason the save button writes an archive is that the pixels are inside the zip, so it still opens after the tab is gone. In your product, upload the file to your own storage at this point and put that URL in the block. A saved scene will be available whenever you need it, on any device, at a much more manageable size.
How to Verify: One Edit vs Four Regenerations
If you would like to test it out for yourself then you can run both paths and count the model calls. The ad regenerations in the test were run directly against IMG.LY’s AI gateway, with the same model that the demo uses for backgrounds. Everything else comes from the demo panel, which logs every step with its time and number of model calls.
| Change | Model calls | Time |
|---|---|---|
| Regenerate the whole ad four times (Ideogram V3) | 4 | 91.5 s in total |
| Generate the four parts once | 2 | 52 s |
| Shorten the headline | 0 | Typing time only |
| Swap the logo | 0 | 10 ms |
| Regenerate the background layer (NanoBanana Pro Edit) | 1 | 38.5 s |
| Resize to 9:16, 16:9 and 1:1 | 0 | 2 ms each |
| Export all three formats | 0 | 3.1 s |
One layer is not faster than generating the whole ad. We find savings in the calls we don’t make, and four of the seven changes above cost nothing. The four regenerations also produced four different ads, and someone still had to pick one. In the layered run, each change touched one layer, and nothing else in the ad moved.
To check your own build, generate once, then shorten the headline and resize. The log should show no model calls for either of those operations. Then you can regenerate the background and confirm that only that block changed.
Some real-world examples of this style of image generation come from two IMG.LY customers that work in a space that relies on high-quality, efficient image generation. Omneky, an advertising creative platform, recorded a 10x month-over-month increase in new sign-ups after embedding CE.SDK. Halio.ai builds content tools for financial advisors, who produce 30 days of branded content in 30 minutes.
When a Plain Text-to-Image API Is Enough
Sometimes a simple image will do the job and you don’t need an editor. A text-to-image API on its own is a totally viable option in these three situations.
In these cases the image will never be edited, think of use cases like a blog header, a mood board or a concept sketch that gets generated once and used as it is. There usually won’t be another version to worry about, so regenerating costs one API call and you get what you need in a few simple steps.
These kinds of images won’t contain text, logo or product, making the requirements even simpler. Decorative images like a landscape behind a page header don’t usually have anything in it that must stay exact. If the result is off, a quick regeneration will get you over the line.
Another example is when a designer finishes some work in a design tool. If the output goes to someone else that will rebuild it in layers anyway, generating layers in your initial attempt will duplicate their work. Layers start to pay off when the person making the change is a non-designer working inside your product.
FAQ: Editing AI-Generated Images and Designs
Which models support image-to-image for single-layer regeneration?
IMG.LY’s image generation docs list the image-to-image models the AI plugins support, and the list changes often, so be sure to check there for current information. The demo was tested with NanoBanana Pro Edit. Because buildInput reads each model’s input schema, trying another model means changing one ID. Test it on your own images and see what your results are like.
Can I lock the logo?
Yes you can lock the logo. All you need to do is turn off the move, resize, rotate, crop, replace and delete scopes on the logo block, like setEditable does in step 3. The user can still select the logo but they can’t change it. Your code can still switch it between approved versions if you like.
What happens to text the image model rendered inside the picture?
It stays as pixels, and the layered approach can’t turn it back into text. Ask the image model for a background with no text in it, and generate the headline separately as a string.
Can users edit after export?
No, they can’t edit the exported file because a PNG or PDF is flat (it combines all the layers into a flat image). But, users can edit the saved scene and then export it again if they need to. For that to work later, the images in the scene must come from a storage source that you have access to. Don’t rely on the gateway’s temporary URLs, as is explained in step 6.
Does this work with my own model or API?
Yes indeed. The demo calls models through IMG.LY’s AI gateway, but CE.SDK’s AI plugins also accept a custom provider for your own model or service, and a proxy server that keeps provider keys on your end. The scene code in steps 2 to 6 doesn’t care where an image came from, it just wants a valid image.
How do I keep generated backgrounds on brand?
The best way is to use the prompt for what a model does well such as color, light and mood. AI models are non-deterministic, which means that even identical inputs can produce different results. Keep everything that must be exact away from the model. The headline typeface and color come from the brand kit, and the logo is a file. When a background doesn’t quite meet your expectations, regenerate that layer with a more detailed prompt, like in step 4, instead of starting the whole ad again.
Glossary: AI Image Editing Terms
Background removal. This is when a subject is cut out of a photo and makes everything else transparent. The demo does it in the browser with no model call.
Brand kit. These are the approved logos, typefaces and colors that a customer supplies. In the demo it’s a set of constants that are defined in src/brand.ts.
Image-to-image. This is a model call that takes an existing image and a prompt and returns a changed image. The demo uses it to regenerate a single layer.
Inpainting. Inpainting is used for regenerating a masked region of an image while keeping the pixels outside the mask.
Placeholder block. A block in a template where the content is meant to be replaced, like an image slot that the user fills.
Scene. A CE.SDK document contains pages and the blocks in them. It can be saved as a string and loaded again.
Scope. A CE.SDK permission that allows or denies one kind of change to a block, like moving it or deleting it.
Text block. A block that holds editable text with a typeface, size and color, as opposed to a picture of text.
Next Steps
Try the demo and paste your own IMG.LY keys into its Keys section, or clone the repository and run it locally. Check out the AI integration docs that go over all the editor’s built-in AI tools, which use the same gateway. For a CE.SDK license, visit the pricing page for a quote.