


Build this with AI in minutes
This tutorial is a great way to understand how CE.SDK works under the hood. But if you just want to get to the result, you can build this entire editor using IMG.LY Agent Skills, no manual setup required.
Install the skills, then run:
/cesdk:build Build a CapCut-like video editor with a dark theme, multi-track timeline, AI video/image/audio generation, background removal, and MP4 export.Want to understand a specific concept in depth? Use /cesdk:explain, for example:
/cesdk:explain How does the video timeline and block hierarchy work?Updated September 2026.
Introduction
CapCut has set the standard for accessible video editing. Its dark UI, intuitive timeline, and AI-powered features make it feel like a professional tool that anyone can use. But what if you could build something similar embedded directly in your own web application in minutes? Yes, minutes!
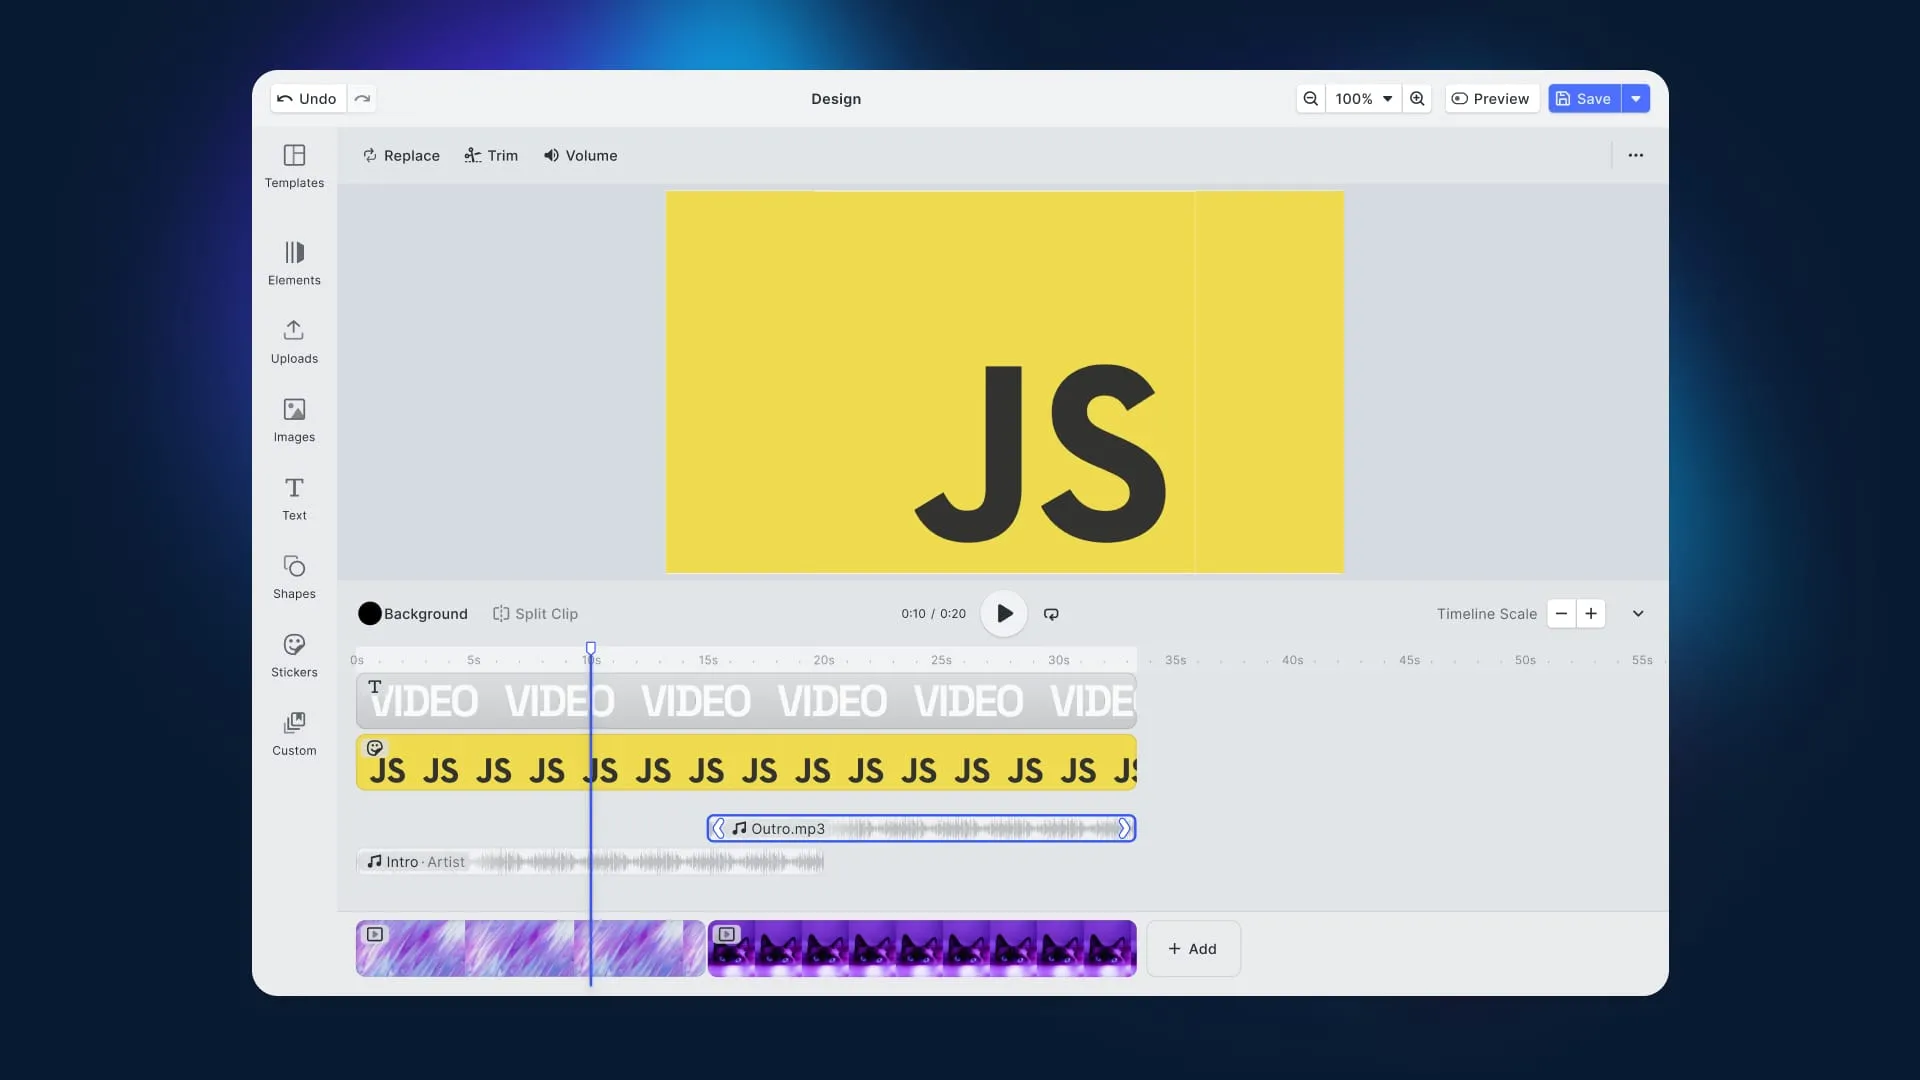
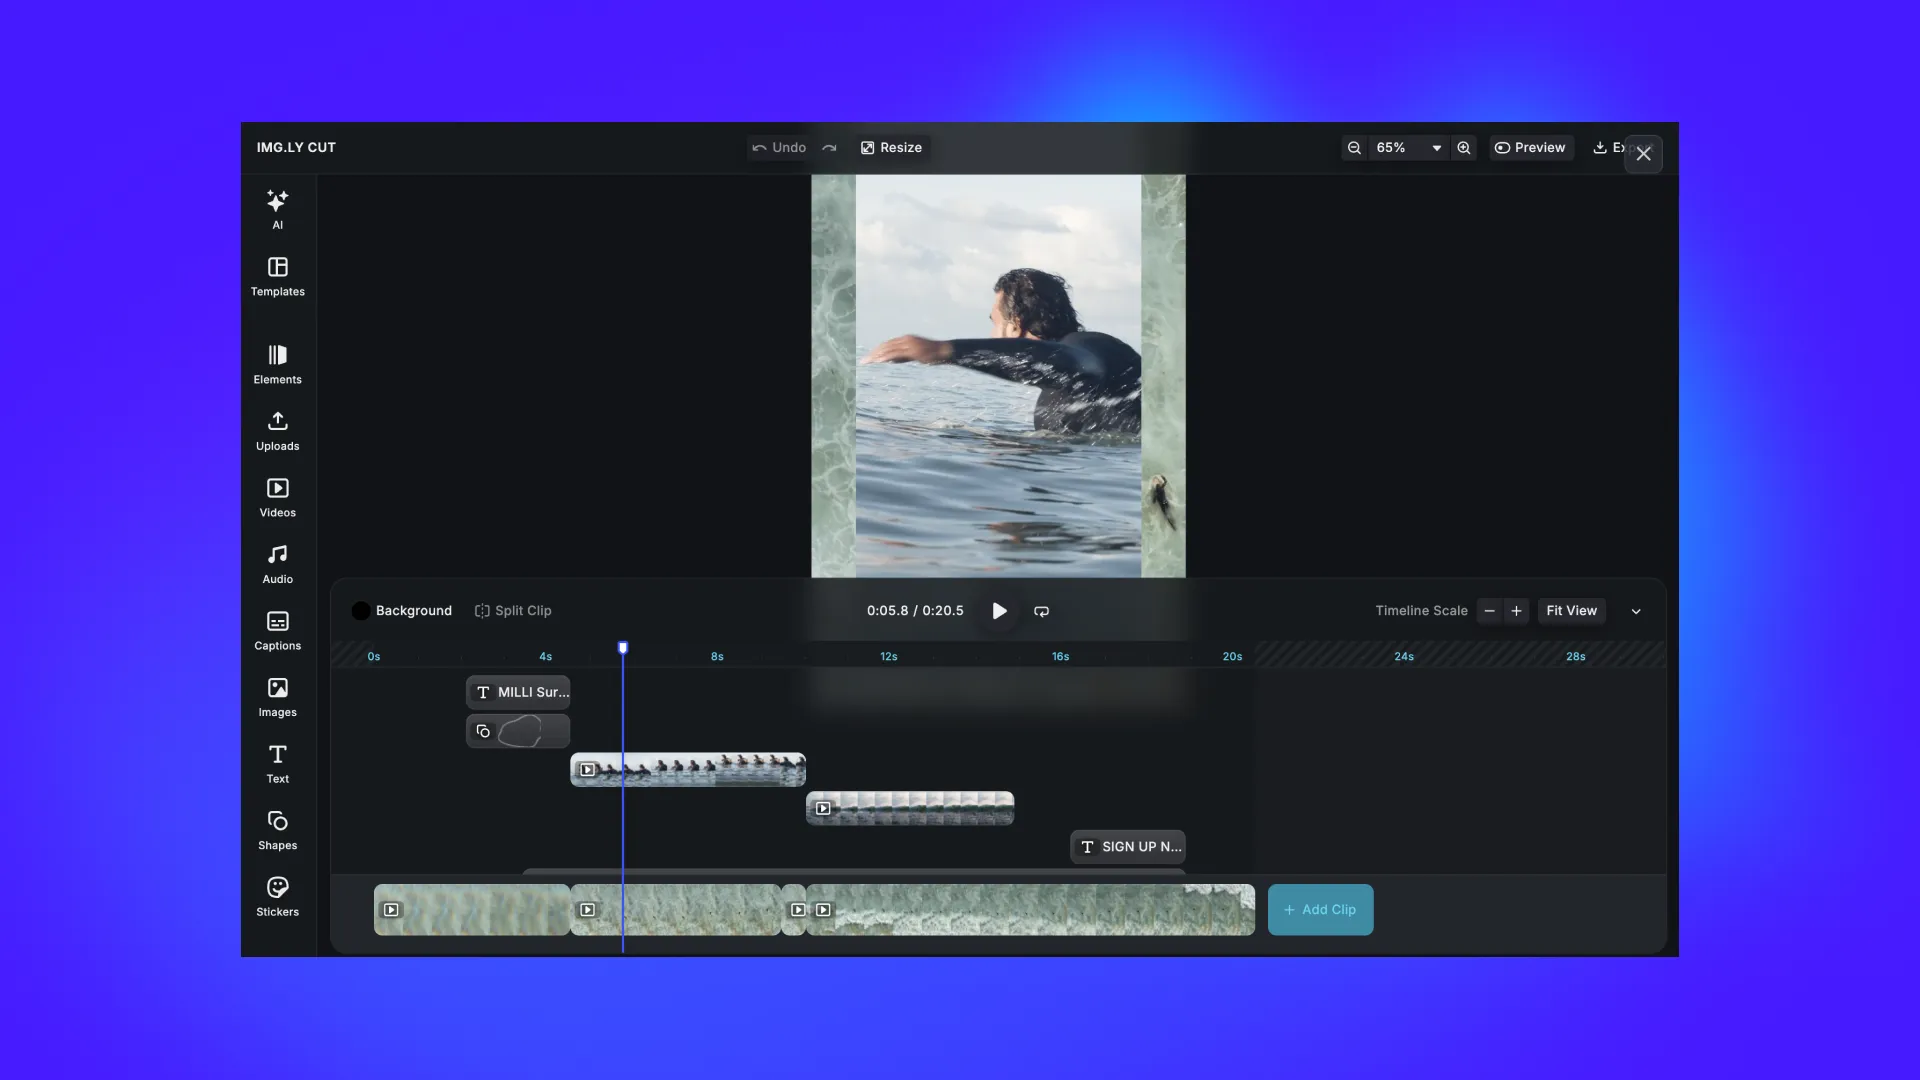
In this tutorial, we’ll walk through how we built a CapCut-like video editor using IMG.LY’s CreativeEditor SDK (CE.SDK) for React. The finished editor includes:
- A multi-track timeline for video, audio, text, and captions
- Trim, split, and join operations on video clips
- A CapCut-inspired dark theme built with CSS custom properties
- AI video generation (text-to-video, image-to-video) via Minimax, Kling, and Pixverse
- AI image generation (text-to-image, image editing) via RecraftV3, IdeogramV3, and GPT Image
- AI audio generation (text-to-speech, sound effects) via ElevenLabs
- AI text generation (copywriting, translation) via Anthropic Claude
- Background removal: client-side, powered by WebAssembly/WebGPU
- MP4 export directly from the browser
The entire editor is a single React component plus two short CSS files, the CapCut theme and a global reset.
Before You Build: The Other Options
This guide assembles an editor from CE.SDK. That is not the only route, and it is worth knowing what the alternatives give you before committing. Details below were checked against each vendor’s own documentation in September 2026.
| CE.SDK | Rendley | Banuba | FFmpeg | Remotion | |
|---|---|---|---|---|---|
| Shape | Editor SDK, web plus native | Browser video SDK | Mobile AR and video SDK | Processing library | Programmatic video in React |
| Prebuilt timeline UI | Yes | Yes | Yes | No | Yes, sold separately |
| Where it renders | Client or server | Client, or server via headless Chromium | On device | Wherever you run it | Node or browser |
| Native iOS and Android | Yes | No, web only | Yes | Via a wrapper | No |
| AI generation built in | Plugin system, bring your own model | Editing agent | Face and beauty effects | No | No |
| License | Commercial | Commercial | Commercial | LGPL or GPL depending on codecs | Free for individuals, non-profits and companies of up to three employees, company license from four |
A note on FFmpeg specifically, since it is the default suggestion whenever this comes up: FFmpegKit, the wrapper most mobile projects used to reach it, has been retired. Its successor FFmpegKitNext is maintained by the same author but ships as source only, so the convenience of pulling a prebuilt package is gone.
When Not to Build This
The honest cases for stopping before step one:
- Editing is a side feature. If users need to trim a clip and add a caption, a full timeline editor is a lot of interface to maintain for two operations. Configure a smaller editor instead.
- You need native mobile performance. This build is a web editor. It runs in a mobile browser, but a React Native or native SDK will feel better for a camera-first product, and Banuba is worth comparing there.
- Your differentiator is the editing model itself. If the way people edit is the product, an SDK’s opinions become something to fight rather than build on.
- You are competing with CapCut on CapCut’s terms. Matching a consumer app feature for feature is a losing framing. The reason to build this is that the editing lives inside your product, next to your data and your workflow, which is the thing CapCut cannot do.
Architecture Overview
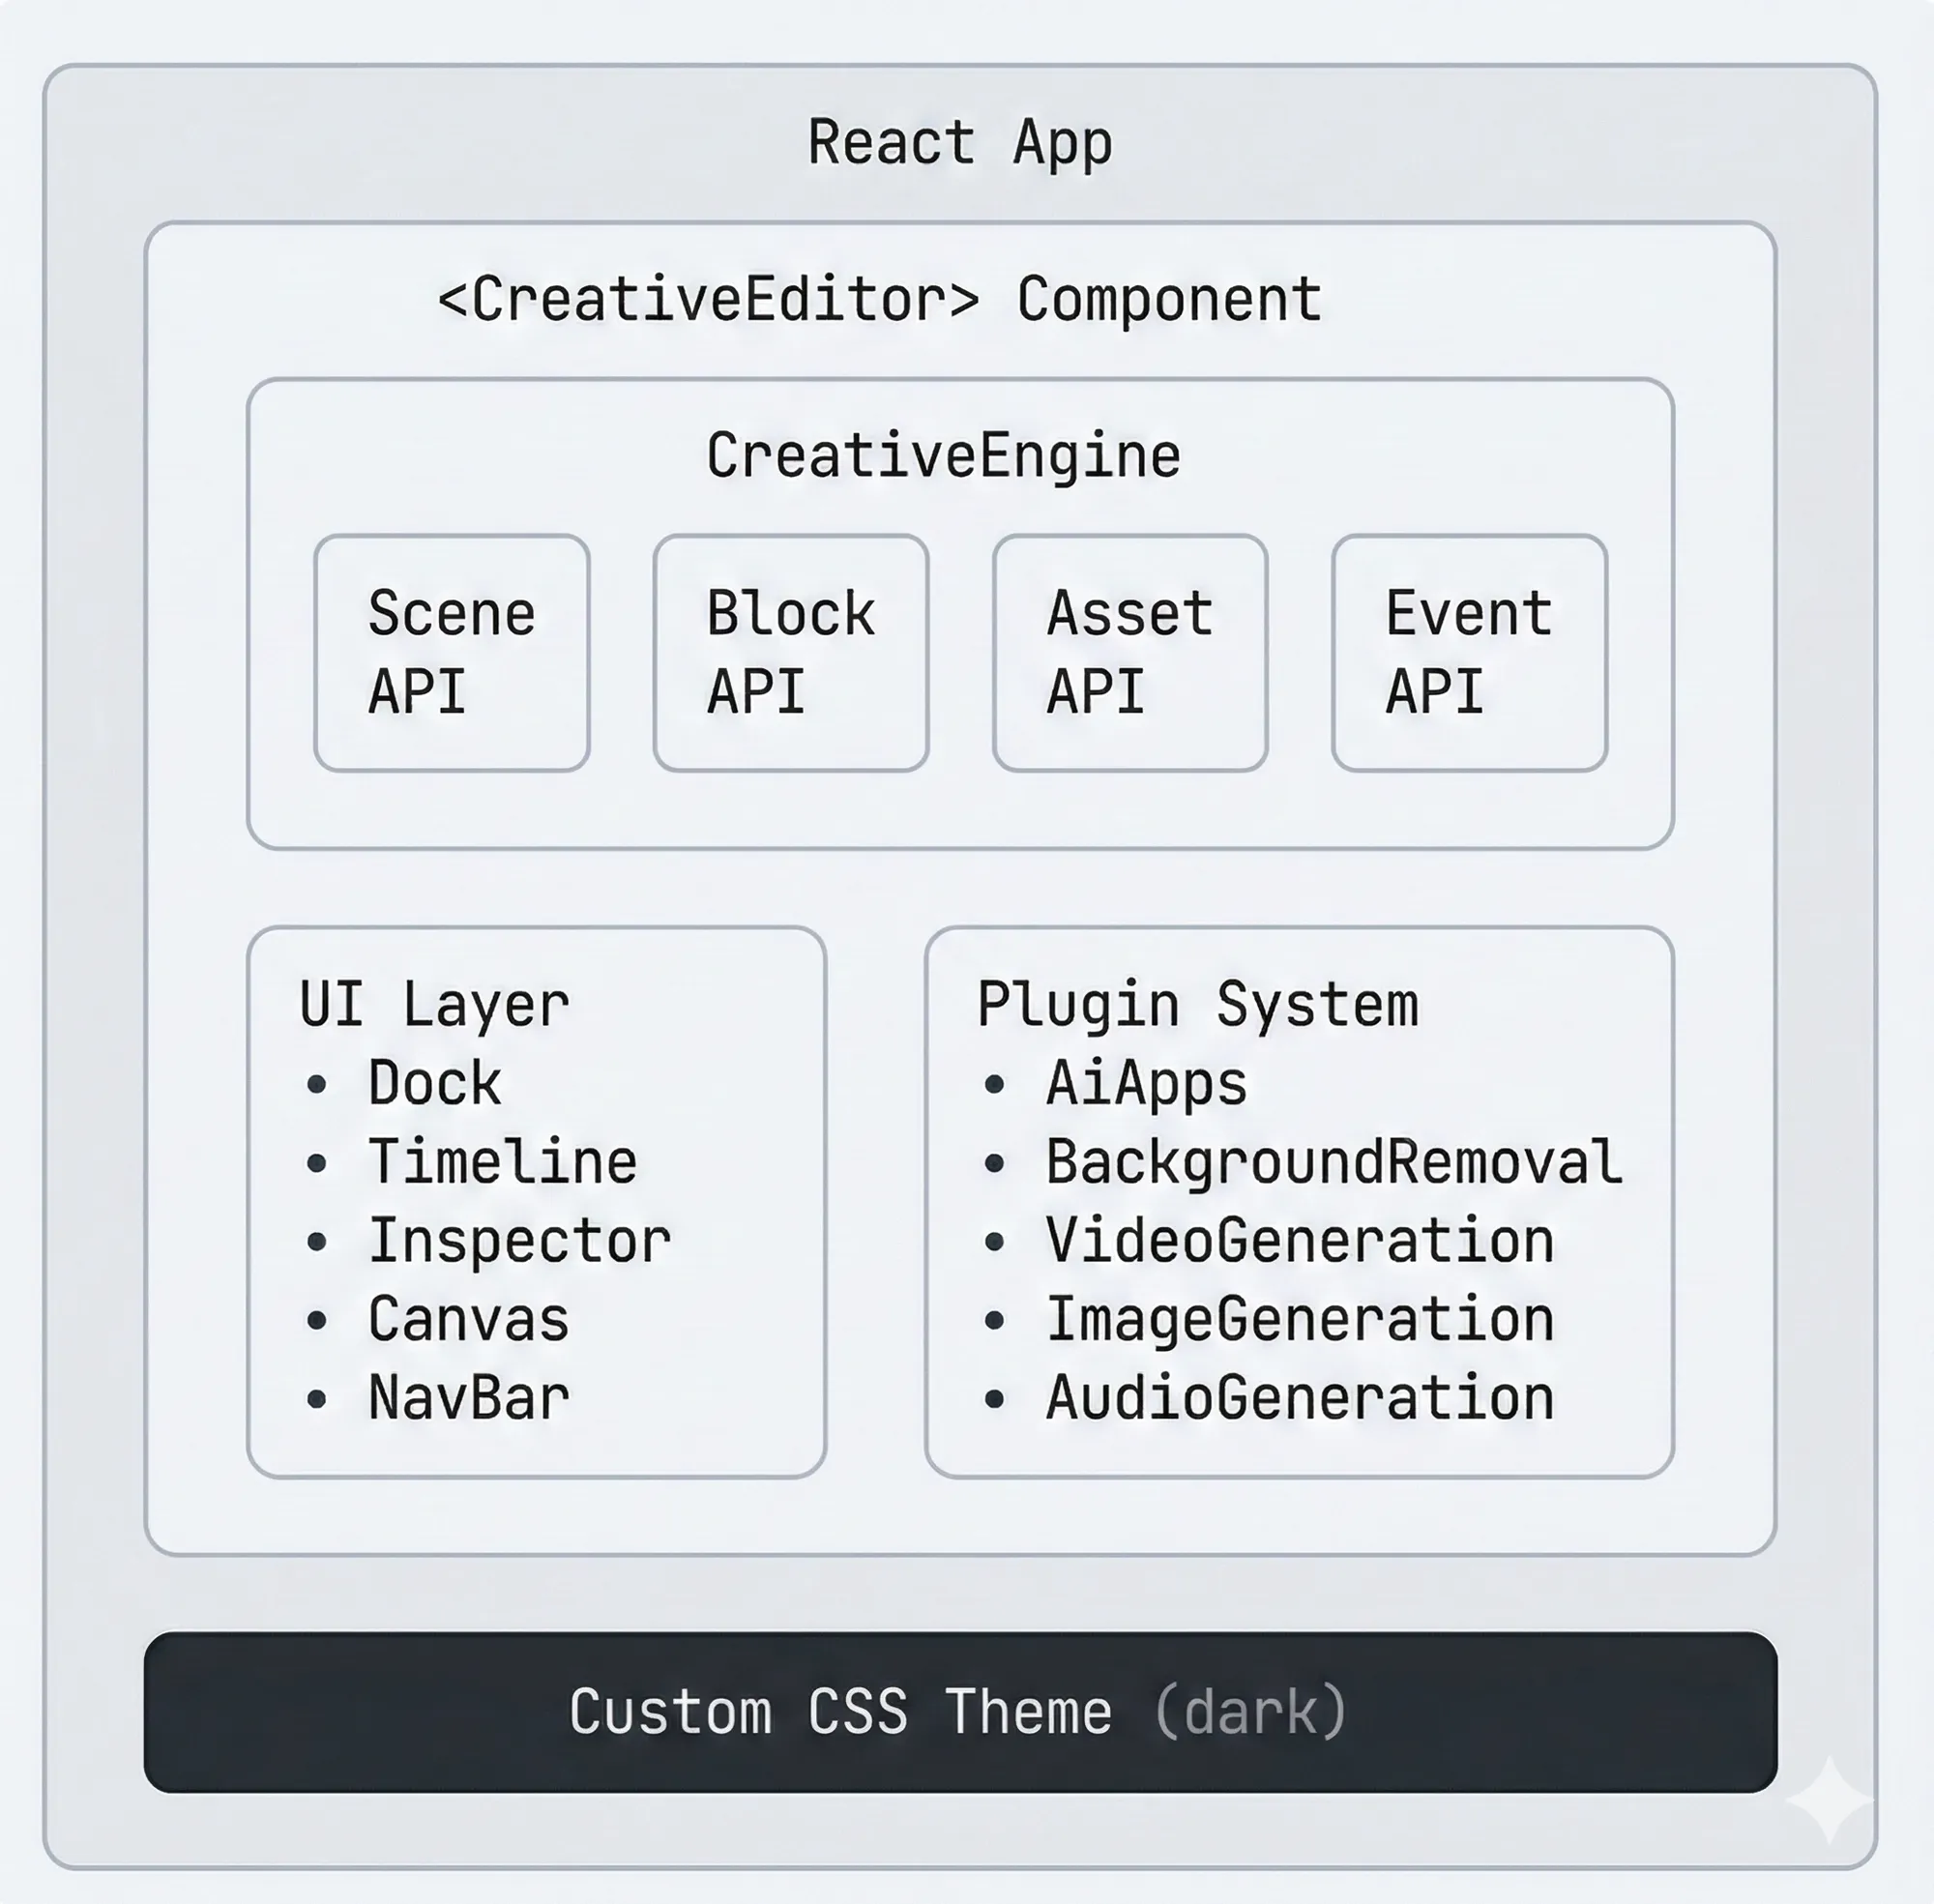
CE.SDK has two main layers:
- CreativeEngine: The headless core that manages scenes, blocks, assets, and rendering. It handles the video timeline, playback, and export entirely client-side.
- CreativeEditor UI: A pre-built, customizable UI layer that wraps the engine with a dock, inspector, timeline, canvas, and navigation bar.
Plugins extend both layers. The AiApps plugin, for example, registers AI providers with the engine and injects UI components (dock buttons, canvas menu items, generation panels) into the editor.
Step 1: Project Setup
We scaffolded a React project with Vite and installed CE.SDK alongside the AI plugin packages:
npm create vite@latest capcut-like-editor -- --template react
cd capcut-like-editor
npm install

# Core SDK
npm install @cesdk/cesdk-js@1.82.0

# AI plugins, pinned to the same version as the SDK
npm install @imgly/plugin-ai-apps-web@1.82.0
npm install @imgly/plugin-ai-video-generation-web@1.82.0
npm install @imgly/plugin-ai-image-generation-web@1.82.0
npm install @imgly/plugin-ai-audio-generation-web@1.82.0
npm install @imgly/plugin-ai-text-generation-web@1.82.0

# Background removal (runs locally via WASM/WebGPU)
npm install @imgly/plugin-background-removal-web@1.82.0 onnxruntime-web@1.21.0
Why so many packages?
CE.SDK follows a modular plugin architecture. Each AI capability is a separate package with its own provider modules. This means you only bundle what you use: if you don’t need audio generation, don’t install @imgly/plugin-ai-audio-generation-web. The @imgly/plugin-ai-apps-web package is the unifying layer that brings them all together into a single dock panel.
Step 2: The React Component
CE.SDK provides a first-class React wrapper via @cesdk/cesdk-js/react. The <CreativeEditor> component handles mounting, initialization, and cleanup:
import CreativeEditor from '@cesdk/cesdk-js/react';

const config = {
  // license: 'YOUR_CESDK_LICENSE_KEY',
};

const init = async (cesdk) => {
  // All setup happens here: theme, assets, plugins, UI customization
};

export default function VideoEditor() {
  return (
    <CreativeEditor
      config={config}
      init={init}
      onError={(error) => console.error(error.message, error.cause)}
      width="100vw"
      height="100vh"
    />
  );
}
Render it from src/App.jsx, together with the theme CSS from Step 4:
// src/App.jsx
import VideoEditor from './VideoEditor';
import './capcut-theme.css';

export default function App() {
  return <VideoEditor />;
}
The Vite starter styles in src/index.css give #root a fixed width, which clips the editor. Replace the contents of that file so the editor fills the window:
/* src/index.css */
html,
body,
#root {
  margin: 0;
  padding: 0;
  width: 100%;
  height: 100%;
  overflow: hidden;
}
The config object is passed to the engine at creation time. The init callback fires once the cesdk instance is ready. This is where all our customization lives.
Pitfall: Silent init errors. The
<CreativeEditor>component catches errors thrown insideinitand only reports them through itsonErrorprop. WithoutonError, the editor loads but appears broken with no console output, which is why the component above always passes one.
Step 3: Creating the Video Scene
A video editor needs three things at startup: asset sources, a video scene, and a timeline. All three come from an editor configuration, which the React video editor starter kit ships as source files. Copy them into the project:
npx degit imgly/starterkit-video-editor-ts-web/src/imgly#release-1.82.0 src/imglyThe release-1.82.0 tag matches the SDK version from Step 1. The configuration lives in your project from here on, so you change the editor by editing these files.
import { initVideoEditor } from './imgly';

// Editor UI, asset libraries, upload sources and background removal
await initVideoEditor(cesdk);

// Open an empty scene, which the timeline reads
await cesdk.actions.run('scene.create');
Older examples call createVideoScene() and addDemoAssetSources() instead. Both still work and both are deprecated, so new projects should use the calls above. Scene modes went the same way in CE.SDK 1.72: scene.create now takes no mode and every new scene supports video. If you share scene files with the iOS or Android SDKs, which do not yet read modeless scenes, check the v1.72 migration guide first.
scene.create sets up the scene and its page, which the timeline reads. As users add media, clips added as background go into a track under the page, captions into a caption track of their own, and overlays and audio sit on the page directly:
Scene
 └── Page (the video canvas)
      ├── Track (background clips, one after another)
      ├── Graphic blocks (overlay clips, images, text, stickers)
      ├── CaptionTrack (captions synced to playback)
      └── Audio blocks (background music, voiceover, sound effects)
Each element on the timeline is a block with timing properties: timeOffset (when it appears) and duration (how long it plays). The engine handles rendering each frame, compositing layers, and synchronizing audio.
Browser support
Video editing relies on modern web codecs (WebCodecs API). Chrome and Edge 114 or newer and Safari 26 or newer support video editing and export, Firefox 130 or newer can edit video but not export it, and mobile browsers do not support video editing yet.
Step 4: The CapCut Dark Theme
CapCut’s visual identity is defined by its deep charcoal backgrounds, teal accent colors, and subtle elevation layers. CE.SDK’s theming system maps perfectly to this through CSS custom properties.
Setting the base theme
cesdk.ui.setTheme('dark');This activates CE.SDK’s built-in dark theme. But we want to go further. We need CapCut’s specific color palette.
Custom CSS overrides
CE.SDK scopes all its UI under .ubq-public with data-ubq-theme and data-ubq-scale attributes. We target the dark theme at every scale, since the responsive scale below switches to large on small and touch screens, and override the CSS custom properties to inject our palette:
/* src/capcut-theme.css */
.ubq-public[data-ubq-theme='dark'] {
  /* Deep charcoal backgrounds, darker than CE.SDK's default dark */
  --ubq-canvas: hsl(220, 15%, 8%) !important;
  --ubq-elevation-1: hsl(220, 13%, 12%) !important;
  --ubq-elevation-2: hsl(220, 12%, 15%) !important;
  --ubq-elevation-3: hsl(220, 10%, 18%) !important;

  /* High-contrast white text */
  --ubq-foreground-default: hsla(0, 0%, 100%, 0.92) !important;
  --ubq-foreground-light: hsla(0, 0%, 100%, 0.55) !important;

  /* CapCut's signature teal/cyan accent */
  --ubq-interactive-accent-default: hsl(190, 85%, 48%) !important;
  --ubq-interactive-accent-hover: hsl(190, 85%, 42%) !important;
  --ubq-interactive-accent-pressed: hsl(190, 85%, 36%) !important;

  /* Subtle borders, barely visible, like CapCut */
  --ubq-border-default: hsla(0, 0%, 100%, 0.08) !important;
}
The key design decisions:
| Property | Value | Why |
|---|---|---|
--ubq-canvas | hsl(220, 15%, 8%) | Near-black with a slight blue tint, matching CapCut’s canvas area |
--ubq-elevation-1/2/3 | 12% → 15% → 18% lightness | Subtle elevation steps create depth without harsh contrast |
--ubq-interactive-accent-* | hsl(190, 85%, 48%) | CapCut’s teal, used for buttons, selections, and progress bars |
--ubq-border-default | 8% opacity white | Nearly invisible borders that only appear on close inspection |
Responsive scale
We also configure responsive scaling so the editor adapts to touch devices:
cesdk.ui.setScale(({ containerWidth, isTouch }) => {
  if ((containerWidth && containerWidth < 768) || isTouch) {
    return 'large'; // Bigger touch targets on small/touch screens
  }
  return 'normal'; // Standard desktop sizing
});
Step 5: AI Plugin Integration
This is where the editor transforms from a basic video tool into something that feels like CapCut’s AI-powered experience. CE.SDK’s plugin system lets us add all AI capabilities through a single unified AiApps plugin.
The unified AiApps approach
Instead of registering each AI plugin separately, @imgly/plugin-ai-apps-web provides a single entry point:
import AiApps from '@imgly/plugin-ai-apps-web';
import FalAiVideo from '@imgly/plugin-ai-video-generation-web/fal-ai';
import FalAiImage from '@imgly/plugin-ai-image-generation-web/fal-ai';
import OpenAiImage from '@imgly/plugin-ai-image-generation-web/open-ai';
import Elevenlabs from '@imgly/plugin-ai-audio-generation-web/elevenlabs';
import Anthropic from '@imgly/plugin-ai-text-generation-web/anthropic';

// Your server that adds the provider API keys (see Going to Production)
const PROXY_URL = 'https://your-server.com/api/ai-proxy';

await cesdk.addPlugin(
  AiApps({
    dryRun: true, // Simulate for development, no API calls
    providers: {
      text2text: Anthropic.AnthropicProvider({ proxyUrl: PROXY_URL }),
      text2image: [
        FalAiImage.RecraftV3({ proxyUrl: PROXY_URL }),
        OpenAiImage.GptImage1.Text2Image({ proxyUrl: PROXY_URL }) /* ... */,
      ],
      image2image: [
        FalAiImage.GeminiFlashEdit({ proxyUrl: PROXY_URL }),
        OpenAiImage.GptImage1.Image2Image({ proxyUrl: PROXY_URL }) /* ... */,
      ],
      text2video: [
        FalAiVideo.MinimaxVideo01Live({ proxyUrl: PROXY_URL }) /* ... */,
      ],
      image2video: [
        FalAiVideo.MinimaxVideo01LiveImageToVideo({
          proxyUrl: PROXY_URL,
        }) /* ... */,
      ],
      text2speech: Elevenlabs.ElevenMultilingualV2({ proxyUrl: PROXY_URL }),
      text2sound: Elevenlabs.ElevenSoundEffects({ proxyUrl: PROXY_URL }),
    },
  })
);
Provider categories explained
| Category | What it does | Models we configured |
|---|---|---|
text2text | AI copywriting: improve text, translate, change tone | Anthropic Claude |
text2image | Generate images from text prompts | RecraftV3, IdeogramV3, GPT Image |
image2image | Transform existing images with AI | Gemini Flash Edit, GPT Image |
text2video | Generate video clips from text descriptions | Minimax Video, Kling Video, Pixverse |
image2video | Animate a static image into video | Minimax Video, Kling Video |
text2speech | Convert text to spoken audio with voice selection | ElevenLabs Multilingual V2 |
text2sound | Generate sound effects from text | ElevenLabs Sound Effects |
When multiple providers are configured in an array (like text2image), the UI automatically shows a provider/model selection dropdown so users can choose which AI model to use.
The proxy server requirement
Every provider shown here takes a proxyUrl parameter. This is critical for production:
Browser  →  Your Proxy Server  →  AI Provider (fal.ai, ElevenLabs, etc.)
                ↑
          Injects API keys
          server-side
Your API keys should never be in client-side code. The proxy server receives requests from CE.SDK, attaches your API key, and forwards to the AI provider. During development, dryRun: true simulates generation without any API calls.
Background removal
Background removal is a separate plugin because it runs entirely client-side, no proxy needed. The starter kit configuration from Step 3 already registers it in the canvas menu, so there is nothing to add here.
This uses ONNX Runtime (WebAssembly + WebGPU) to run an AI segmentation model directly in the browser. The first run downloads the default model, around 80MB of weights, which are then cached. A quantized model of roughly half that size is available if you configure it. Select any image on the canvas and click “BG Removal” in the canvas menu.
Step 6: UI Customization with the Component Order API
CE.SDK’s UI is built from eight customizable areas: Dock, Inspector Bar, Canvas Menu, Navigation Bar, Canvas Bar, Caption Panel, Video Clip Menu, and Video Timeline Controls Bar. The Component Order API lets us insert, remove, and reorder components in each area.
Adding the AI button to the dock
We want the AI Apps button to be the first thing users see in the dock:
cesdk.ui.insertOrderComponent(
  { in: 'ly.img.dock', position: 'start' },
  'ly.img.ai.apps.dock'
);
insertOrderComponent takes a location specifier and the component(s) to insert. position: 'start' puts it at the top of the dock. Alternative positions include 'end', a numeric index, or relative placement with before/after matchers.
AI options in the canvas context menu
When a user selects a text or image block, we want AI options available in the canvas menu:
cesdk.ui.insertOrderComponent({ in: 'ly.img.canvas.menu', position: 'start' }, [
  'ly.img.ai.text.canvasMenu',
  'ly.img.ai.image.canvasMenu',
]);
Passing an array inserts multiple components at once.
Customizing the MP4 export
The starter kit already adds an Export Video button to the navigation bar. To change what happens on export, register your own exportDesign action, which that button runs:
cesdk.actions.register('exportDesign', async (options) => {
  const { blobs } = await cesdk.utils.export({
    videoBitrate: 'Auto',
    ...options,
    mimeType: 'video/mp4',
  });
  await cesdk.utils.downloadFile(blobs[0], 'video/mp4');
});
The export renders every frame of the timeline (compositing video tracks, overlays, text, captions, and audio) into an MP4 blob entirely in the browser.
Step 7: Wiring Generated Audio into the Asset Library
AI-generated audio (speech and sound effects) is stored in provider-specific history sources. To make this audio browsable alongside regular audio assets, we inject the history source into the audio asset library entry:
const audioEntry = cesdk.ui.getAssetLibraryEntry('ly.img.audio');
if (audioEntry != null) {
  const existingSourceIds = Array.isArray(audioEntry.sourceIds)
    ? audioEntry.sourceIds
    : audioEntry.sourceIds({});
  cesdk.ui.updateAssetLibraryEntry('ly.img.audio', {
    sourceIds: [...existingSourceIds, 'ly.img.ai.audio-generation.history'],
  });
}
Now when users open the Audio panel in the dock, they’ll see their AI-generated audio alongside the sample library.
Step 8: Custom Labels with i18n
CE.SDK’s i18n system lets us customize any UI string. We used it to make the AI prompt fields more inviting:
cesdk.i18n.setTranslations({
  en: {
    'ly.img.plugin-ai-video-generation-web.fal-ai/minimax/video-01-live.property.prompt':
      'Describe your video',
    'ly.img.plugin-ai-image-generation-web.fal-ai/recraft-v3.property.prompt':
      'Describe your image',
  },
});
Translation keys follow the pattern {plugin-id}.{provider-id}.property.{field}. You can also add multi-language support by including keys for de, fr, es, etc.
The Complete File Structure
capcut-like-editor/
├── src/
│   ├── App.jsx              # Root: imports VideoEditor + theme CSS
│   ├── VideoEditor.jsx      # The entire editor (single component)
│   ├── capcut-theme.css     # CapCut dark theme overrides
│   ├── imgly/               # Editor config copied in Step 3 (16 files)
│   ├── index.css            # Global reset (margin/padding/overflow)
│   └── main.jsx             # React entry point
├── index.html
├── package.json
└── vite.config.js
That’s it. The entire CapCut-like editor is four files you write, one React component, two CSS files and a thin App wrapper, plus the editor configuration you copied in Step 3.
What We Get Out of the Box
Because CE.SDK’s video UI is pre-built, we didn’t write any code for these features. They come from the starter kit configuration and the default UI:
- Multi-track timeline with drag-to-reorder, drag-to-resize
- Trim and split: drag clip edges or use the split tool
- Join and arrange: drag clips between tracks
- Transform: crop, flip, rotate via the inspector
- Playback controls: play, pause, seek, scrub
- Text overlays: add styled text with the text tool
- Stickers and graphics: from the asset library
- Filters and effects: LUT-based color grading
- Undo/redo: full history stack
- Zoom and pan: standard canvas navigation
The AI plugins add their own UI components (dock buttons, generation panels, context menu items) through the plugin system. We just positioned them where we wanted.
Going to Production
To take this from a prototype to production, you need three things:
1. License key
Get a free trial key at https://img.ly/docs/cesdk/ and set it in the config (yes, if you want to ship to production you’ll have to talk to our lovely colleagues in sales):
const config = {
  license: 'YOUR_CESDK_LICENSE_KEY',
};
2. Proxy server
Set up a server that forwards AI requests with your API keys, and point the PROXY_URL from Step 5 at it:
const PROXY_URL = 'https://your-server.com/api/ai-proxy';See the CE.SDK Proxy Server guide for Express.js and other server examples.
3. Disable dry run
Remove dryRun: true from the AiApps configuration to enable real AI generation.
Key Takeaways
- CE.SDK does the heavy lifting. The timeline, playback, rendering, and export are all handled by the engine. We wrote zero video processing code.
- The plugin system is powerful. Seven AI capabilities were added with a single
addPlugin(AiApps({ ... }))call. Background removal came with the starter kit configuration. - CSS custom properties make theming painless. We matched CapCut’s aesthetic by overriding ten CSS variables. No forking, no patching.
- The Component Order API is the customization backbone.
insertOrderComponentwith position-based placement is the cleanest pattern for adding UI elements. - Pass
onError. CE.SDK’s<CreativeEditor>only reports errors frominitthrough itsonErrorprop. This is the single most important debugging tip. - Pin your package versions. All
@imgly/*plugins declare a^peer range on@cesdk/cesdk-js, so the SDK must not be older than the plugins. A version mismatch (like 1.81 vs 1.82) will cause peer dependency conflicts.
FAQ
Can you build a CapCut-like video editor for the web? Yes, and the timeline is the part you should not write yourself. This guide assembles one from CE.SDK: a multi-track timeline, trim and split, transforms, text overlays, stickers, filters, undo and redo, all configured rather than built. The work that remains is theming, AI provider wiring and the parts specific to your product.
How long does it take to build a video editor like CapCut? Assembling one from an SDK is a day or two of configuration for a working editor, then the usual weeks for theming, edge cases and production hardening. Writing the timeline, codec handling and cross-browser behavior from scratch is a different order of magnitude, which is the reason this guide starts from an SDK.
Does the editor run entirely in the browser? The editing does. Background removal runs client-side through WebAssembly and WebGPU, so media does not need to leave the device for that. AI generation calls a provider, which needs a proxy server holding your API keys, and video export can run in the browser or on a server depending on how you set it up.
Why does AI generation need a proxy server?
Because the API keys cannot live in browser code. The plugins call providers such as fal.ai, OpenAI, Anthropic and ElevenLabs, and those calls have to go through a server you control. The guide runs with dryRun enabled so you can build the interface before wiring any of that up.
Can you theme an SDK editor to look like CapCut? Yes. The dark theme in this guide is the base CE.SDK dark theme plus CSS variable overrides for the charcoal backgrounds and the teal accent, then the Component Order API to move buttons where you want them. Nothing is forked to achieve it.
Should you build a CapCut clone at all? Not if editing is a minor feature, not if you need native mobile performance, and not if you are trying to match a consumer app feature for feature. The case for building it is that the editor sits inside your product, next to your data and your workflow, which is what CapCut cannot offer.