

Discover how to integrate IMG.LY’s video editor into your Vue.js application.
Users who trim and caption clips every day in TikTok or CapCut expect to do the same inside your product. When they cannot, they export, edit somewhere else, and upload again. That round trip is where people drop out of the workflow and where your assets stop being yours to template or version.
This guide covers adding a video editor to a Vue.js app with CreativeEditor SDK (CE.SDK): the component, the timeline and export APIs underneath it, and the customization points that come up once it runs.
Updated September 2026.
Check browser support before you scope the work
CE.SDK’s video features encode and decode in the browser through the WebCodecs API. That is what makes client-side MP4 export possible without a render backend, and it is also the constraint. Chrome and Edge 114 or newer support both video editing and export, and so does Safari 26 or newer. Firefox 130 or newer can edit video but cannot export it, because it does not ship the H.264 and AAC encoders the export needs. Chrome on Linux usually lacks those encoders as well, so exports can fail there. Chrome on Android and iOS and Safari on iOS do not support video editing yet, and other Chromium-based browsers such as Opera, Arc, and Brave may work but are not officially supported.
Design and photo editing work in more browsers, so this only limits the video path. If a large share of your traffic is on Firefox, mobile, or older Safari versions, plan a fallback message now rather than during QA. You can check support in code with cesdk.utils.supportsVideoDecode() and await cesdk.utils.supportsVideoEncode(), and the browser support page has the details.
Why put the editor inside the app
TikTok reported more than a billion monthly active users in 2021. That number matters here for one reason: it sets the baseline for how easy people think video editing should be.
Two things follow. Users expect filters, overlays, audio, and text within a few clicks, and they expect it where they already are. Vue’s single-file components suit this well, because the editor becomes one component you mount with a config object and an init hook.
How to integrate a video editor in Vue.js
Requirements
- Node.js 22.18+ or 24.12+, which create-vue requires. Download Node.js if needed.
- A Vue 3 project, typically scaffolded with create-vue.
- A CE.SDK license key, optional to start and needed for production. Start a free trial to get one.
If you need a project, scaffold one and answer “No” when it asks about TypeScript, because the code below is plain JavaScript. The other prompts are up to you:
npm create vue@latest my-vue-video-editor
cd my-vue-video-editor
Step 1: Install CE.SDK
Install the SDK together with the background removal plugin that the editor configuration below uses:
npm install @cesdk/cesdk-js@1.82.0 @imgly/plugin-background-removal-web@1.82.0 onnxruntime-web@1.21.0Step 2: Add the video editor configuration
The editor’s dock, inspector, timeline controls, and asset libraries come from an editor configuration. The Vue video editor starter kit ships it as source files, so copy them into your project:
npx degit imgly/starterkit-video-editor-ts-web/src/imgly#release-1.82.0 src/imglyThe release-1.82.0 tag matches the SDK version from Step 1. The configuration is written in TypeScript, which Vite handles even in a JavaScript project, and you change the editor by editing these files.
Step 3: Create the editor component
CE.SDK ships a Vue component, so you do not manage the editor instance or its teardown yourself. Import it from the /vue entry point and give it a config object and an init function.
Create src/components/VideoEditor.vue:
<!-- src/components/VideoEditor.vue -->
<template>
  <CreativeEditor
    :config="config"
    :init="init"
    width="100vw"
    height="100vh"
    @error="(error) => console.error('[CE.SDK]', error.message, error.cause)"
  />
</template>

<script setup>
import CreativeEditor from '@cesdk/cesdk-js/vue';
import { initVideoEditor } from '../imgly';

const config = {
  userId: 'YOUR_USER_ID', // optional, for MAU tracking
};

const init = async (cesdk) => {
  // Video editor UI, asset libraries and plugins from the starter kit
  await initVideoEditor(cesdk);

  // Open an empty video scene
  await cesdk.actions.run('scene.create');
};
</script>
You do not need a CE.SDK license key to try it: without one the editor runs in evaluation mode and exports carry a watermark. Start a free trial to get one and set it as license in the config.
initVideoEditor applies the configuration and adds the asset libraries, including demo clips and music, upload sources, and background removal. In production you swap the demo sources in src/imgly/index.ts for your own, whether that is your backend or a third-party library such as Unsplash.
cesdk.actions.run('scene.create') opens an empty scene. Since CE.SDK 1.72 deprecated the design and video scene modes, every new scene supports video. Older examples that call createVideoScene() or addDemoAssetSources() still work, but both are deprecated. One caveat: the iOS and Android SDKs do not yet support scenes without a mode, so if you share scenes with mobile apps, read the v1.72 migration guide first.
The configuration also runs editor.checkBrowserSupport, which shows a blocking message in browsers that cannot decode video and a dismissible warning in browsers that cannot export it. Since CE.SDK 1.72, the editor no longer runs this check on its own, so keep that call if you replace the configuration.
The editor loads its engine assets from the IMG.LY CDN, which is meant for development. For production, serve the assets from your own servers.
Step 4: Use the component
<!-- src/App.vue -->
<template>
  <VideoEditor />
</template>

<script setup>
import VideoEditor from './components/VideoEditor.vue';
</script>
The create-vue starter styles in src/assets/main.css limit #app to 1280px with padding, which squeezes the editor. Replace the contents of that file with:
/* src/assets/main.css */
body {
  margin: 0;
}
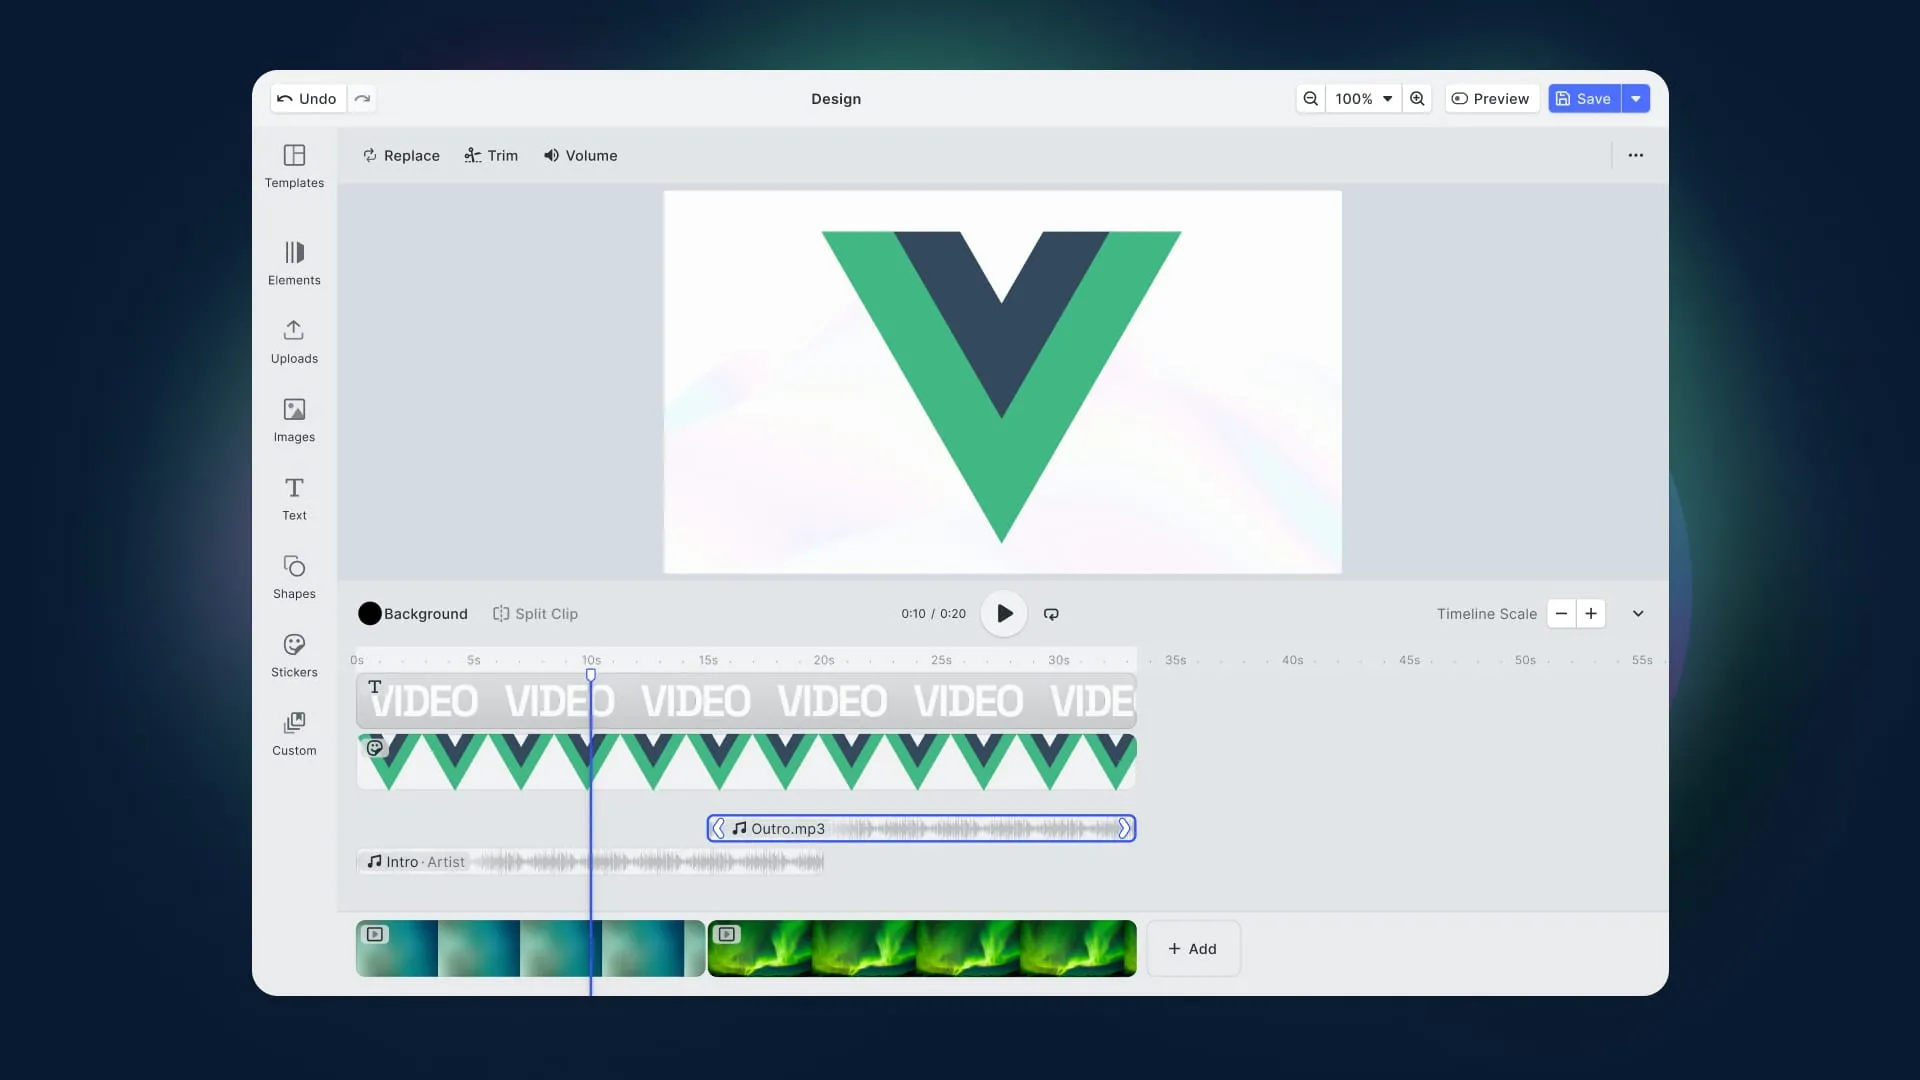
Run npm run dev. You should get a full editor with a timeline: trimming, splitting, text overlays, audio tracks, filters, and transitions.
Gotchas worth knowing up front
init errors go to the error event. If a line inside init throws, the component skips the rest and emits an error event. Without a listener, nothing reaches the console and you get a half-built scene with no explanation, which is why the component above listens with @error.
Relative asset URLs resolve against the CDN. CE.SDK resolves relative URIs against config.baseURL, which points at the IMG.LY CDN, so /videos/intro.mp4 will not hit your origin. Make local paths absolute before passing them to the engine.
Trim calls need loaded media. setTrimOffset and setTrimLength depend on duration metadata. Call await engine.block.forceLoadAVResource(fill) first or they throw The video has not been loaded yet., which inside init reaches the error event and skips every line after it.
Nuxt needs a client-only boundary. The editor is browser-only, so server-side rendering will break it. Wrap it in <ClientOnly> so Nuxt only renders it in the browser. The .client.vue suffix works only with Nuxt auto-imports, not with the explicit path import this guide uses.
Let an agent do the integration
If you work in an AI-assisted editor, Agent Skills for CE.SDK load the current documentation and conventions into Claude Code, Codex, and similar tools, so the generated integration matches the current API rather than a remembered one. There is also an MCP server for live doc lookup during a session. We wrote about the reasoning in Introducing IMG.LY Agent Skills.
Building compositions in code
The default UI handles user-facing editing. For templates, automation, or a custom interface, work through cesdk.engine.
Create a scene and a page
A page owns a timeline. Its duration comes from the clips you put on it, and that is the duration of the export.
const engine = cesdk.engine;

const scene = engine.scene.create();

const page = engine.block.create('page');
engine.block.appendChild(scene, page);
engine.block.setWidth(page, 1280);
engine.block.setHeight(page, 720);
Add clips
Video is not a block type of its own. You create a graphic block and attach a video fill, so the same positioning and animation APIs apply to video as to anything else.
const clip1 = engine.block.create('graphic');
engine.block.setShape(clip1, engine.block.createShape('rect'));

const fill1 = engine.block.createFill('video');
engine.block.setString(
  fill1,
  'fill/video/fileURI',
  'https://cdn.img.ly/assets/demo/v4/ly.img.video/videos/pexels-drone-footage-of-a-surfer-barrelling-a-wave-12715991.mp4'
);
engine.block.setFill(clip1, fill1);

const clip2 = engine.block.create('graphic');
engine.block.setShape(clip2, engine.block.createShape('rect'));

const fill2 = engine.block.createFill('video');
engine.block.setString(
  fill2,
  'fill/video/fileURI',
  'https://cdn.img.ly/assets/demo/v4/ly.img.video/videos/pexels-taryn-elliott-7108793.mp4'
);
engine.block.setFill(clip2, fill2);
Sequence with a track
The background track keeps its children playing back to back and recalculates offsets when a duration changes, so you do not position clips by hand. It also sets the page duration. The timeline shows every track on the page, including ones you create yourself.
engine.block.moveToBackgroundTrack(clip1);

const track = engine.block.getBackgroundTrack();
if (track === null) throw new Error('No background track');
engine.block.setDuration(clip1, 10); // set it before clip2 joins

engine.block.moveToBackgroundTrack(clip2); // the track shifts it to 10s

engine.block.fillParent(track);
Size the children, not the track. A track derives its dimensions from what it contains, and moveToBackgroundTrack creates the background track the first time you call it.
Trim and audio
Blocks default to 5 seconds. A longer clip gets cut off, a shorter one stops at its end unless you call engine.block.setLooping(fill, true).
await engine.block.forceLoadAVResource(fill1);
engine.block.setTrimOffset(fill1, 1); // skip the first second
engine.block.setTrimLength(fill1, 10);
engine.block.setMuted(fill1, true);

const audio = engine.block.create('audio');
engine.block.appendChild(page, audio);
engine.block.setString(
  audio,
  'audio/fileURI',
  'https://cdn.img.ly/assets/demo/v4/ly.img.audio/audios/far_from_home.m4a'
);
engine.block.setVolume(audio, 0.7);
engine.block.setTimeOffset(audio, 2);
Export to MP4
Encoding runs in a background worker, so the editor stays usable. The scene freezes when the export starts, so later edits will not show up in the file.
const exportPage = engine.scene.getCurrentPage();
if (!exportPage) throw new Error('No page to export');

const blob = await engine.block.exportVideo(exportPage, {
  mimeType: 'video/mp4',
  videoBitrate: 'Auto', // bounded bitrate, recommended in the browser
  onProgress: (rendered, encoded, total) => {
    progress.value = Math.round((encoded / total) * 100);
  },
});

const anchor = document.createElement('a');
anchor.href = URL.createObjectURL(blob);
anchor.download = 'export.mp4';
anchor.click();
Bind onProgress to a ref, declared as const progress = ref(0) with ref imported from vue, and you have a progress bar. Long compositions take a while to encode, and silence reads as a hang.
You can also extract just the audio with engine.block.exportAudio(page, { mimeType: 'audio/wav' }), which is still marked experimental in the SDK types, and is handy for transcription and caption pipelines. Speaking of which, caption presets and transitions between clips are both worth a look once the basics work.
Full reference: the create and edit videos guide and the timeline editor docs.
Customizing the editor
- Component order. Add, remove, and reorder UI elements with
setComponentOrder({ in: location }, order)across locations like'ly.img.dock','ly.img.canvas.menu', and'ly.img.inspector.bar'. - Theming.
cesdk.ui.setTheme()for light, dark, or system, or build a custom theme with CSS custom properties. See the theming demo. - Asset libraries. Serve media from your own backend or connect third-party sources. Users can browse and search both from inside the editor.
- Feature API. Show and hide functionality by context, which is how you reflect backend permissions in the UI.
- Localization. Override and extend every string with full i18n support.
Reusable customizations belong in a plugin. Background removal and vectorization ship that way.
Where a Vue video editor pays off
Marketing automation. Generate campaign variants from one template with text variables, and push template edits across every asset built on it. The separate PSD importer package turns existing Photoshop files into editable scenes. This is mostly an engine job rather than a UI one.
E-learning. Instructors record, trim, and caption in the browser and build a template library instead of one-off files. Plugins can add quizzes and polls.
Sales outreach. Personalized video at volume, with localization for teams selling into several markets.
Social publishing. Templates, an audio library, and configurable animations, then export per platform aspect ratio.
Digital asset management. Teams adapt approved footage centrally. CE.SDK’s roles and scopes control what users can edit, while permissions live in your backend and surface through the Feature API.
Next steps
Start from the Vue video editor starter kit, which is a working project rather than a snippet, or try the demo first.
On a different framework? We have the same guide for React and Angular, plus a broader JavaScript video editing guide on the underlying browser tech. Still comparing vendors? See our breakdown of the leading video editing SDKs.
Questions about your use case? Talk to us.
FAQ
How do I catch errors from init? The Vue component catches errors thrown inside init and emits them as an error event. Listen with @error on the component to log them, otherwise they never reach the console.
Can I use CE.SDK with Nuxt?
Yes, as long as the editor only renders in the browser. The component file imports CE.SDK plugins that need browser APIs, so wrap it in <ClientOnly> and Nuxt will skip it during server rendering. The .client.vue suffix only applies to auto-imported components.