You may think that video processing can only be performed on a server, but this is not true. Thanks to WebAssembly (Wasm), you can run high-performance code written in C or C++ in your browser. This opens up a lot of possibilities and gives you the ability to build a client-side video editor. Let’s now learn how to create a Wasm-based video editor in React.
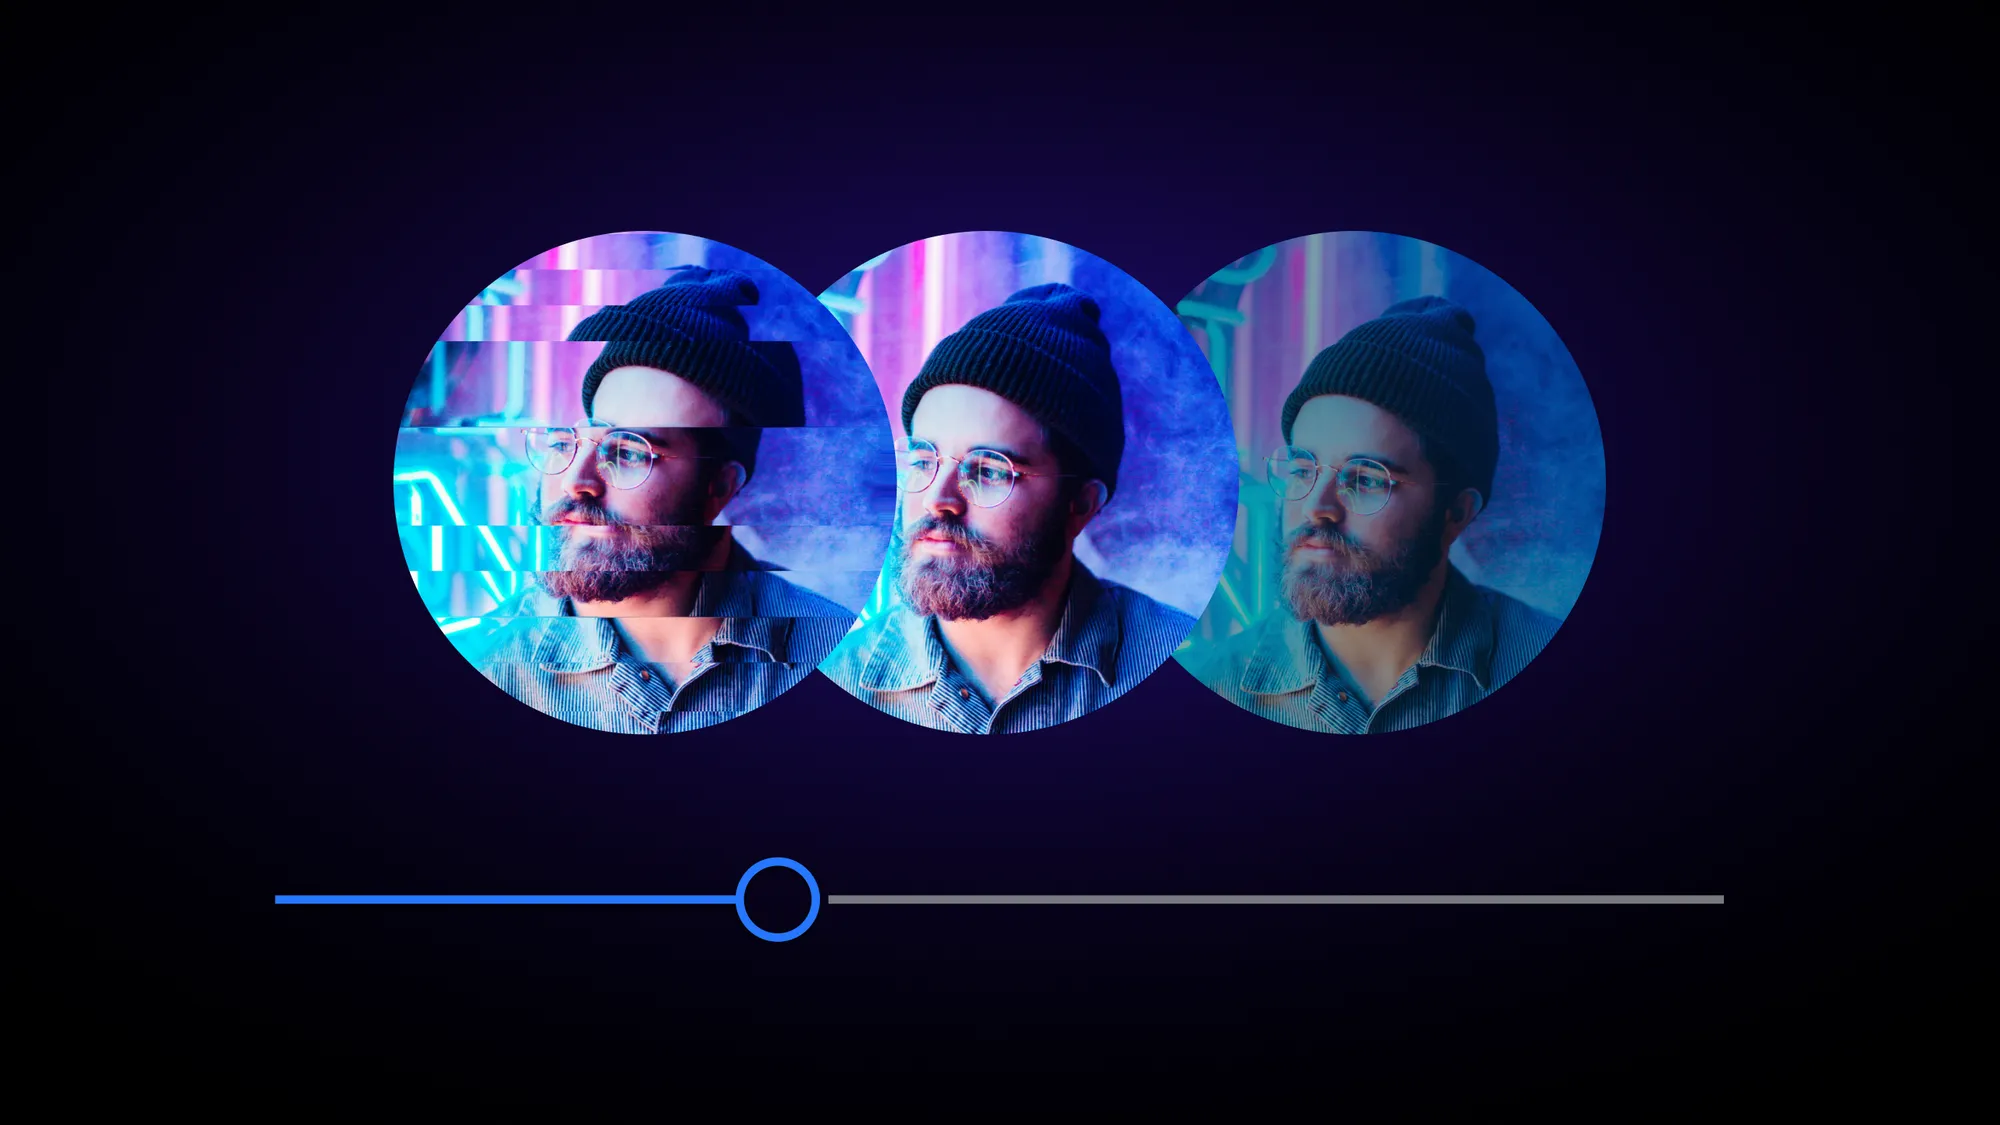
Follow this tutorial and learn how to build the application below:
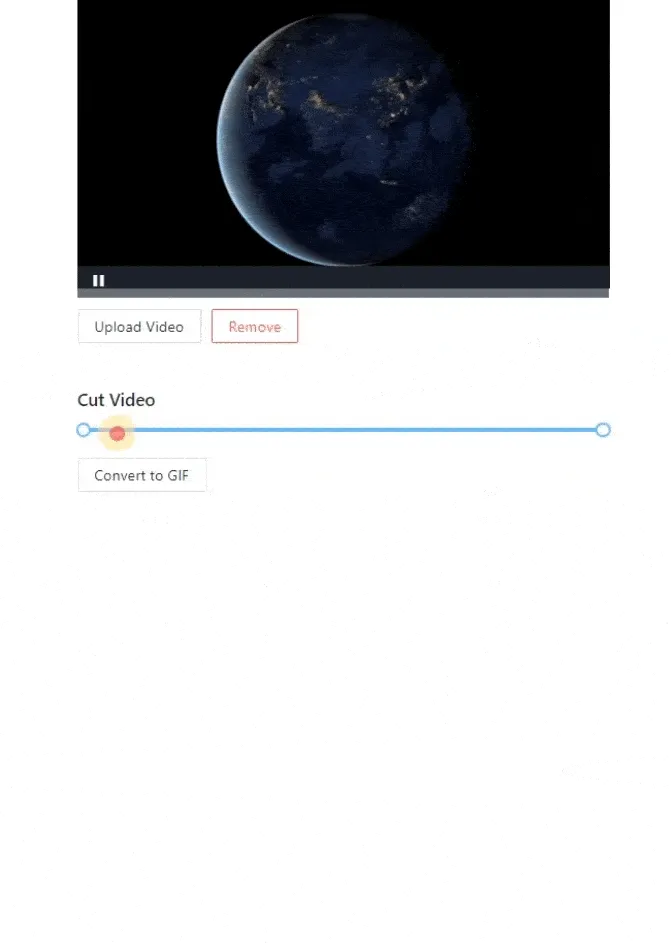
This React video editor allows users to upload a video, select a portion of it, convert it to GIF, and download the resulting image file – all of this in your browser.
What is WebAssembly?
WebAssembly (also called Wasm) is a new type of code that modern web browsers can run and understand. Specifically, Wasm provides new functionality to web development and brings significant performance benefits. This applies to both frontend and backend, since Wasm can be used by both clients and servers.
Wasm code should not be written by hand. This is because Wasm is a binary instruction format. So, Wasm is designed to be a compilation target for source languages such as C, C++, Rust, and others. Learn more about Wasm on the WebAssembly MDN Web Docs page.
Wasm provides a way to run code written in several languages on the Web at near-native speed. This means that WebAssembly forms can be easily imported and executed by a Web client or server application. In other words, you can use WebAssembly functions via JavaScript and achieve results that were not previously possible on a browser, especially in terms of performance.
What is ffmpeg.wasm?
As stated on the GitHub page of the project, ffmpeg.wasm is a WebAssembly and JavaScript port of FFmpeg. If you are not familiar with it, FFmpeg is an open-source software suite that includes several libraries and programs for managing audio, video, streams, and other media files. All of these tools can be invoked and executed via the ffmpeg command-line instruction.
Therefore, ffmpeg.wasm enables video and audio processing in JavaScript-based web applications. In detail, it enables video and audio recording, format transcoding, video and audio editing, and video scaling. Even though it is a WebAssembly-based library, you can use it in your JavaScript code just like any other npm library. This is the power of Wasm.
Since it transpiles to Wasm, you can take advantage of ffmpeg.wasm directly in your browser without performance concerns. This means that ffmpeg.wasm opens the door to client-side audio and video processing. Let’s now learn how to use ffmpeg.wasm to build a client-side video editor in React!
Building a Video Editor in React with WASM
In this step-by-step tutorial, you will learn how to build a Wasm-based video editor in React with ffmpeg.wasm. This React video editor application will allow you to upload a video, trim it, and convert it to GIF in the browser, without using any backend functionality or external API.
Clone the GitHub repository that supports the tutorial and try the video editor application by launching the following commands:
git clone https://github.com/Tonel/video-editor-wasm-react
cd video-editor-wasm-react
npm install
npm run start
Let’s waste no more time and see how to build a video editor application in React.
Prerequisites
This is the list of libraries the video editor application you are about to build depends on:
- Node.js and npm 8+ and higher
- React 18.2+
[ffmpeg.wasm](https://github.com/ffmpegwasm/ffmpeg.wasm)[antd](https://www.npmjs.com/package/antd)>= 4.3[video-react](https://www.npmjs.com/package/video-react)>= 0.15
antd is one of the most popular UI libraries for React. In this tutorial, its [Slider](https://ant.design/components/slider/) component will be used to implement the video cutting feature. So, any other UI library including a slider component with a range option will do.
video-react is one of the most advanced and reliable HTML5 video players for React. You can replace it with any other React video player library.
Initializing a React Project
Let’s initialize a new Create React App React project called video-editor-wasm-react with the command below:
npx create-react-app video-editor-wasm-reactYour video-editor-wasm-react directory should now contain the following files:
video-editor-wasm-react
├── README.md
├── node_modules
├── package.json
├── .gitignore
├── public
│   ├── favicon.ico
│   ├── index.html
│   ├── logo192.png
│   ├── logo512.png
│   ├── manifest.json
│   └── robots.txt
└── src
    ├── App.css
    ├── App.js
    ├── App.test.js
    ├── index.css
    ├── index.js
    ├── logo.svg
    ├── reportWebVitals.js
    └── setupTests.js
Enter the video-editor-wasm-react folder in your terminal and launch a React local server with the commands below:
cd video-editor-wasm-react
npm start
Now, visit the [http://localhost:3000/](http://localhost:3000/) page in your browser, and you should be seeing the default Create React App screen.
Before installing ffmpeg.wasm, you need to get your server ready. As stated in the official documentation, fmmpeg.wasm depends on [SharedArrayBuffer](https://developer.mozilla.org/en-US/docs/Web/JavaScript/Reference/Global_Objects/SharedArrayBuffer). This means that only browsers that support SharedArrayBuffer can run ffmpeg.wasm. You can find a complete list of all browsers here.
In the most popular browsers, SharedArrayBuffer is only available to cross-origin isolated webpages. To enable this, you need to set the following headers in your server hosting the React application:
Cross-Origin-Embedder-Policy: require-corp
Cross-Origin-Opener-Policy: same-origin
In a Create-React-App application, you achieve this by creating a src/setupProxy.js file and making sure it contains the following code:
module.exports = function (app) {
    app.use(function (req, res, next) {
        res.setHeader("Cross-Origin-Opener-Policy", "same-origin")
        res.setHeader("Cross-Origin-Embedder-Policy", "require-corp")
        next()
    })
}
Your local development server is now ready to use ffmpeg.wasm!
Installing the Project’s Dependencies
It is now time to add the aforementioned required dependencies to your project.
First, install ffmpeg.wasm with the following command:
npm install @ffmpeg/ffmpeg @ffmpeg/coreNow, let’s install Antd Design:
npm install antdFinally, it is time to install Video-React:
npm install video-react reduxNote that video-react also requires [redux](https://www.npmjs.com/package/redux) to work.
You have now everything you need to start developing your React video editor!
Uploading a Video to the Video Editor
Create a VideoUpload component as below:
// src/components/VideoUpload.js

import { Button, Upload } from 'antd';

function VideoUpload({ disabled, onChange = () => {}, onRemove = () => {} }) {
  return (
    <>
      <Upload
        disabled={disabled}
        beforeUpload={() => {
          return false;
        }}
        accept="video/*"
        onChange={(info) => {
          if (info.fileList && info.fileList.length > 0) {
            onChange(info.fileList[0].originFileObj);
          }
        }}
        showUploadList={false}
      >
        <Button>Upload Video</Button>
      </Upload>
      <Button
        danger={true}
        disabled={!disabled}
        onClick={() => {
          onRemove(undefined);
        }}
      >
        Remove
      </Button>
    </>
  );
}

export default VideoUpload;
As you can see, this component uses the Antd Design Upload component to allow users to upload a video file. Then, a “Remove” button gives users the ability to remove the uploaded video. Note that when the Upload component is enabled, the “Remove” button is disabled and vice versa. This way, users can deal with only one video at a time.
Playing a Video in React
You now need a VideoPlayer component to play the uploaded video. You can build it as below:
// src/components/VideoPlayer.js

import {
  BigPlayButton,
  ControlBar,
  LoadingSpinner,
  Player,
  PlayToggle,
} from 'video-react';
import 'video-react/dist/video-react.css';
import { useEffect, useState } from 'react';

export function VideoPlayer({
  src,
  onPlayerChange = () => {},
  onChange = () => {},
  startTime = undefined,
}) {
  const [player, setPlayer] = useState(undefined);
  const [playerState, setPlayerState] = useState(undefined);

  useEffect(() => {
    if (playerState) {
      onChange(playerState);
    }
  }, [playerState]);

  useEffect(() => {
    onPlayerChange(player);

    if (player) {
      player.subscribeToStateChange(setPlayerState);
    }
  }, [player]);

  return (
    <div className={'video-player'}>
      <Player
        ref={(player) => {
          setPlayer(player);
        }}
        startTime={startTime}
      >
        <source src={src} />
        <BigPlayButton position="center" />
        <LoadingSpinner />
        <ControlBar autoHide={false} disableDefaultControls={true}>
          <PlayToggle />
        </ControlBar>
      </Player>
    </div>
  );
}
This is a simple video-react-based video player component, which only allows playing or stop the video file received with the src prop.
Cutting a Video in React
Your goal is to allow users to select a portion of the video and watch it before converting it into GIF. Implement this with the logic below:
import { Slider } from "antd"
import { sliderValueToVideoTime } from "../utils/utils"

function VideoEditor() {
  const [sliderValues, setSliderValues] = useState([0, 100])

  // logic to handle videoFile, videoPlayer, and videoPlayerState...

  useEffect(() => {
      const min = sliderValues[0]
      // when the slider values are updated, updating the
      // video time
      if (min !== undefined && videoPlayerState && videoPlayer) {
          videoPlayer.seek(sliderValueToVideoTime(videoPlayerState.duration, min))
      }
  }, [sliderValues])

  useEffect(() => {
      if (videoPlayer && videoPlayerState) {
          // allowing users to watch only the portion of
          // the video selected by the slider
          const [min, max] = sliderValues

          const minTime = sliderValueToVideoTime(videoPlayerState.duration, min)
          const maxTime = sliderValueToVideoTime(videoPlayerState.duration, max)

          if (videoPlayerState.currentTime < minTime) {
              videoPlayer.seek(minTime)
          }
          if (videoPlayerState.currentTime > maxTime) {
              // looping logic
              videoPlayer.seek(minTime)
          }
      }
  }, [videoPlayerState])

  return (
          // other video editor components...
          <Slider
            disabled={!videoPlayerState}
            value={sliderValues}
            range={true}
            onChange={(values) => {
              setSliderValues(values)
            }}
            tooltip={{
              formatter: null,
            }}
          />
        // ...
}
This component equips users with the ability to select a portion of the uploaded video with the Antd Design Slider component and watch it in loop, before converting it into a GIF file.
Specifically, the logic here uses the sliderValueToVideoTime() function below to transform the slider values into time coordinates:
// src/utils/utils.js

export function sliderValueToVideoTime(duration, sliderValue) {
    return Math.round(duration * sliderValue / 100)
}
Note that the actual video processing slider will be performed by the next component through ffmpeg.
Converting a Video to GIF in React
To convert a video to GIF, create a VideoConversionButton component as follows:
// src/components/VideoConversionButton.js

import { Button } from 'antd';
import { fetchFile } from '@ffmpeg/ffmpeg';
import { sliderValueToVideoTime } from '../utils/utils';

function VideoConversionButton({
  videoPlayerState,
  sliderValues,
  videoFile,
  ffmpeg,
  onConversionStart = () => {},
  onConversionEnd = () => {},
  onGifCreated = () => {},
}) {
  const convertToGif = async () => {
    // starting the conversion process
    onConversionStart(true);

    const inputFileName = 'gif.mp4';
    const outputFileName = 'output.gif';

    // writing the video file to memory
    ffmpeg.FS('writeFile', inputFileName, await fetchFile(videoFile));

    const [min, max] = sliderValues;
    const minTime = sliderValueToVideoTime(videoPlayerState.duration, min);
    const maxTime = sliderValueToVideoTime(videoPlayerState.duration, max);

    // cutting the video and converting it to GIF with an FFMpeg command
    await ffmpeg.run(
      '-i',
      inputFileName,
      '-ss',
      `${minTime}`,
      '-to',
      `${maxTime}`,
      '-f',
      'gif',
      outputFileName
    );

    // reading the resulting file
    const data = ffmpeg.FS('readFile', outputFileName);

    // converting the GIF file created by FFmpeg to a valid image URL
    const gifUrl = URL.createObjectURL(
      new Blob([data.buffer], { type: 'image/gif' })
    );
    onGifCreated(gifUrl);

    // ending the conversion process
    onConversionEnd(false);
  };

  return <Button onClick={() => convertToGif()}>Convert to GIF</Button>;
}

export default VideoConversionButton;
This component uses ffmpeg.wasm to launch an ffmpeg command. This command takes care of clipping the video to the time limits defined by sliderValues and converting it to GIF. Note that all these operations are performed client-side in the browser.
In detail, the ffmpeg -ss flag defines the time from which to start reading the video file, while -to defines the end time. Then, the gif option specifies that you want to produce a GIF file. Learn more about the flags and options offered by ffmpeg here.
The resulting GIF image is stored in the output.gif memory file, loaded as a valid "image/gif" Blob, and finally converted to a valid image URL with the [URL.createObjectURL()](https://developer.mozilla.org/en-US/docs/Web/API/URL/createObjectURL_static) native function.
Putting It All Together
Now, let’s see the full code of the VideoEditor component:
// src/components/VideoEditor.js

import { createFFmpeg } from '@ffmpeg/ffmpeg';
import { useEffect, useState } from 'react';
import { Slider, Spin } from 'antd';
import { VideoPlayer } from './VideoPlayer';
import { sliderValueToVideoTime } from '../utils/utils';
import VideoUpload from './VideoUpload';
import VideoConversionButton from './VideoConversionButton';
const ffmpeg = createFFmpeg({ log: true });

function VideoEditor() {
  const [ffmpegLoaded, setFFmpegLoaded] = useState(false);
  const [videoFile, setVideoFile] = useState();
  const [videoPlayerState, setVideoPlayerState] = useState();
  const [videoPlayer, setVideoPlayer] = useState();
  const [gifUrl, setGifUrl] = useState();
  const [sliderValues, setSliderValues] = useState([0, 100]);
  const [processing, setProcessing] = useState(false);

  useEffect(() => {
    // loading ffmpeg on startup
    ffmpeg.load().then(() => {
      setFFmpegLoaded(true);
    });
  }, []);

  useEffect(() => {
    const min = sliderValues[0];
    // when the slider values are updated, updating the
    // video time
    if (min !== undefined && videoPlayerState && videoPlayer) {
      videoPlayer.seek(sliderValueToVideoTime(videoPlayerState.duration, min));
    }
  }, [sliderValues]);

  useEffect(() => {
    if (videoPlayer && videoPlayerState) {
      // allowing users to watch only the portion of
      // the video selected by the slider
      const [min, max] = sliderValues;

      const minTime = sliderValueToVideoTime(videoPlayerState.duration, min);
      const maxTime = sliderValueToVideoTime(videoPlayerState.duration, max);

      if (videoPlayerState.currentTime < minTime) {
        videoPlayer.seek(minTime);
      }
      if (videoPlayerState.currentTime > maxTime) {
        // looping logic
        videoPlayer.seek(minTime);
      }
    }
  }, [videoPlayerState]);

  useEffect(() => {
    // when the current videoFile is removed,
    // restoring the default state
    if (!videoFile) {
      setVideoPlayerState(undefined);
      setSliderValues([0, 100]);
      setVideoPlayerState(undefined);
      setGifUrl(undefined);
    }
  }, [videoFile]);

  return (
    <div>
      <Spin
        spinning={processing || !ffmpegLoaded}
        tip={!ffmpegLoaded ? 'Waiting for FFmpeg to load...' : 'Processing...'}
      >
        <div>
          {videoFile ? (
            <VideoPlayer
              src={URL.createObjectURL(videoFile)}
              onPlayerChange={(videoPlayer) => {
                setVideoPlayer(videoPlayer);
              }}
              onChange={(videoPlayerState) => {
                setVideoPlayerState(videoPlayerState);
              }}
            />
          ) : (
            <h1>Upload a video</h1>
          )}
        </div>
        <div className={'upload-div'}>
          <VideoUpload
            disabled={!!videoFile}
            onChange={(videoFile) => {
              setVideoFile(videoFile);
            }}
          />
        </div>
        <div className={'slider-div'}>
          <h3>Cut Video</h3>
          <Slider
            disabled={!videoPlayerState}
            value={sliderValues}
            range={true}
            onChange={(values) => {
              setSliderValues(values);
            }}
            tooltip={{
              formatter: null,
            }}
          />
        </div>
        <div className={'conversion-div'}>
          <VideoConversionButton
            onConversionStart={() => {
              setProcessing(true);
            }}
            onConversionEnd={() => {
              setProcessing(false);
            }}
            ffmpeg={ffmpeg}
            videoPlayerState={videoPlayerState}
            sliderValues={sliderValues}
            videoFile={videoFile}
            onGifCreated={(girUrl) => {
              setGifUrl(girUrl);
            }}
          />
        </div>
        {gifUrl && (
          <div className={'gif-div'}>
            <h3>Resulting GIF</h3>
            <img
              src={gifUrl}
              className={'gif'}
              alt={'GIF file generated in the client side'}
            />
            <a
              href={gifUrl}
              download={'test.gif'}
              className={'ant-btn ant-btn-default'}
            >
              Download
            </a>
          </div>
        )}
      </Spin>
    </div>
  );
}

export default VideoEditor;
Since ffmpeg takes time to load, you need to let users know that they need to wait a while before they can use the video editor component. Also, ffmpeg operations take time to execute. This wait logic is implemented by using the Antd Design [Spin](https://ant.design/components/spin/) component.

Also, note that by passing the log: true option to the createFFmpeg() function, ffmpeg will log useful debug info in the console. For example, after ffmpeg gets loaded, you should be able to see the following lines in the browser console:
[info] use ffmpeg.wasm v0.11.5
createFFmpeg.js:43 [info] load ffmpeg-core
createFFmpeg.js:43 [info] loading ffmpeg-core
createFFmpeg.js:43 [info] ffmpeg-core loaded
What the VideoComponent does is use all the components presented earlier to allow users to upload a video, select a portion through a slider, convert it to GIF, and download the resulting GIF file.
Et voilà! You just learned how to build a client-side video editor in React without using any backend functionality!
Commercial Alternative
VideoEditor SDK by IMG.LY provides powerful video editing features, including cropping and trimming videos in your project. You will receive staples of video editing, including straightening videos, filters, brightness, color adjustments, and more.
Conclusion
Building a client-side video processing and editing application that uses only the browser possible. With WebAssembly, you can run high-performance code written in C or C++ in JavaScript. This allows you to perform complex operations at lightning speed directly in the browser, without having to delegate the work to a server.
In this tutorial, you learned how to use ffmpeg.wasm to build a video editor in React. ffmpeg.wasm is the Wasm port of ffmpeg and enables video and audio processing and editing directly in the browser. Using it to build a web application to upload a video, cut it, and export it to GIF requires only a few lines of code, and here we have seen how to implement such a video editing application.
If your app goes beyond merely displaying video, and you want to allow your users to also edit video or create video based templates in the browser, explore our VideoEditor SDK for the Web – a performant video editing solution based on WASM and WebCodecs. Try the editor for yourself in action with our showcases.
Thanks for reading! Let us know what you think on Twitter! To stay in the loop, subscribe to our Newsletter.