




Registration Marks
What Are Registration Marks?
Registration marks are small targets printed outside the trim of a press sheet. Every color plate prints them in the same spot, so the press operator can adjust cyan, magenta, yellow, and black until their targets sit exactly on top of each other. When the plates line up, the target prints as one crisp black mark, and the artwork’s colors sit in register with it.
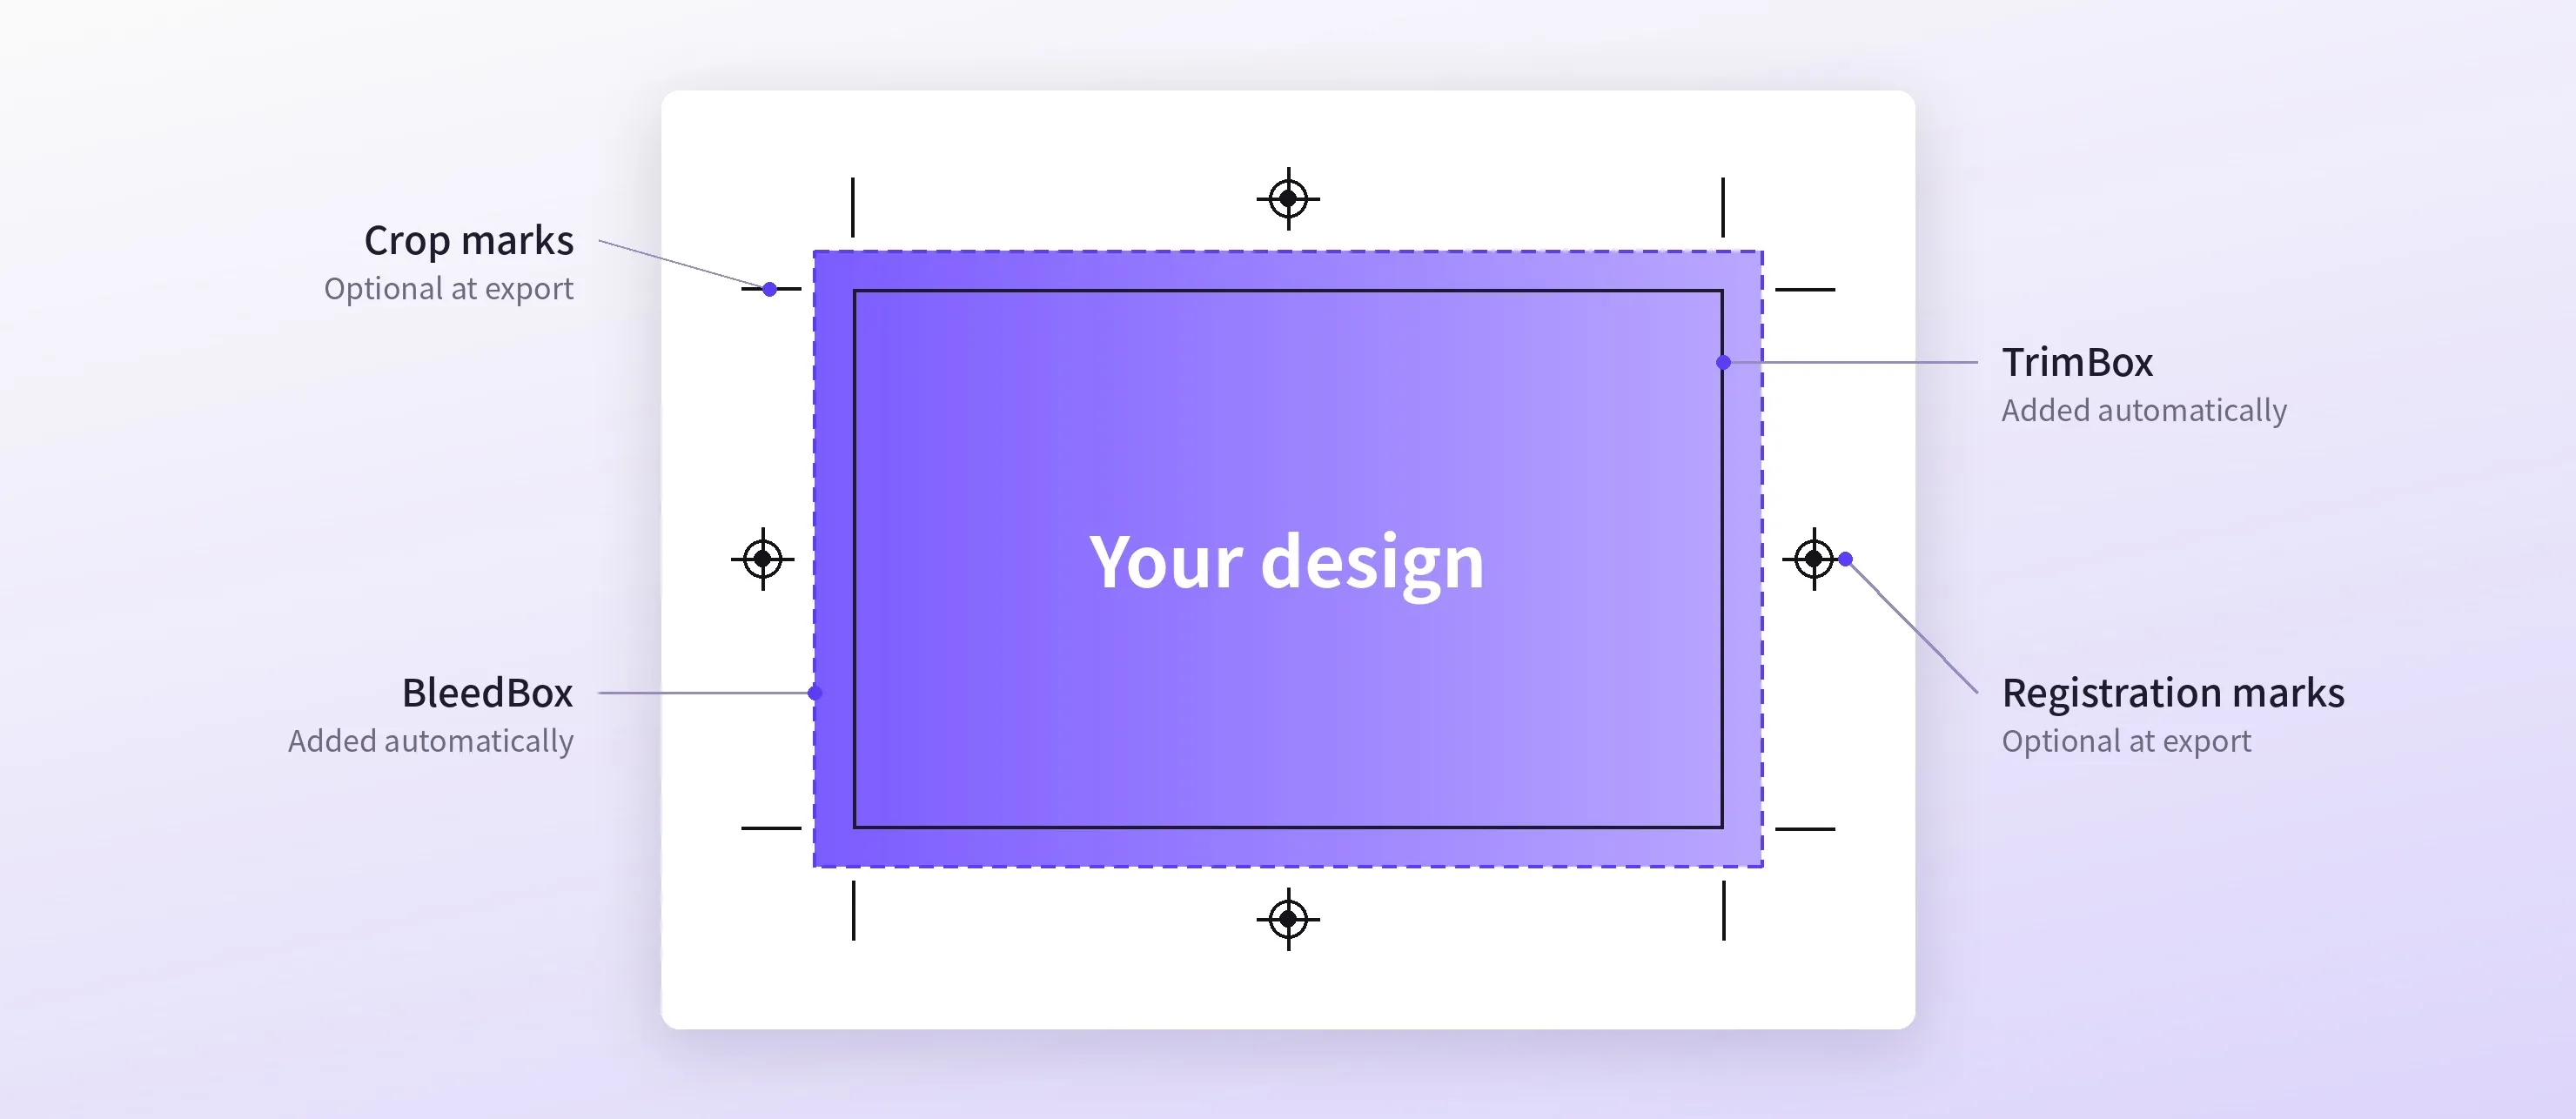
CE.SDK can include registration marks in a PDF export, along with the crop marks that show where to cut.
They matter on any job where colors print against each other, or where a later step, such as a foil stamp, has to land on the print.
What Do Registration Marks Look Like?
The usual shape is a crosshair inside a circle, placed in the margin outside the trim. Some shops use the lines of the crop marks as their registration target instead.
What Is Misregistration in Printing?
Misregistration is when one color plate prints out of line with the others, so its color separates from the rest. Registration marks make that shift visible before the run continues, because a target with a colored fringe instead of a single black mark tells the operator the plates need adjusting.
Colored edges
Edges pick up a colored ghost where one ink sits off its neighbors.
Doubled photos
Photos get the doubled look familiar from newspaper color pages.
Blurred graphics
A shift of a fraction of a millimeter is enough to blur multi-color graphics.
Registration Marks vs. Crop Marks
Crop marks show where to trim, and registration marks line up the plates. Both sit outside the trim with a few other printer’s marks, and all of them are cut away when the sheet is trimmed.
| What it looks like | What it's for | |
|---|---|---|
| Crop marks | Short lines at each corner | Show where to trim |
| Registration marks | A crosshair in a circle | Line up the color plates |
| Bleed marks | Fine lines at the edge of the bleed | Show how far the bleed runs |
| Color bars | A strip of CMYK and gray patches | Check ink density and gray balance |
| Page information | File name, page number, date, and plate | Identify the file and each plate |
Keep registration color for marks
The marks use a special color, usually called registration, which puts 100 percent of every ink on every plate. Text or artwork set in it stacks four full layers of ink, far above the coverage limit most papers can take, so print shops ask that it only ever be used for marks. For a deep black in artwork, use rich black instead.
How to Add Registration Marks to a PDF in CE.SDK
Turn the marks on
The marks are an option on CE.SDK’s PDF export, off until your product asks for them. On the web, you can let users choose crop and registration marks in the editor’s Print Setup panel, where they also set the bleed. On iOS, Android, and Node.js, your integration turns them on when it exports the PDF.
Set the offset and line weight
Your product sets how far the marks sit from the trim and how heavy their lines are. The offset uses the same unit as the page bleed, so the two are easy to compare.
Export the PDF
Export the page as a PDF. A target appears at the middle of each page edge in the registration color, so it lands on every separation, and each mark is knocked out in white underneath to stay readable over dark artwork. The exported page grows to fit the marks, but the artwork stays where it is, and the trim and bleed boxes in the PDF still describe the same edges.
Print-and-Cut Registration Marks
Desktop cutters and print-and-cut plotters use registration marks in a different way. A few marks print in the corners of the sheet together with the design, and the cutter’s optical sensor reads them to find exactly where the design landed. It then cuts along the outline, which is how stickers and heat-transfer decals get kiss cut or die cut to shape.
The cutter’s own software adds these marks, in the positions its sensor expects to find them.
Registration Marks in Web-to-Print and Finishing
Web-to-print orders
A storefront where customers design business cards or flyers in a web-to-print design tool sends each order to a print partner. When the export includes crop and registration marks, the file is ready for the press without a separate prepress step to add them.
Foil and die cutting
Packaging and stationery often get a foil stamp or a die cut after printing. That step has to land exactly on the artwork, and the registration marks give the finisher a target to line it up against.
Links
Documentation and references for this concept.
Printer's Marks Guide
Turn on crop and registration marks for a PDF and set their offset and line weight.
Print Setup Panel
Let users set the bleed and pick printer’s marks in the web editor.
Print-Ready PDF Demo
See a CMYK PDF/X-4 export running in a web editor.
Related Terms
Bleed / Cutout
Bleed is the margin of artwork beyond the trim, usually 3 mm, so a cut that lands slightly off never leaves a white edge…
PDF/X
An ISO-standardized subset of PDF designed for reliable, predictable reproduction in professional print production, enfo…
Kiss Cut vs. Die Cut
Two ways to cut stickers and labels to shape. A kiss cut stops at the backing paper, so the sticker sits on a larger she…
Crop Marks
Short corner lines printed just outside the trim that tell the cutter where a page's finished edges are. CE.SDK can add …