React Native Video Filters
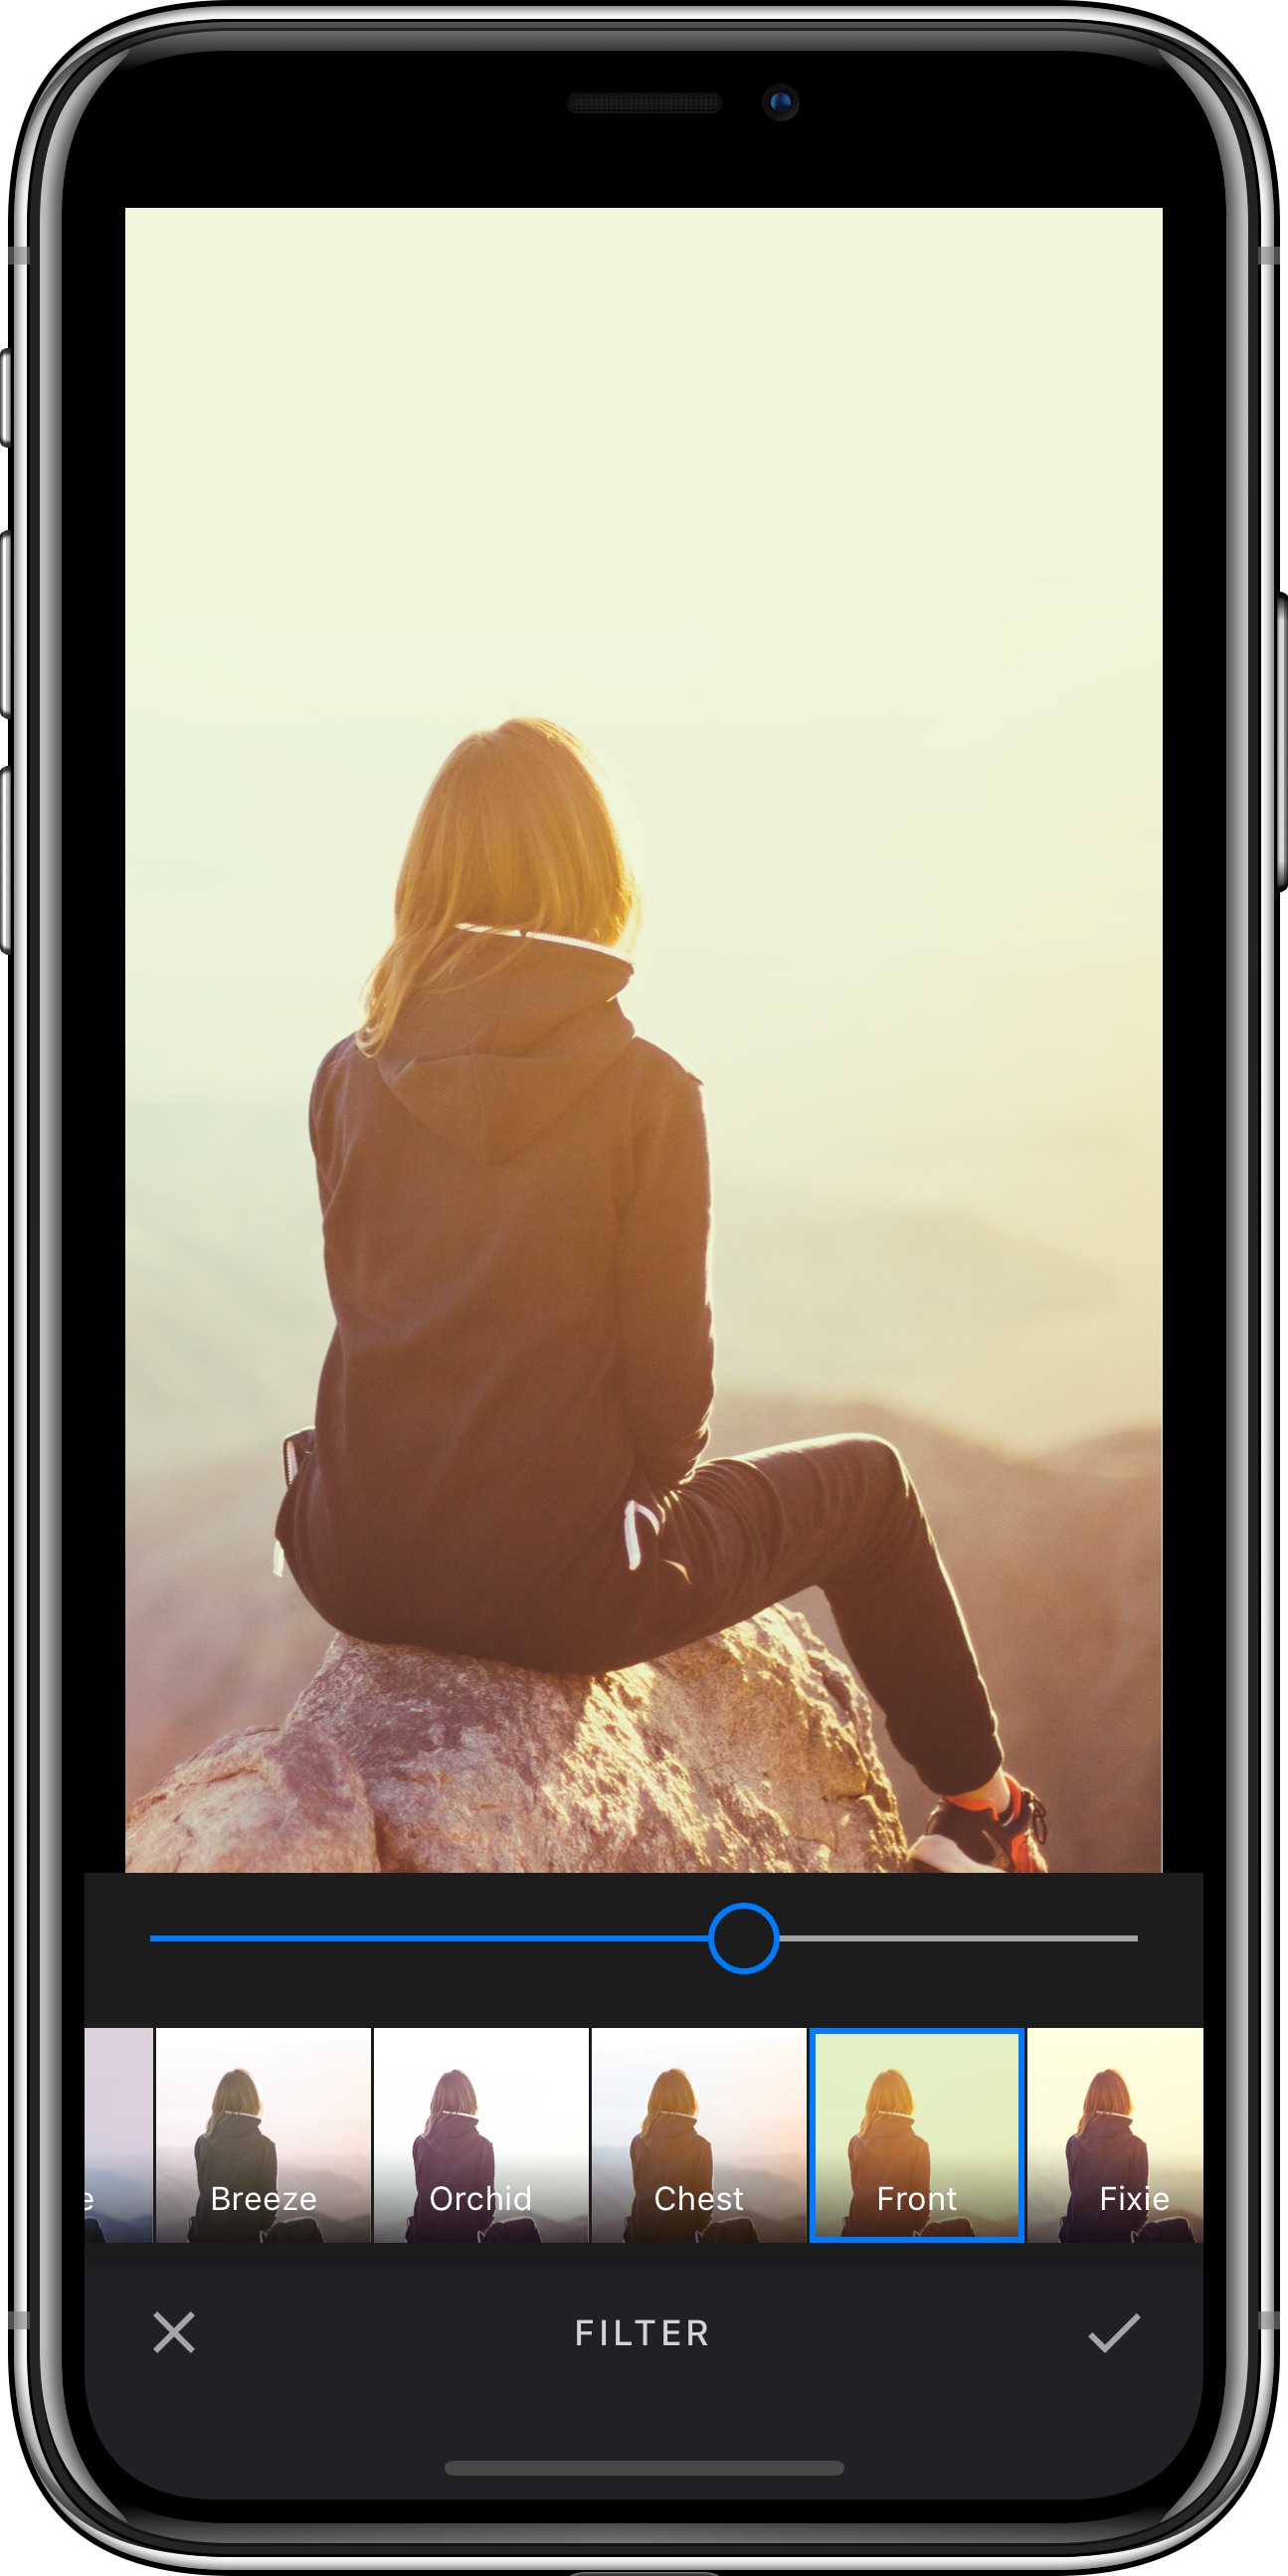
Our SDK features more than 60 high-quality filters. The processing is lightning fast, and it's easy to add your own filters. You might think that adding your filters is complicated or requires advanced math skills. Well, not at all. The way we realize filters makes it super easy. You don't have to code filters, you just need a program like Gimp or Photoshop. The only thing that needs to be done in code, is to add the filter you created.
The filter tool can be customized using the configuration.filter object. For details on how to modify the options, take a look at the configuration section.
Setting available filters#
Custom, as well as predefined filters, can be added via the configuration.filter.categories array.
The following example shows how a custom selection of filters can be set:
const configuration: Configuration = {filter: {categories: [{identifier: "custom_filter_group",name: "Custom",thumbnailURI: require("../../../assets/custom_filter_category.jpg"),items: [{identifier: "custom_filter",name: "Custom",lutURI: require("../../../assets/custom_lut_invert.png"),},],},],},};
Filter groups#
By default, the filters are grouped according to the FilterCategory instances passed to the configuration.filter.categories array. However, you can also disable the filter grouping so that all available filters will be displayed separately:
const configuration: Configuration = {filter: {flattenCategories: true,},};
Response filters#
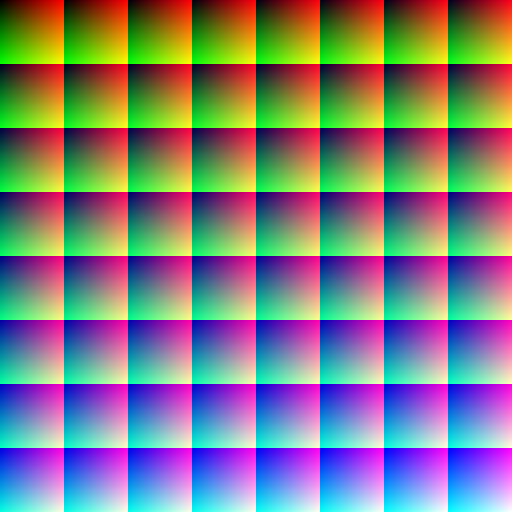
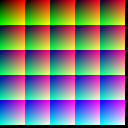
We use a technology called LUTs in order to add new filters to our SDK. The main idea is that colors respond to operations that are carried out during the filtering process. We 'record' that very response by applying the filter to the identity image shown below.
Starting with version 7.0, we support lower resolution LUT files in order to further reduce your app's deployment size and speed up live filters and filter previews. The supported formats are:
- 512x512 LUT with 8 columns and 8 rows (default) (download)
- 256x256 LUT with 7 columns and 7 rows (download)
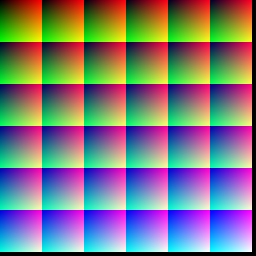
- 256x256 LUT with 6 columns and 6 rows (download)
- 128x128 LUT with 5 columns and 5 rows (download)
The end of the assets name, holds information about structure of the data it contains. The ending 8_8_512 tells the SDK that the LUT image contains 8 times 8 tiles, and has a resolution of 512 pixel.
When you create your own filters you must name your assets accordingly.
Using a smaller LUT file may lead to issues when applying your filter, as our processing engine needs to interpolate missing values. We recommend starting with the smallest possible LUT file and falling back to larger files, if you notice that your filter can’t be fully reproduced:
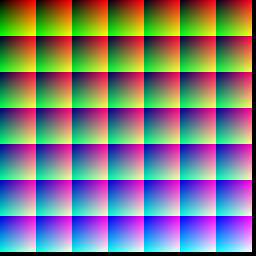
The black borders are required in order to optimize performance and the number of rows translates to the resolution for the green channel, the number of columns translates to the resolution of the red channel and the number of tiles translates to the blue channels resolution. And larger LUTs naturally guarantee a larger resolution across all channels.
The resulting image can be used within our SDK and the recorded changes can then be applied to any image by looking up the transformed colors in the modified LUT.
If you want to create a new filter, you'll have to download one of the identity LUTs shown above, load it into an image editing software of your choice, apply your operations, save it and add it to your app.
WARNING: As any compression artifacts in the edited LUT could lead to distorted results when applying the filter, you have to save your LUT as a PNG file.
The last step is described above, but you have to pass the path to your own LUT file instead of pointing to our bundle. Please note that not all operations can be translated into a response filter. Typically those operations use surrounding the pixels to determine the color of the pixel, such as blur.