Border Frames
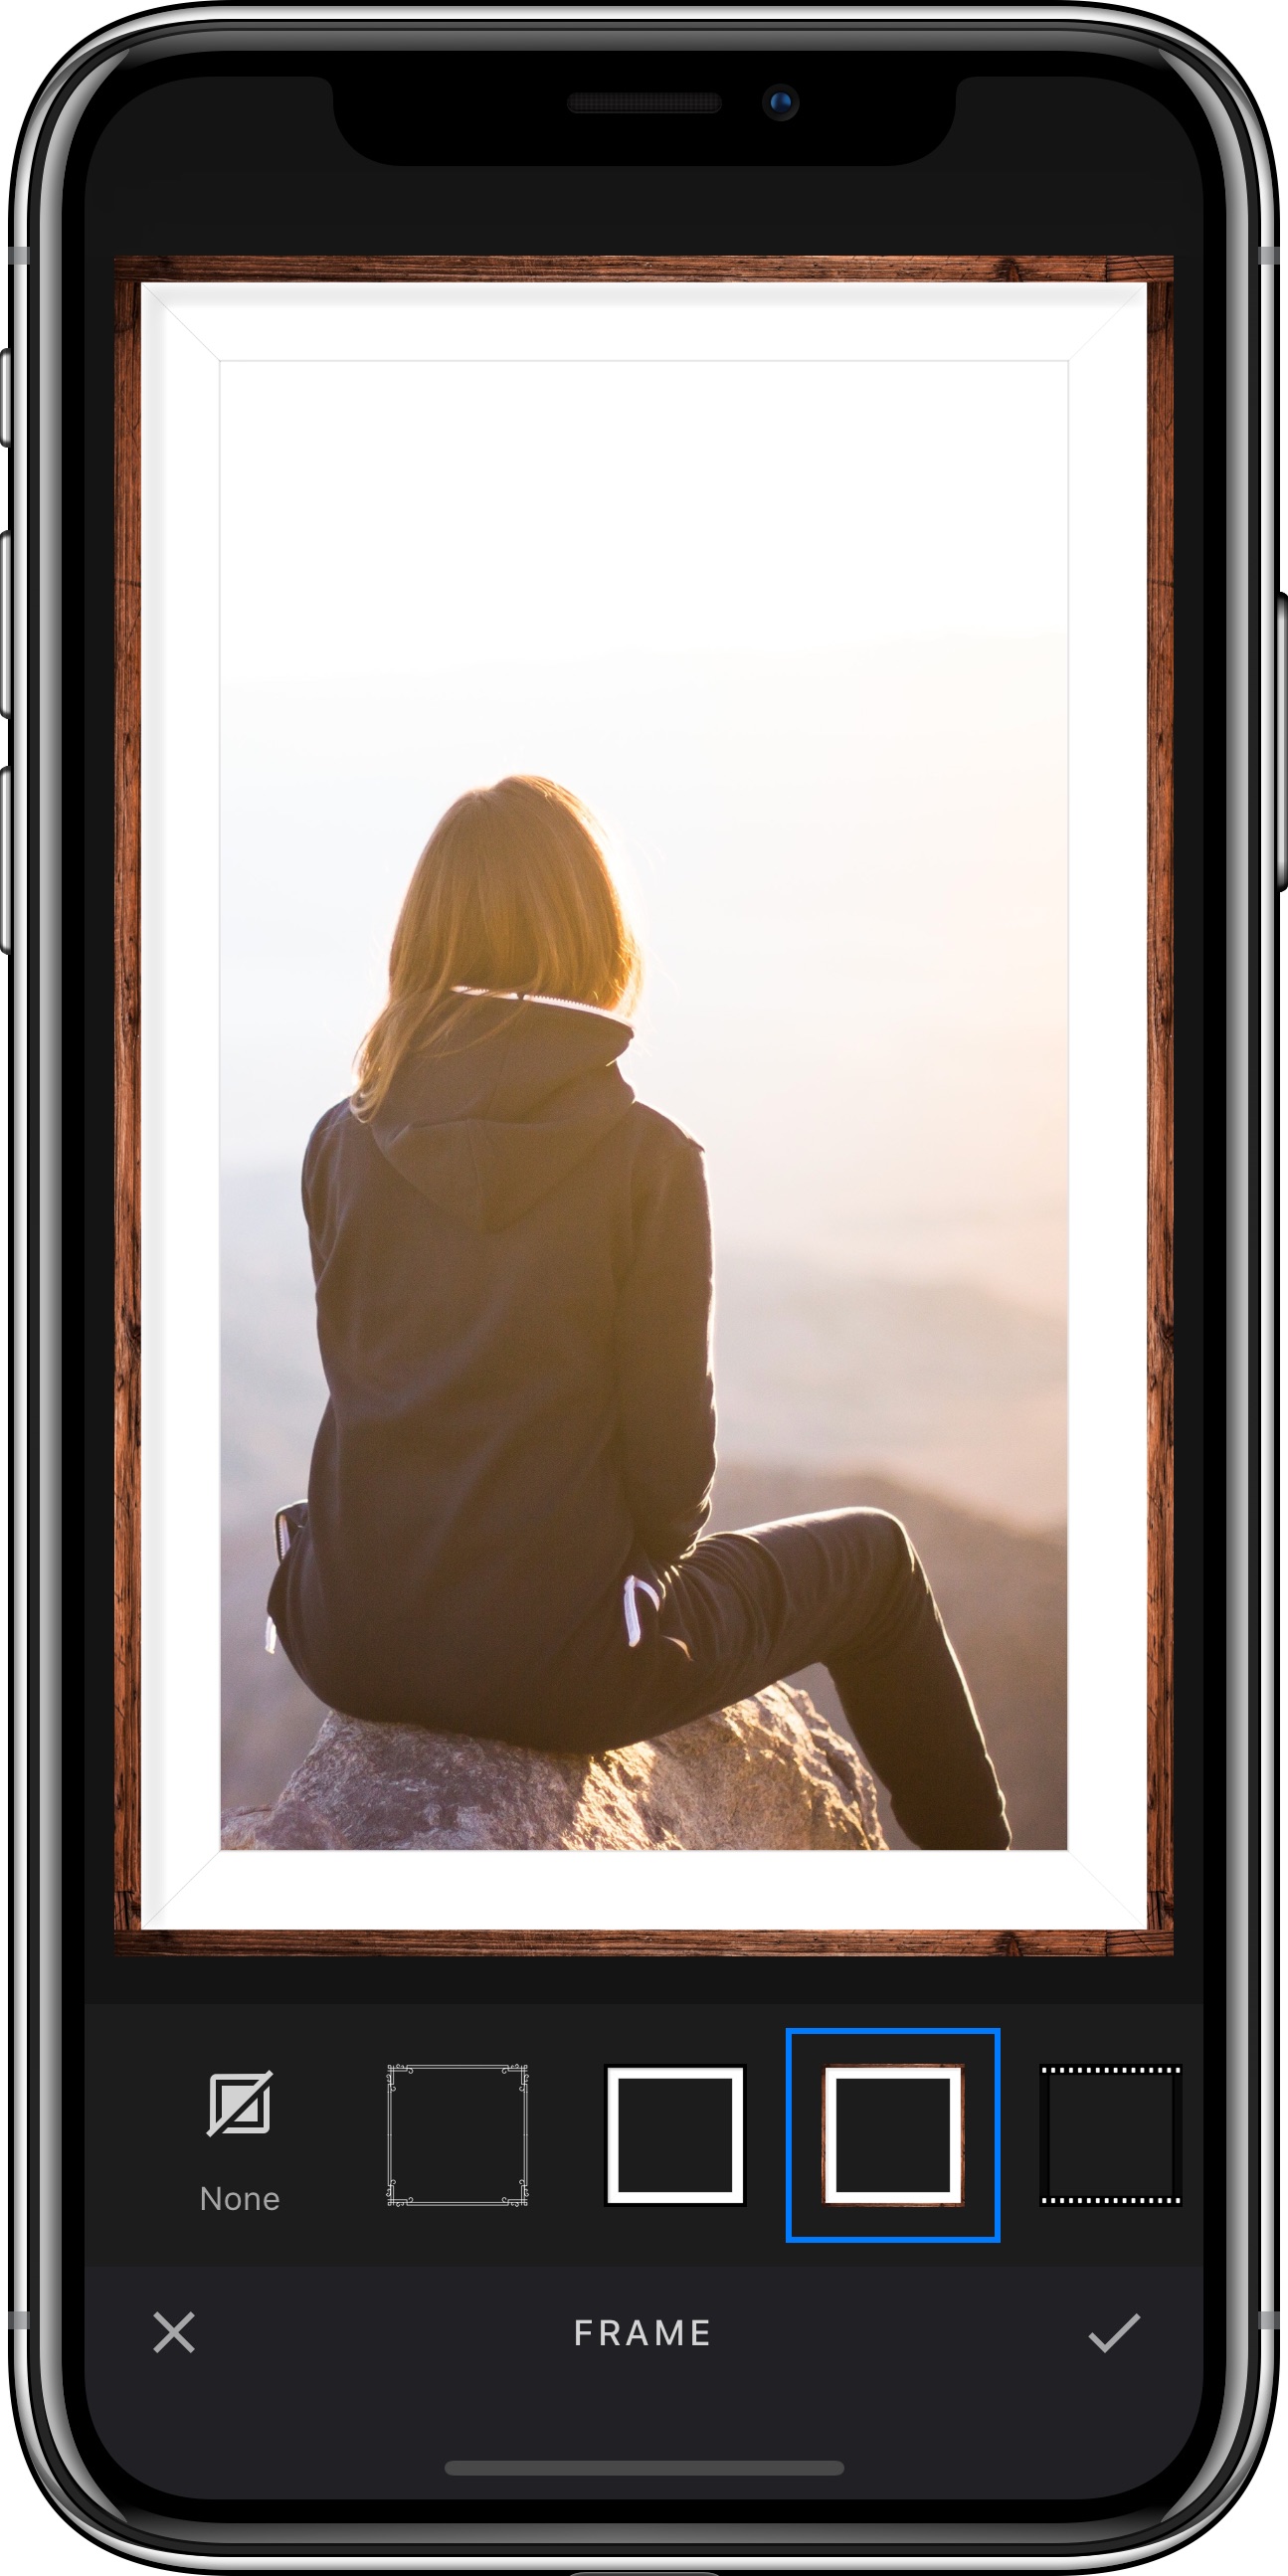
PhotoEditor SDK includes a versatile frame tool that works with any given image size or ratio. The custom frames work perfectly for creatives with repeatable or stretchable areas. To realize these, we abandoned the 9-patch standard and replaced it with a novel and even more flexible 12-patch layout. Supported asset formats are jpeg and png.
Adding Frames#
Frames consist of four groups. Each group has a start, middle and end image. The start and end images are optional,
and for the middle image there are two modes, FrameTileMode.repeat and FrameTileMode.stretch. These determine whether the asset should be stretched over the area,
or if they should be repeated to fill up space. If the middle asset is set to mode FrameTileMode.repeat the images will be made to fit the width of the section.
In some cases this results in the individual tiles being compressed or stretched a small amount, to fit only complete assets and avoid cutting the tiles.
The four groups can be laid out in two ways. Horizontal inside and vertical inside, see the images below.
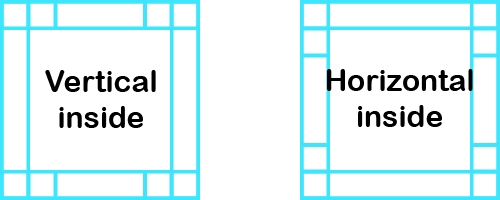
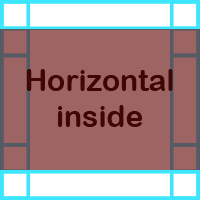
The idea behind the naming is, that if you imagine a box that covers the right and left groups and the top and bottom groups surrounding it, the horizontal box is inside the groups, as illustrated by the following image.
Finally, let's have a look at a real-world example.
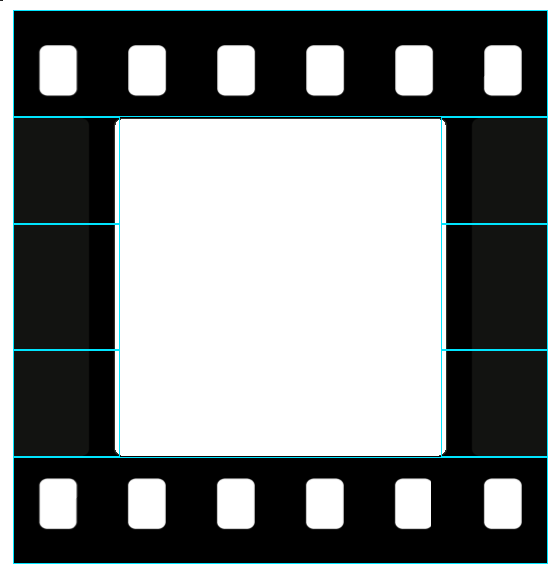
The layout mode is horizontal inside. The top and bottom groups just have a middle image, containing the film strip pattern. The left and right groups consist of a stretched border texture, and a start and end image to create a nice transition between the two sides of the film strip.
For a detailed example of how to create such frames, please have a look at the dedicated guides.