Manual Integration
Free Trial#
Our tech is modified to be used for testing purposes without a license key. To start testing just follow this Get Started guide and leave out the step of entering the commercial license keys. The editor will simply render a watermark over the preview and final results. And in case you need any technical assistance, make sure to reach out to us: https://img.ly/support. We’ll be glad to help.
Requirements#
PhotoEditor SDK requires iOS 13+ and Xcode 14.3.1+ with Swift 5.8+. If you have to use older versions of Swift or support older versions of iOS, please have a look at previous versions.
Manual Integration#
If you prefer not to use CocoaPods, you can integrate PhotoEditor SDK into your project manually via a dynamic framework.
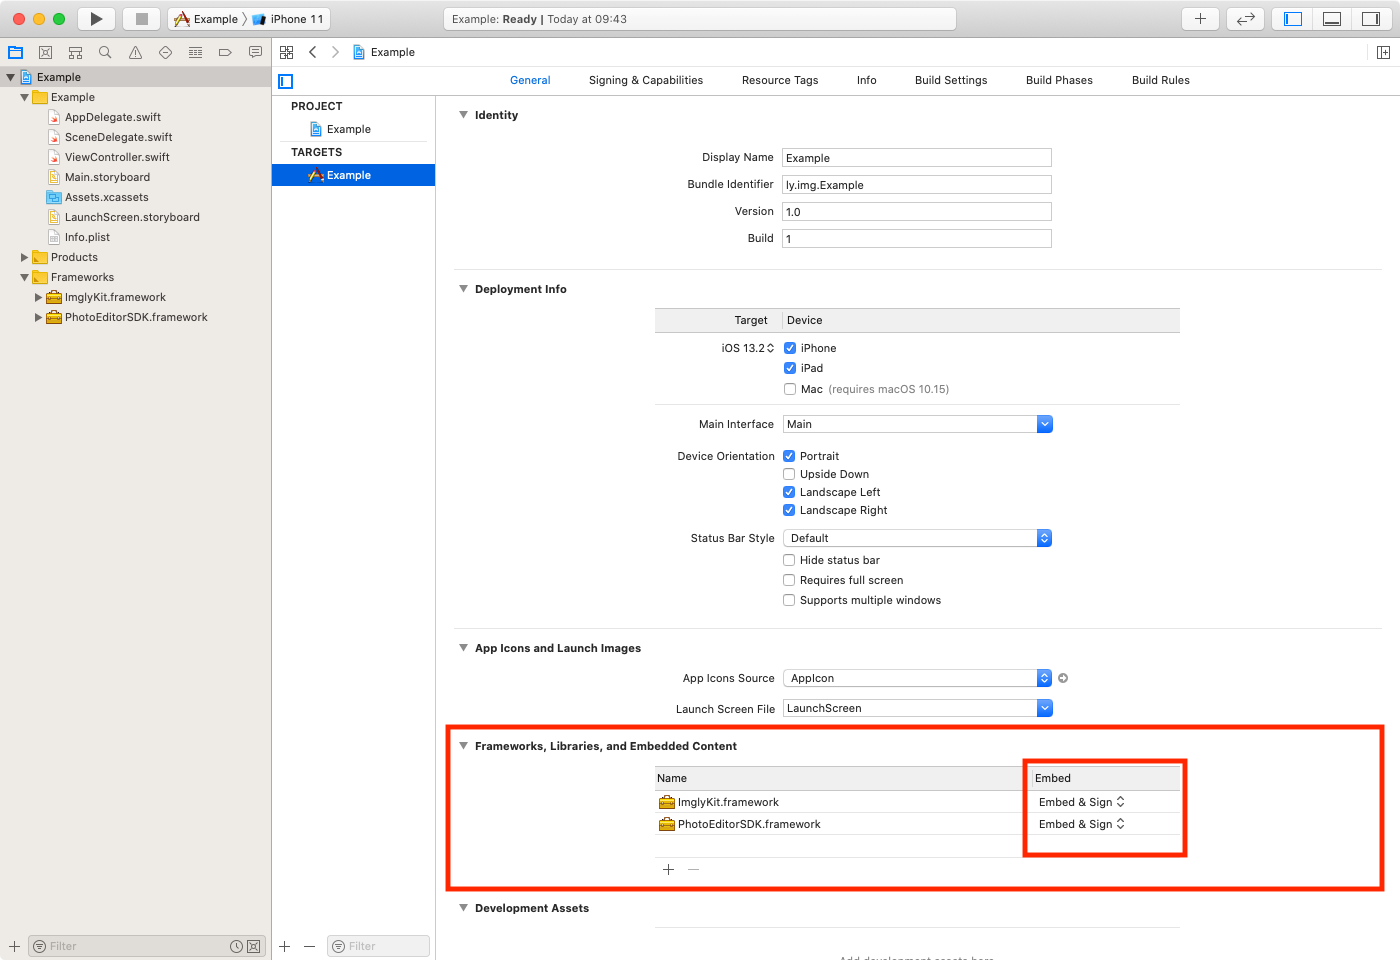
- Download the SDK here, then simply drag
ImglyKit.frameworkas well asPhotoEditorSDK.frameworkinto theFrameworks, Libraries, and Embedded Contentsection of your target and make sure that theEmbedsettings are set toEmbed & Sign:
- Open your project's
Build Phasestab and add a newRun Script Phasesomewhere below theEmbed Frameworksphase. Then copy the following line into the newly created build phase's text field:
bash "$BUILT_PRODUCTS_DIR/$FRAMEWORKS_FOLDER_PATH/ImglyKit.framework/strip-framework.sh"
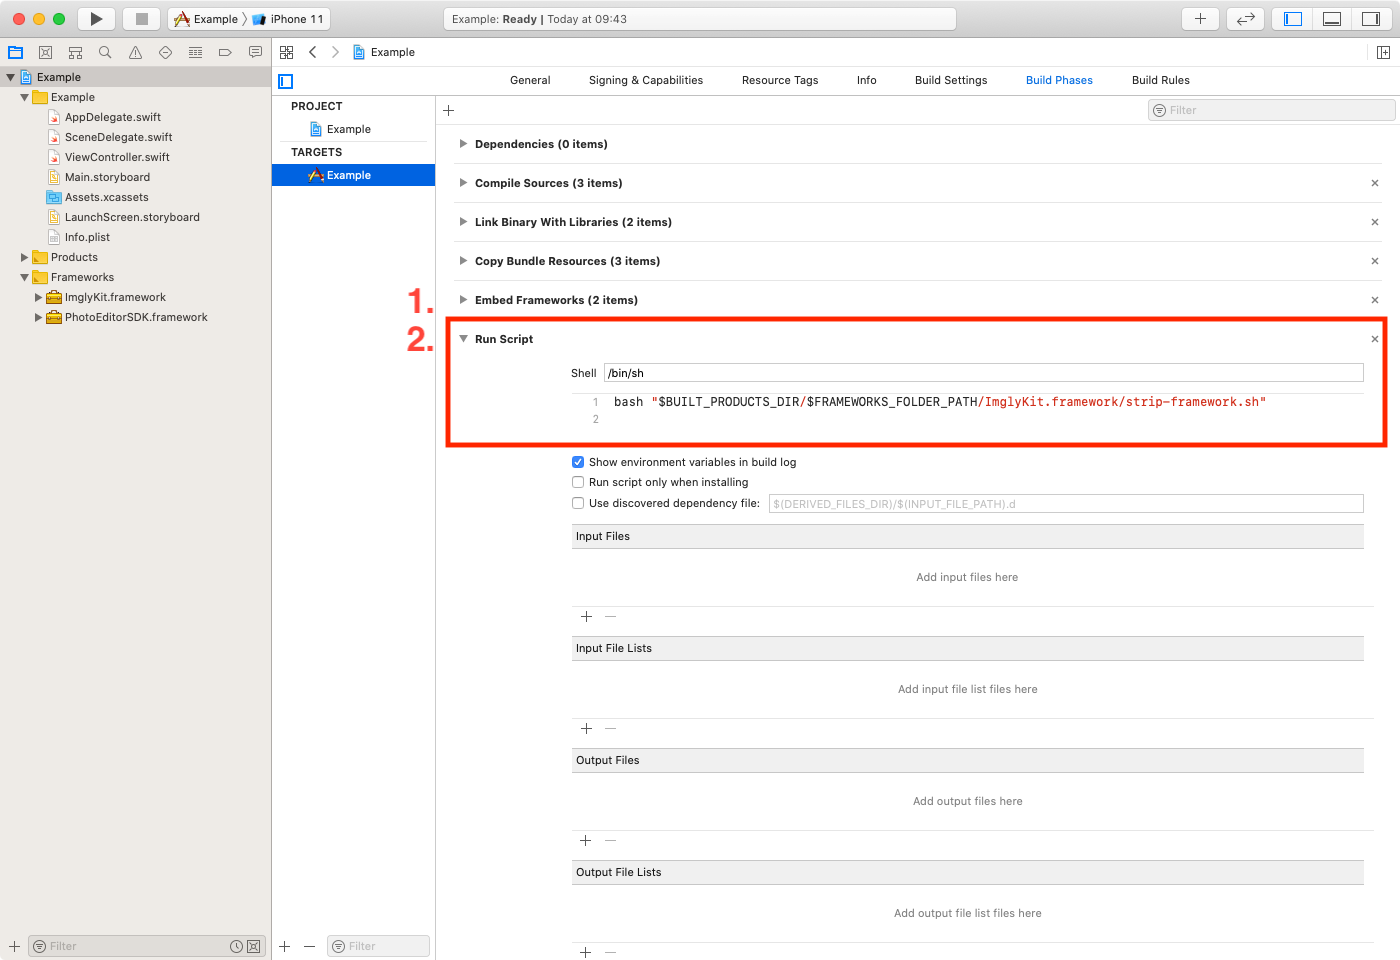
This script will remove the simulator slices from the universal binary, because Xcode does not allow uploading apps to App Store Connect that contain slices for both, the simulator and for devices.
If you are integrating PhotoEditor SDK into an otherwise Objective-C only project you also have to set the
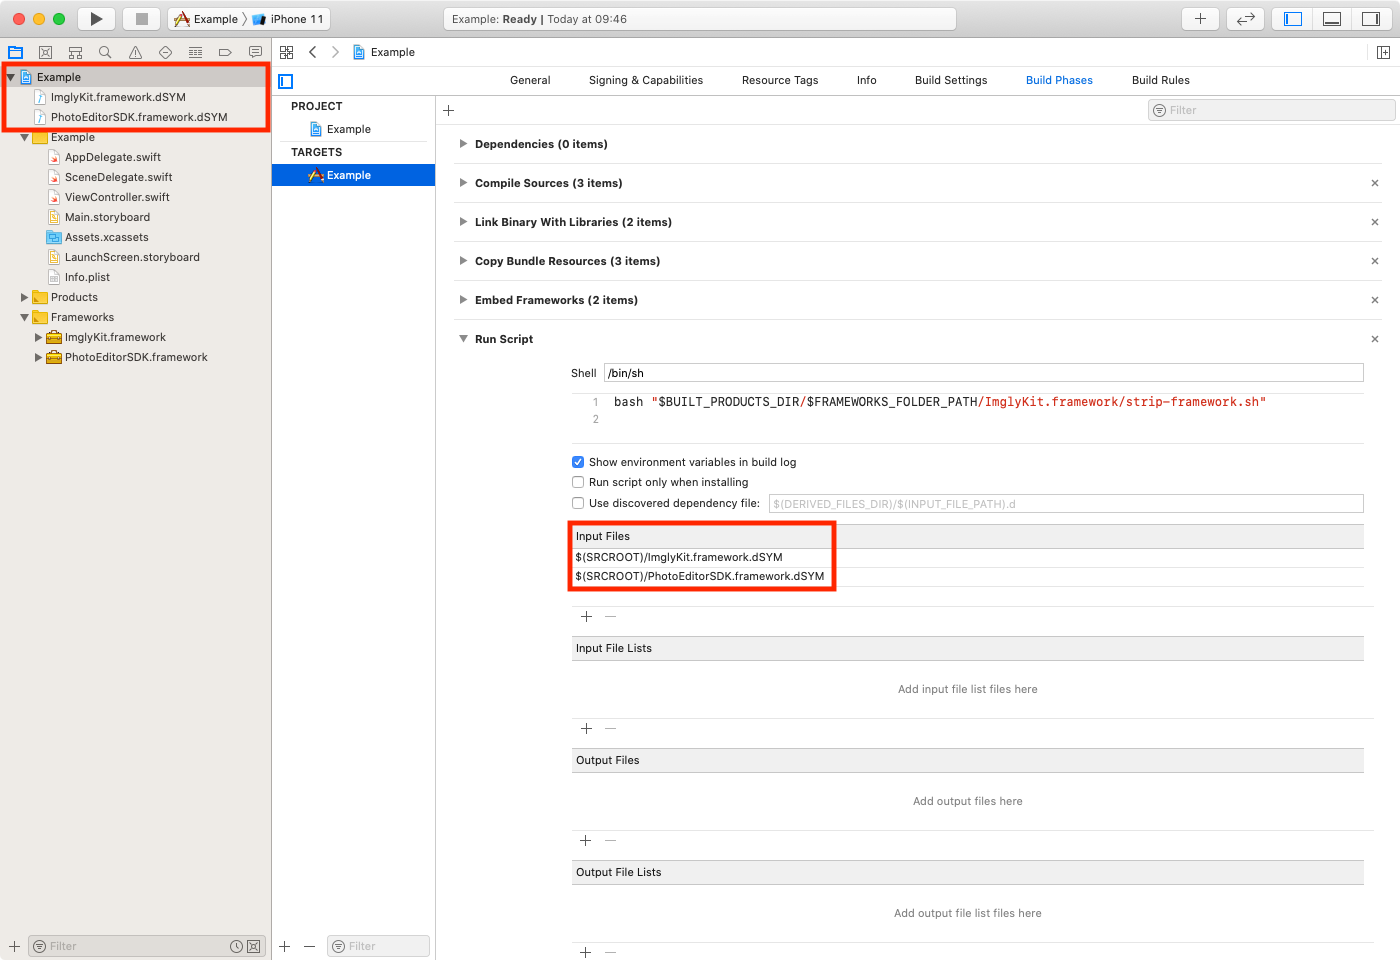
Always Embed Swift Standard Librariesbuild setting in your project'sBuild Settingstab toYes.To receive symbolicated crash logs, you need to include our debug symbols. Copy the
ImglyKit.framework.dSYMandPhotoEditorSDK.framework.dSYMfile to your project's tree without adding it to any of your targets. Then add the copied file as an input file to theRun Script Phaseof step 2.