Build a custom AI-powered image generation provider for CE.SDK using the @imgly/plugin-ai-generation-web package. You’ll implement an AI provider from scratch using the schema-based approach and integrate it seamlessly with the editor.
This guide walks you through creating an image generation provider that connects to your own AI service. You’ll learn about the provider interface, OpenAPI schema-based input configuration, quick actions, middleware patterns, and CE.SDK integration.
This guide covers:
- Understanding the Provider interface for image generation
- Creating an OpenAPI schema for input configuration
- Implementing a custom image provider with quick actions
- Adding middleware for logging, uploads, and error handling
- Integrating the provider with CE.SDK
Prerequisites#
- Basic knowledge of TypeScript and React
- Familiarity with CreativeEditor SDK
- An image generation API to integrate with
Project Setup#
First, set up your project and install the necessary packages:
# Create a new project or use an existing onemkdir my-image-providercd my-image-provider
# Initialize package.jsonnpm init -y
# Install required dependenciesnpm install @imgly/plugin-ai-generation-web@1.77.0 @imgly/plugin-ai-image-generation-web@1.77.0 @cesdk/cesdk-js@1.77.0 typescript
Then import the packages in your TypeScript file:
import { CommonProviderConfiguration, ImageOutput, Provider, loggingMiddleware, uploadMiddleware} from '@imgly/plugin-ai-generation-web';import ImageGeneration from '@imgly/plugin-ai-image-generation-web';Understanding the Provider Interface#
The core of the AI generation system is the Provider interface. For image generation, we implement this interface with kind: 'image'.
Key components of an image provider:
- id: Unique identifier for your provider
- kind: Always ‘image’ for image generation
- initialize: Setup function for any necessary configuration
- input: Configuration for the input UI panel and parameters
- output: Configuration for generation behavior and result handling
Creating an OpenAPI Schema#
For schema-based input, you need an OpenAPI schema that defines your input parameters. The schema controls what UI components appear in the generation panel:
{ "openapi": "3.0.0", "info": { "title": "My Image Generator API", "version": "1.0.0" }, "components": { "schemas": { "GenerationInput": { "type": "object", "required": ["prompt"], "properties": { "prompt": { "type": "string", "title": "Description", "description": "Describe the image you want to generate", "x-imgly-builder": { "component": "TextArea" } }, "width": { "type": "integer", "title": "Width", "default": 512, "enum": [256, 512, 768, 1024], "x-imgly-builder": { "component": "Select" } }, "height": { "type": "integer", "title": "Height", "default": 512, "enum": [256, 512, 768, 1024], "x-imgly-builder": { "component": "Select" } }, "style": { "type": "string", "title": "Style", "default": "photorealistic", "enum": ["photorealistic", "cartoon", "sketch", "painting"], "x-imgly-builder": { "component": "Select" } } }, "x-order-properties": ["prompt", "width", "height", "style"] } } }}Key concepts in the schema:
- Required vs optional properties: Use the
requiredarray to specify which fields must be filled - x-imgly-builder extension: Specifies the UI component type (TextArea, Select, etc.)
- x-order-properties: Controls the display order of fields in the UI
- enum values: Provides predefined options for Select components
Import the schema in your provider:
import apiSchema from './myApiSchema.json';Understanding CommonProviderConfiguration#
Before creating your provider, understand the CommonProviderConfiguration interface. This interface provides standardized configuration options that all providers should extend:
// Define provider configuration interface extending CommonProviderConfigurationinterface MyProviderConfiguration extends CommonProviderConfiguration<MyProviderInput, ImageOutput> { // Add any provider-specific configuration here customApiKey?: string;}Configuration Options#
proxyUrl: The URL of your proxy server that forwards requests to your AI API. This is essential for keeping API keys secure on the server side.
headers: Custom headers to include in all API requests. Useful for:
- Adding client identification headers
- Including version information
- Passing through metadata required by your API
- Adding correlation IDs for request tracing
history: Override the provider’s default history storage behavior:
false: Disable history storage entirely'@imgly/local': Use temporary local storage (not persistent across sessions)'@imgly/indexedDB': Use browser IndexedDB storage (persistent across sessions)string: Use your own custom asset source ID
supportedQuickActions: Configure which quick actions are supported:
falseornull: Remove the quick action entirely- Object with
mapInput: Override with custom input mapping
properties: Define default values for any provider property (static values or dynamic functions based on context).
Defining Input Types#
Define TypeScript interfaces for your provider’s input and configuration:
// Define your input type based on your schemainterface MyProviderInput { prompt: string; width: number; height: number; style: string; image_url?: string; // For image-to-image operations}Creating the Provider Factory#
The provider factory function returns a provider instance configured with your settings:
// Create a function that returns your providerexport function MyImageProvider(  _config: MyProviderConfiguration): (context: {  cesdk: CreativeEditorSDK;}) => Promise<Provider<'image', MyProviderInput, ImageOutput>> {  // Return a function that returns the provider  return async ({ cesdk: _cesdk }) => {    // Create and return the provider    const provider: Provider<'image', MyProviderInput, ImageOutput> = {      // Unique identifier for your provider      id: 'my-image-provider',
      // Define output type as 'image'      kind: 'image',
      // Initialize your provider      initialize: async () => {        console.log('Initializing my image provider');        // Any setup needed (e.g., API client initialization)      },
Configuring the Input Panel#
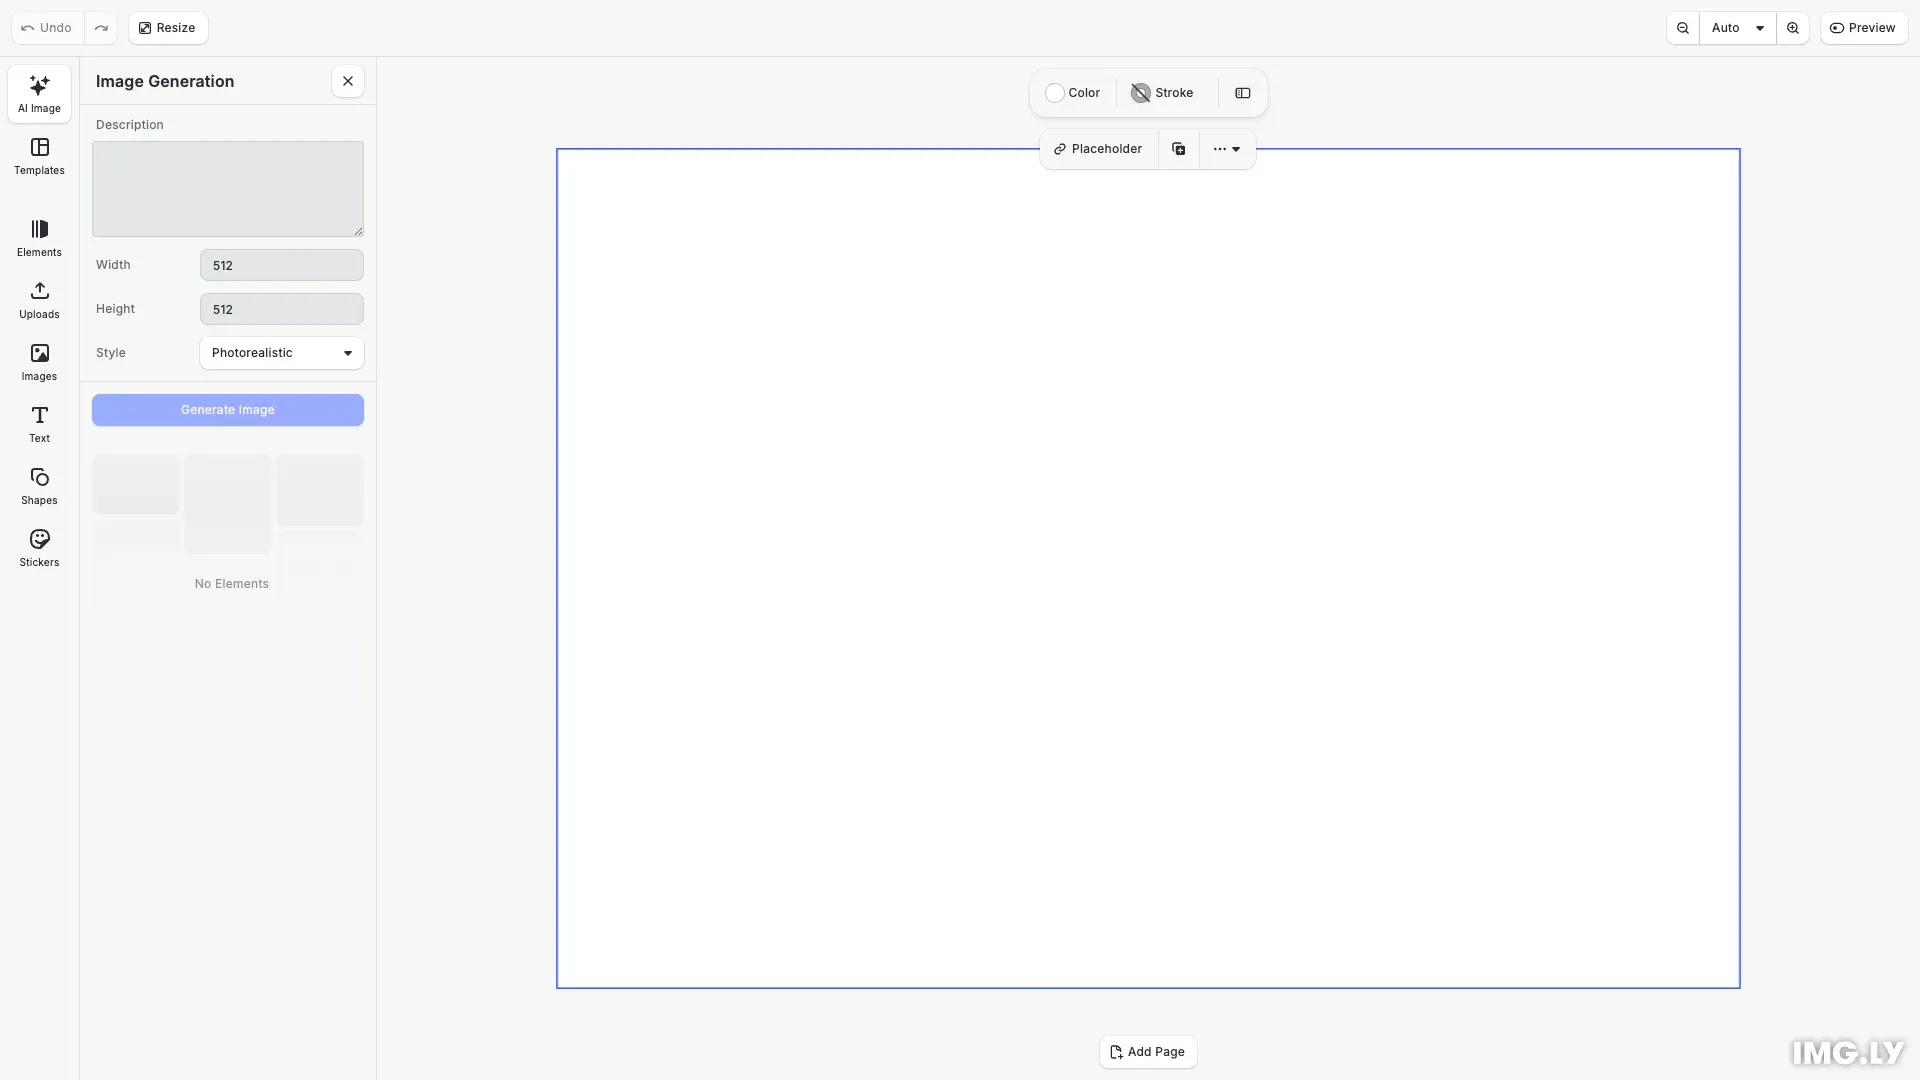
The input panel configuration uses your OpenAPI schema to automatically generate the UI:
// Define input panel and UI using schemainput: {  panel: {    type: 'schema',    document: apiSchema, // Your OpenAPI schema    inputReference: '#/components/schemas/GenerationInput', // Reference to your input schema    userFlow: 'placeholder', // Creates a block first, then updates it with the generated content    orderExtensionKeyword: 'x-order-properties', // Used to control property display order
    // Convert API input to block parameters    getBlockInput: async (input) => ({      image: {        width: input.width || 512,        height: input.height || 512,        label: `AI: ${input.prompt?.substring(0, 20)}...`      }    })  },
Configuration properties:
- type: Set to
'schema'for OpenAPI-driven UI - document: Your OpenAPI schema object
- inputReference: JSON pointer to the input schema definition
- userFlow: Either
'placeholder'(creates a block first) or'direct' - getBlockInput: Transforms API input to block parameters (dimensions, label)
Adding Quick Actions#
Quick actions appear in the canvas context menu for supported block types. Map quick action IDs to your provider’s input format:
// Add quick actions for canvas menuquickActions: { supported: { // Map quick action IDs to provider input transformations 'ly.img.editImage': { mapInput: (quickActionInput) => ({ prompt: quickActionInput.prompt, image_url: quickActionInput.uri, width: 512, height: 512, style: 'photorealistic' }) }, 'ly.img.swapBackground': { mapInput: (quickActionInput) => ({ prompt: quickActionInput.prompt, image_url: quickActionInput.uri, width: 512, height: 512, style: 'photorealistic' }) }, 'ly.img.createVariant': { mapInput: (quickActionInput) => ({ prompt: quickActionInput.prompt, image_url: quickActionInput.uri, width: 512, height: 512, style: 'photorealistic' }) }, 'ly.img.styleTransfer': { mapInput: (quickActionInput) => ({ prompt: quickActionInput.style, image_url: quickActionInput.uri, width: 512, height: 512, style: 'photorealistic' }) } }}Available quick action IDs:
'ly.img.editImage': Edit selected image with AI'ly.img.swapBackground': Replace image background'ly.img.createVariant': Generate variation of image'ly.img.styleTransfer': Apply style to image
Configuring Output Behavior#
The output configuration defines how generation works and handles results:
// Define output generation behavioroutput: {  // Allow cancellation of generation  abortable: true,
  // Store generated assets in browser's IndexedDB  history: '@imgly/indexedDB',
Adding Middleware#
Middleware functions process requests and responses in the generation pipeline:
// Add middleware for logging and uploadingmiddleware: [  loggingMiddleware({ enable: true }),  // Example of upload middleware that stores generated images on your server  uploadMiddleware(async (output: ImageOutput) => {    // In production, upload the image to your server    // For this example, we just return the output as-is    console.log('Upload middleware: Processing output', output.url);    return output;  }),  // Custom error handling middleware  async (input, options, next) => {    try {      return await next(input, options);    } catch (error: any) {      // Prevent default error notification      options.preventDefault();
      // Show custom error notification      options.cesdk?.ui.showNotification({        type: 'error',        message: `Image generation failed: ${error.message}`      });
      throw error;    }  }],
Available Middleware#
loggingMiddleware(): Debug logging for development.
uploadMiddleware(): Store generated images on your server before adding to design.
Custom middleware: Create your own for error handling, rate limiting, or request transformation.
Custom Error Handling with preventDefault()#
Middleware can suppress default UI feedback using options.preventDefault(). This is useful when you want complete control over how errors are presented:
What gets prevented:
- Error/success notifications (toast messages)
- Block error state (error icon)
- Console error logging
What is NOT prevented:
- Pending → Ready transition (loading spinner always stops)
Configuring Notifications#
Configure success and error notifications shown to users:
// Configure success/error notificationsnotification: { success: { show: true, message: 'Image generated successfully!' }, error: { show: true, message: (context) => `Generation failed: ${context.error}` }},Implementing the Generate Function#
The generate function is the core of your provider—it calls your AI API and returns the result:
// The core generation functiongenerate: async (input, { abortSignal }) => {  try {    // Use mock API for demonstration    // In production, replace with actual API call:    // const response = await fetch(config.proxyUrl, { ... });    const data = await mockGenerateImage(input, abortSignal);
    // Return the image URL    return {      kind: 'image',      url: data.imageUrl    };  } catch (error) {    console.error('Image generation failed:', error);    throw error;  }}
In production, replace the mock API call with actual requests to your image generation service.
Integrating with CE.SDK#
Register your provider with CE.SDK using the image generation plugin:
// Add your image generation providerawait cesdk.addPlugin( ImageGeneration({ providers: { text2image: MyImageProvider({ proxyUrl: 'https://your-proxy-server.com/api/proxy', headers: { 'x-client-version': '1.0.0', 'x-request-source': 'cesdk-tutorial' } }) }, debug: true }));Add the dock component to make the panel accessible:
// Add the dock component to open the AI image generation panelcesdk.ui.setComponentOrder({ in: 'ly.img.dock' }, [ 'ly.img.ai.image-generation.dock', ...cesdk.ui.getComponentOrder({ in: 'ly.img.dock' })]);Controlling Features with Feature API#
Control which UI elements and features are available to users:
// Hide the provider dropdown if you only have one providercesdk.feature.set( 'ly.img.plugin-ai-image-generation-web.providerSelect', () => false);// Enable text-to-image generationcesdk.feature.set( 'ly.img.plugin-ai-image-generation-web.fromText', () => true);// Disable image-to-image generationcesdk.feature.set( 'ly.img.plugin-ai-image-generation-web.fromImage', () => false);Available feature flags:
ly.img.plugin-ai-image-generation-web.providerSelect: Show/hide provider dropdownly.img.plugin-ai-image-generation-web.fromText: Enable text-to-image inputly.img.plugin-ai-image-generation-web.fromImage: Enable image-to-image input
Troubleshooting#
Common issues and solutions:
- API errors: Check proxy URL configuration and headers. Ensure your proxy server is correctly forwarding requests to your AI API.
- Generation not starting: Verify the license key is valid. Check browser console for initialization errors.
- Quick actions not appearing: Ensure quick action IDs are mapped correctly in the
supportedobject. Verify the block type supports quick actions. - UI not updating: Check that
generate()returns the correct output format withkind: 'image'and a validurl.
Next Steps#
- Explore the AI Image Generation Overview for built-in provider options
- Learn about AI Text Generation for text-based AI providers
- Understand the Plugin System for extending CE.SDK