In this example, learn how to initialize the CreativeEditor SDK’s mobile camera in your iOS app.
Explore a full code sample on GitHub.
Requirements#
The mobile camera requires:
- iOS 16
- Swift 6.2 (Xcode 26.0.1) or later
Using Swift Package Manager#
If you use Swift Package Manager to build your app, and want to integrate the Creative Engine and UI modules using your regular workflows, add the IMGLYUI Swift Package as a dependency to your project.
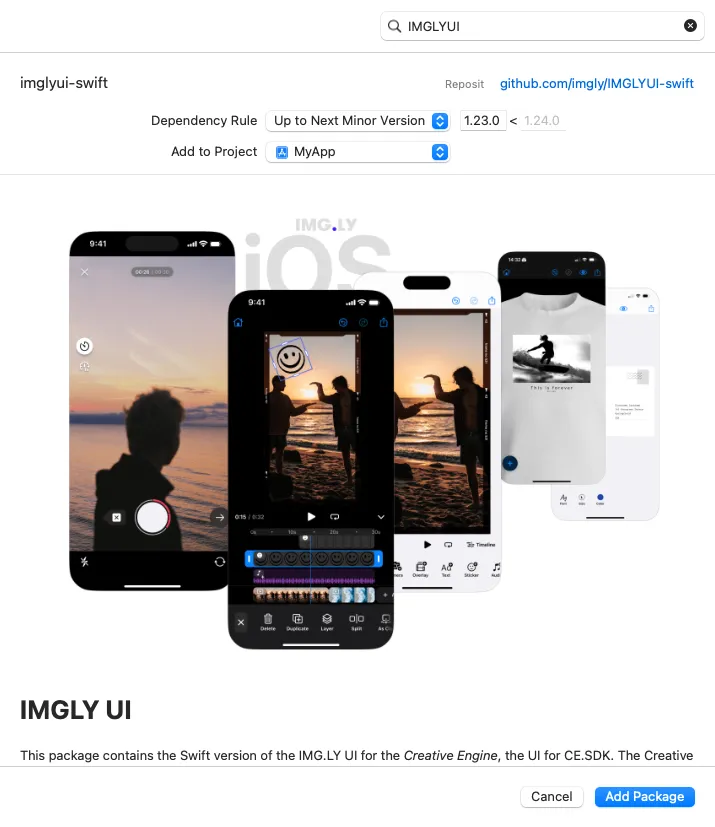
This package provides multiple library products. Add the default IMGLYUI library to your app target to add all available UI modules included in this package to your app.
To keep your app size minimal, only add the library product that you need, For example, only add the IMGLYCamera library if you need to import IMGLYCamera in your code.
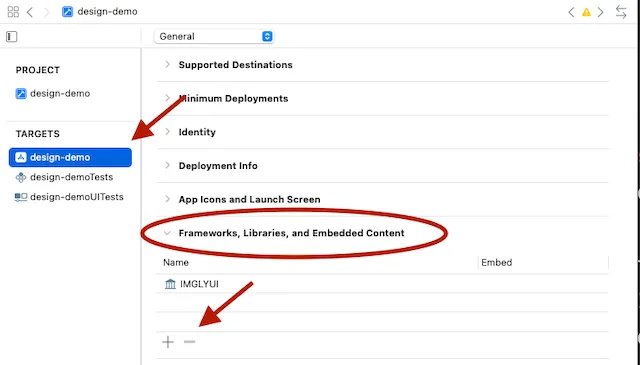
On the General page of your app target’s Xcode project settings the Frameworks, Libraries, and Embedded Content section lists all used library products. You can use the + and - buttons to change them.
Usage#
This example shows the basic usage of the camera.
Launch the Camera#
You can get started right away by importing the camera module into your own code.
import IMGLYCameraimport IMGLYCameraIn this integration example, the camera is presented as a modal view after tapping a button.
Button("Use the Camera") { isPresented = true } private lazy var button = UIButton( type: .system, primaryAction: UIAction(title: "Use the Camera") { [unowned self] _ in camera.modalPresentationStyle = .fullScreen present(camera, animated: true) } )Initialization#
The camera is initialized with EngineSettings. You need to provide the license key that you received from IMG.LY.
Optionally, you can provide a unique ID tied to your application’s user. This helps us accurately calculate monthly active users (MAU) and it is especially useful when one person uses the app on multiple devices with a sign-in feature, ensuring they’re counted once.
Camera(.init(license: secrets.licenseKey, userID: "<your unique user id>")) { result in Camera(.init(license: secrets.licenseKey, userID: "<your unique user id>")) { result inResult#
The Camera’s onDismiss closure returns a Result<CameraResult, CameraError>. If the user has recorded videos, the .success(_) case contains the CameraResult.
        switch result {        case let .success(.recording(recordings)):          let urls = recordings.flatMap { $0.videos.map(\.url) }          let recordedVideos = urls          // Do something with the recorded videos          print(recordedVideos)
        case .success(.reaction):          print("Reaction case not handled here")
        case let .failure(error):          print(error.localizedDescription)          isPresented = false        }
switch result { case let .success(.recording(recordings)): let urls = recordings.flatMap { $0.videos.map(\.url) } let recordedVideos = urls // Do something with the recorded videos print(recordedVideos)
case .success(.reaction): print("Reaction case not handled here")
case let .failure(error): print(error.localizedDescription) self.presentedViewController?.dismiss(animated: true) }When using UIKit, it needs to be integrated with a UIHostingController object into a UIKit view hierarchy.
  private lazy var camera = UIHostingController(rootView:    Camera(.init(license: secrets.licenseKey,                 userID: "<your unique user id>")) { result in      switch result {      case let .success(.recording(recordings)):        let urls = recordings.flatMap { $0.videos.map(\.url) }        let recordedVideos = urls        // Do something with the recorded videos        print(recordedVideos)
      case .success(.reaction):        print("Reaction case not handled here")
case let .failure(error): print(error.localizedDescription) self.presentedViewController?.dismiss(animated: true) } })Environment#
When using SwiftUI, the camera is best opened in a fullScreenCover.
.fullScreenCover(isPresented: $isPresented) {Full Code#
Here’s the full code:
import IMGLYCamera
import SwiftUI
struct CameraSwiftUI: View {@State private var isPresented = false
var body: some View {Button("Use the Camera") {isPresented = true}
    .fullScreenCover(isPresented: $isPresented) {      Camera(.init(license: secrets.licenseKey,                   userID: "<your unique user id>")) { result in        switch result {        case let .success(.recording(recordings)):          let urls = recordings.flatMap { $0.videos.map(\.url) }          let recordedVideos = urls          // Do something with the recorded videos          print(recordedVideos)
        case .success(.reaction):          print("Reaction case not handled here")
        case let .failure(error):          print(error.localizedDescription)          isPresented = false        }      }    }
}}
import IMGLYCamera
import SwiftUI
class CameraUIKit: UIViewController { private lazy var camera = UIHostingController(rootView: Camera(.init(license: secrets.licenseKey, userID: "<your unique user id>")) { result in switch result { case let .success(.recording(recordings)): let urls = recordings.flatMap { $0.videos.map(\.url) } let recordedVideos = urls // Do something with the recorded videos print(recordedVideos)
case .success(.reaction): print("Reaction case not handled here")
case let .failure(error): print(error.localizedDescription) self.presentedViewController?.dismiss(animated: true) } })
private lazy var button = UIButton( type: .system, primaryAction: UIAction(title: "Use the Camera") { [unowned self] _ in camera.modalPresentationStyle = .fullScreen present(camera, animated: true) } )
override func viewDidLoad() { super.viewDidLoad()
view.addSubview(button) button.translatesAutoresizingMaskIntoConstraints = false NSLayoutConstraint.activate([ button.centerXAnchor.constraint(equalTo: view.centerXAnchor), button.centerYAnchor.constraint(equalTo: view.centerYAnchor), ]) }}