Using filters and effects with video streams requires different strategies than applying them to files. In this tutorial, you will see how to apply effects and filters to video streams in real-time. The code in this tutorial compiles with Xcode 13.
As with most AVFoundation code, the Xcode simulator is not the best platform for running the code. Test on an actual device. A project with code that supports this tutorial can be found on GitHub.
Streams or Files
For video files stored on the device, you can use an AVMutableVideoComposition to apply filters. When streaming video from a remote location, this strategy will not work. The AVMutuableVideoComposition classes are not designed to work in real-time with streams. Apple provides a way to extract the pixels from the stream at regular intervals. You can manipulate the pixels and then render them to the screen. An AVPlayerItemVideoOutput object gives access to the pixels that make up a video frame. Apple also supplies a CADisplayLink object to ensure you are extracting the right pixels at the right time. The display link is a specialized timer that will fire in sync with the redraw rate of the current display.
So, to filter a video stream, the strategy becomes:
- Set up an AVPlayer as normal and assign it the URL of the stream
- Attach an
AVPlayerItemVideoOutputobject to the stream - Attach a
CADisplayLinkobject to the run loop - Extract the current pixel buffer from the AVPlayerItem every time the screen redraws
- Convert the pixel buffer to a CoreImage object
- Apply filters
- Display the image
Setting up AVPlayer
You won’t use the AVPlayerLayer or AVPlayerViewController to display the video, but the AVPlayer plays a central role. The AVPlayer keeps the video in sync with the audio, handles decoding whatever format the stream uses, controls buffering, and more. The basic setup is the same as with any other project:
//create a player
let videoItem = AVPlayerItem(url: streamURL)
self.player = AVPlayer(playerItem: videoItem)
The URL can either point to a local resource or a stream.
Using AVPlayerItemVideoOutput
The AVPlayerItemVideoOutput allows you to query the AVPlayerItem for the pixel buffer (one screen worth of pixels) at any given time. You can specify different pixel formats and other options for the output. For this tutorial, you will you can create the object with a simple instantiation using the default formats.
let playerItemVideoOutput = AVPlayerItemVideoOutput()
Later you will add this video output to your player item. Then you can ask it to generate the pixel buffers as needed. In this tutorial, you will ask for the pixel buffer of the current frame. You could ask for the frame for any timestamp though.
Creating the Display Link
The CADisplayLink class is a specialized NSTimer that synchronizes itself to the screen refresh rate of the display. This ensures that the pixel buffer you extract will be from the correct time of your video stream. It will get rendered at the correct time in the screen refresh. Syncing a standard NSTimer to the screen refresh has always been problematic. With the new variable refresh rate screens that Apple makes, it becomes impossible. However, CADisplayLink adjusts its rate as the screen refresh rate changes. Apple explains how this works in the 2021 WWDC Session Optimize for Variable Refresh Rate Displays. When you create the display link, you give it the name of a function to call each time it executes. A sample for creating a link could look like this:
lazy var displayLink: CADisplayLink = CADisplayLink(target: self,
                                                  selector: #selector(displayLinkFired(link:)))
Elsewhere in the code, a function called displayLinkFired(link: CADisplayLink) extracts the pixel buffer from the AVPlayerItem.
Starting the Player
Apple notes that loading a video file takes a measurable amount of time. It can take even longer when the video file is streaming across a network. AVFoundation allows your program to continue to execute while the setup steps and initial buffering are occurring in the background. You can run into issues if you load a video into AVFoundation and then immediately attempt to work with it. AVFoundation may not show an error or status message, but it will not perform as expected either.
The most important step in this entire process is using an observer to wait until the AVPlayerItem has a .readyToPlay status before attaching the output and displaying link objects. In the example below statusOberserver, player, playerItemVideoOutput and displayLink are all declared at the class level. They need to persist the entire time the video is being used.
//create a player
let videoItem = AVPlayerItem(url: streamURL!)
self.player = AVPlayer(playerItem: videoItem) //1
//*important* add the display link and the output only after it is ready to play
self.statusObserver = videoItem.observe(\.status, //2
                       options: [.new, .old],
                 changeHandler: { playerItem, change in
    if playerItem.status == .readyToPlay { //3
      playerItem.add(self.playerItemVideoOutput)
      self.displayLink.add(to: .main, forMode: .common)
      self.player?.play() //4
    }
})
Here is what to notice about the code above
- Creating the player will take a large amount of time, but the program execution will not stop and wait
NSKeyValueObservationis how swift defines key value observers the code will execute every time thevideoItem.statusproperty changes values- Checks to see if the
.statusproperty is.readyToPlay - After adding the display link and the video output objects start playing the video
Extracting the Pixel Buffer
Once the video begins to play, the display link function gets called for each screen refresh. Here is an example of how to extract the pixel buffer and render it to a UIImageView.
@objc func displayLinkFired(link: CADisplayLink) { //1
  let currentTime = playerItemVideoOutput.itemTime(forHostTime: CACurrentMediaTime())
  if playerItemVideoOutput.hasNewPixelBuffer(forItemTime: currentTime) { //2
    if let buffer = playerItemVideoOutput.copyPixelBuffer(forItemTime: currentTime, itemTimeForDisplay: nil) {
      let frameImage = CIImage(cvImageBuffer: buffer) //3
      //4
      let pixelate = CIFilter(name: "CIPixellate")!
      pixelate.setValue(frameImage, forKey: kCIInputImageKey)
      pixelate.setValue(self.filterSlider.value, forKey: kCIInputScaleKey)
      pixelate.setValue(CIVector(x: frameImage.extent.midX, y: frameImage.extent.midY), forKey: kCIInputCenterKey)
     let newFrame = pixelate.outputImage!.cropped(to: frameImage.extent)
     self.videoView.image = UIImage(ciImage: newFrame) //5
    }
  }
}
Here is what the code is doing:
- Marks the
funcwith@objcso that it works with the display link selector - Asks if there is a new pixel buffer to display. Depending on the refresh rate of the screen and the frame rate of the video, there will not always be a new buffer.
- After extracting the pixel buffer, convert it to a CoreImage object
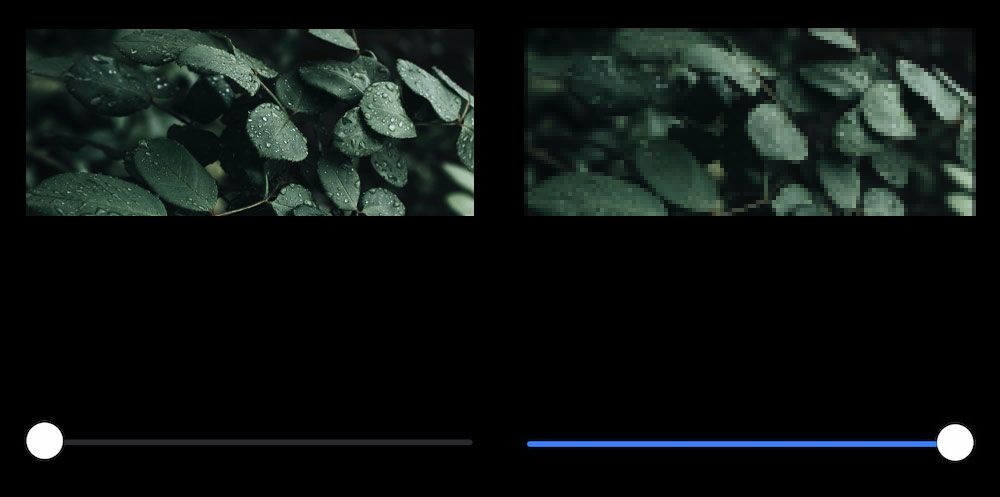
- Apply any filters. This example applies the
CIPixellatefilter. It uses a slider to let the user change the intensity as the video plays - Convert the filtered image to a
UIImageand assign it to theUIImageView
Now as the pixellate scale changes the image will be filtered but the video will continue to play smoothly.
Going Further
Using the strategy above you should be able to apply different filters to the video stream in real-time. Remember that you only have a few milliseconds though, then the video will begin to stutter. CoreImage filters are optimized to make use of the GPU and should be fast enough in most cases. For better performance, you can render the filtered image to an MTKView and use Metal. Apple has also begun to create Metal Performance Shaders which are even more efficient than CoreImage filters when used with a MetalKit view. As of now, there are many more CoreImage filters, so that may give you the most flexibility.
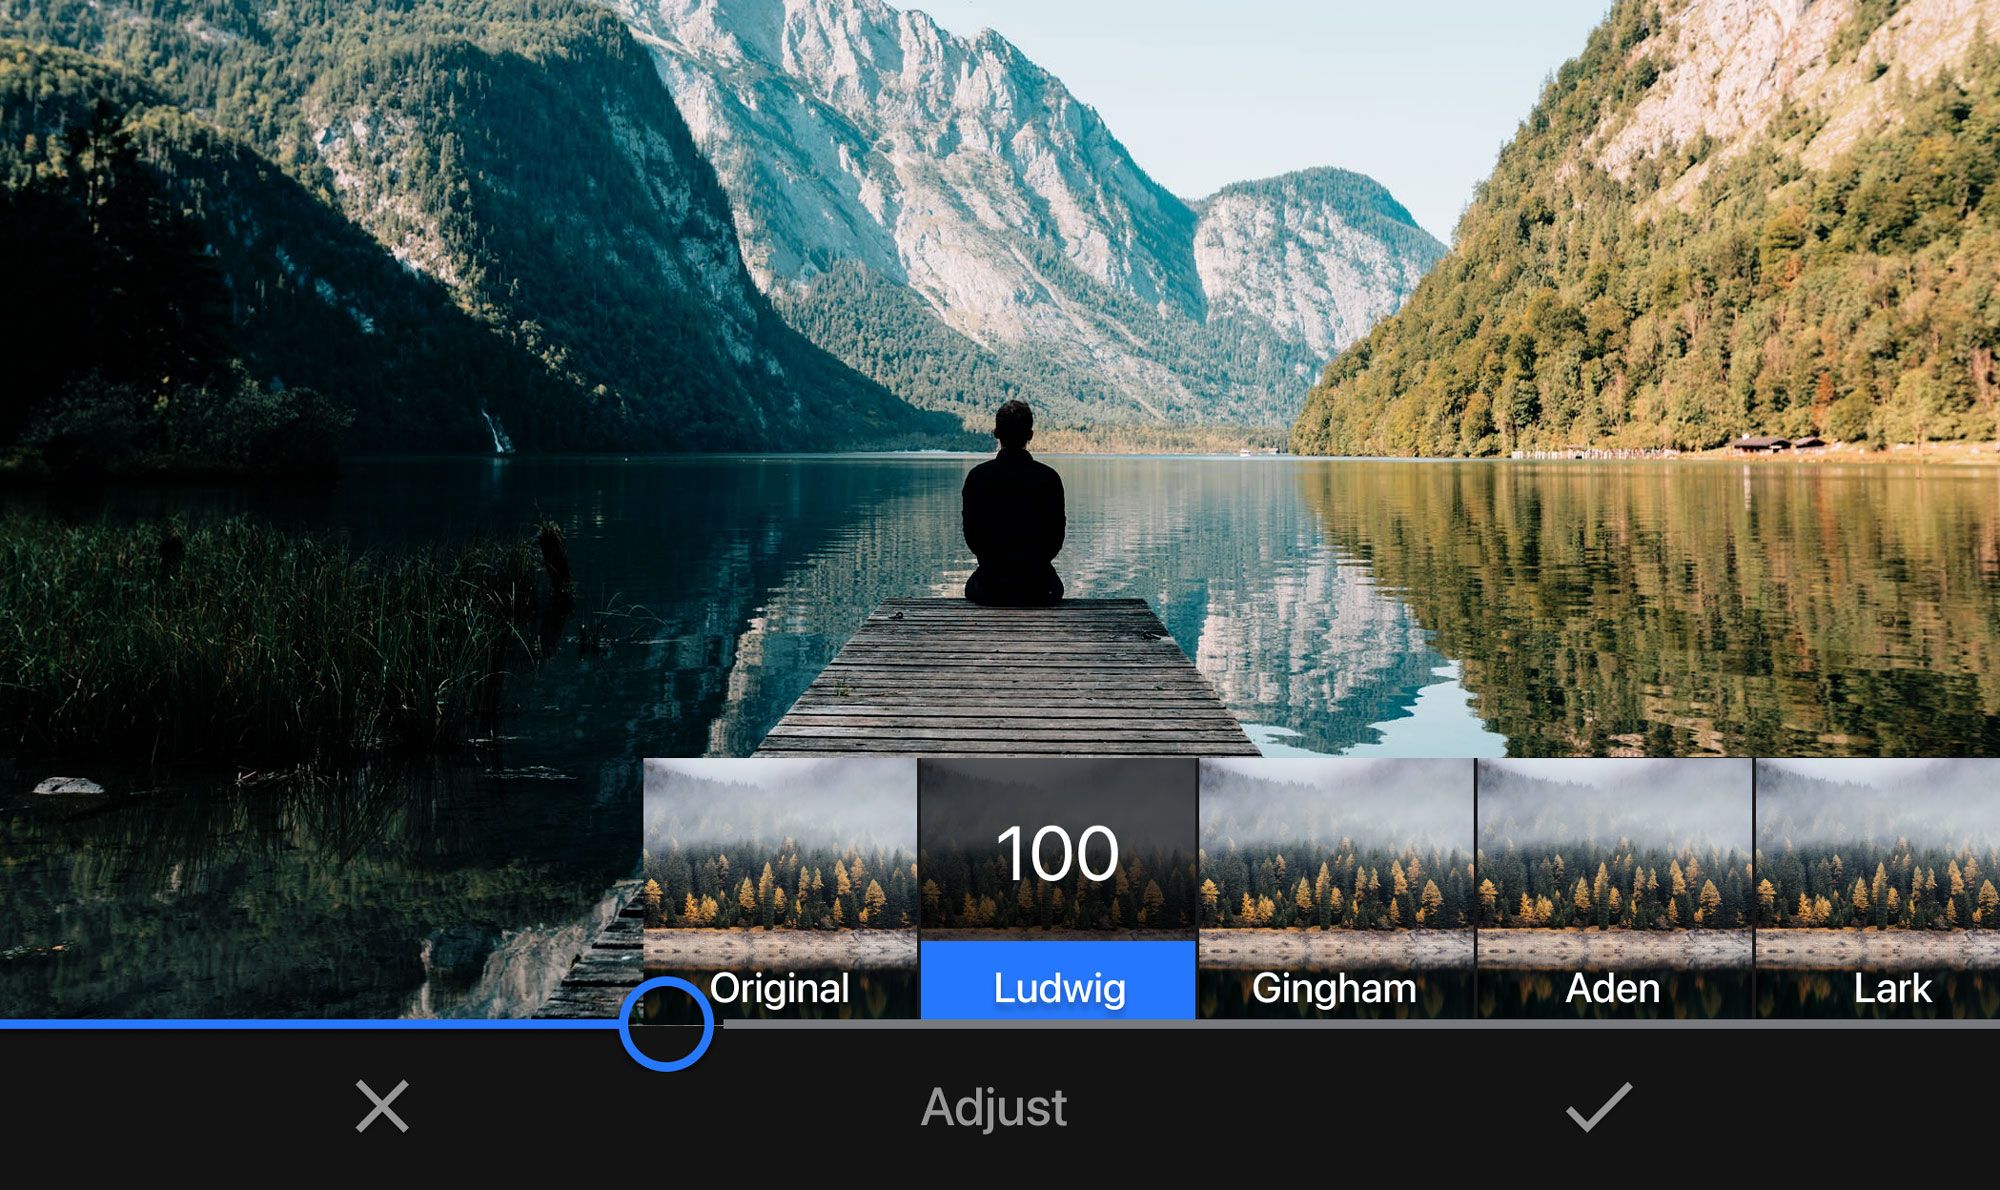
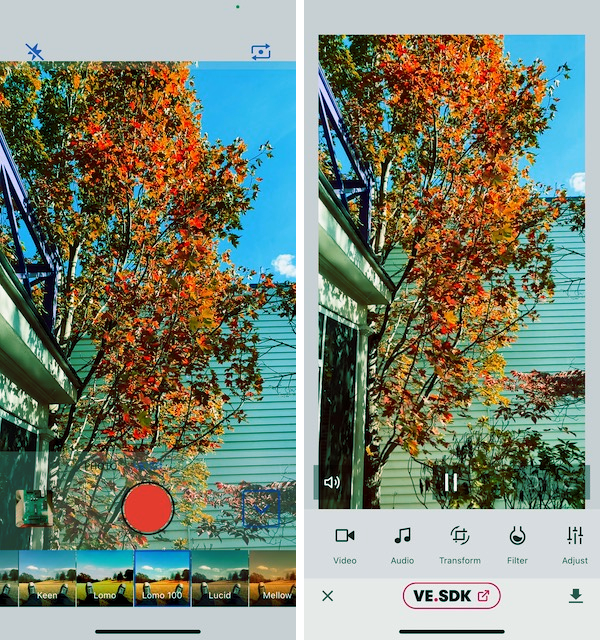
The strategy in this tutorial is adequate for filtering video streams. If you want to give your users more flexibility with filters and other video tweaks, an editor such as VideoEditorSDK can let you focus on your application’s core functions and let a team of professionals worry about the video. Using VideoEditorSDK your users can apply filters to video as well as text annotations and more.
Looking for more video capabilities? Check out our solutions for Short Video Creation, and Camera SDK!
Thanks for reading! We hope that you found this tutorial helpful. Feel free to reach out to us on Twitter with any questions or suggestions.
You like what we do? Check our careers page. Even if you can’t find your role listed, we might be interested since you are already here!