Video files and image files are among the largest files. The AVFoundation and CoreImage libraries that Apple supplies widely store data on the disk. They try to bring into memory only as much of a file as is needed to complete a task. As you are working on an application that uses files, there are times you will want to compress or resize them. Usually, this is to upload to a server or because you have noticed performance issues, such as stuttering when scrolling or long render times.
This article will cover strategies for compressing and resizing images, videos, and other files. We will also be looking at using URLSession for file uploads and downloads.
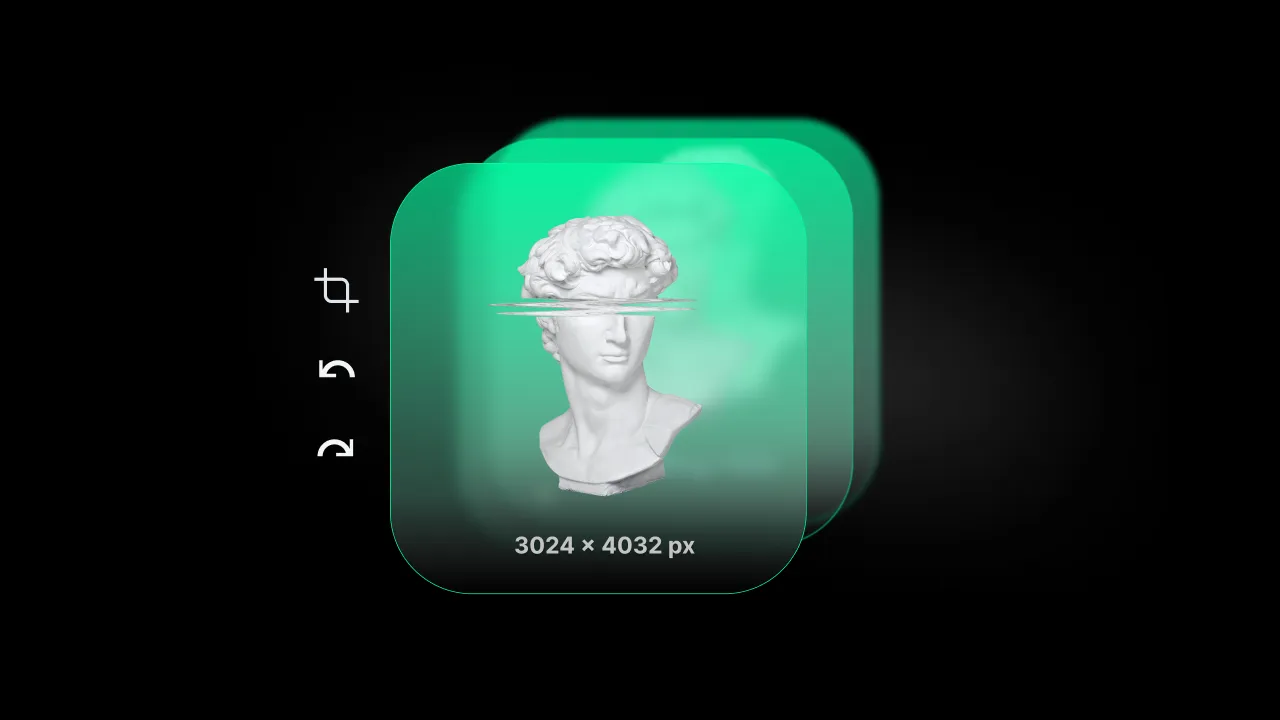
As iPhone cameras can take higher-quality pictures, the file sizes have grown quite large. For the last few years, Apple has been using a 12MP camera that takes pictures at 3024 x 4032 resolution. Apple uses a special HEIC compression to make each image about 1.7MB. The same image will generate a 15MB file when saved as a .png and a 3MB file when saved as a .jpeg. Though this will be a high-quality image, services like Instagram or Facebook will often only display images at less than half of that size. The extra pixel data will be compressed away. Perhaps the first and most important part of working with large image files in your app is planning around what size or quality you need. Social Media services similarly resize video files. For instance, TikTok displays images and video using 1080 x 1920, but any iPhone after X will capture video at a larger size.
Writing an Image to Disk
When working with a UIImage or CoreImage object, normally you can save it as an NSData object. These files are lossless (the image quality will not degrade), but they are only useful inside of your application. The standards on the Internet are jpeg and png files.
Fortunately, Apple provides methods to convert UIImage to .jpegData or .pngData. There are also ways to convert CIImage and CGImage, but they are slightly more complicated to configure.
let imageToSave = UIImage(ciImage: <someImage>)! \\1
let jpegData = imageToSave.jpegData(compressionQuality: 1.0) \\2
let file = FileManager.default.urls(for: .documentDirectory, in: .userDomainMask).first \\3
do {
  try jpegData?.write(to: file!.appendingPathComponent("sleeping_dog.jpg")) //4
} catch(let err) {
  print(err.localizedDescription) //5
}
Here is what’s going on in the code above:
- First we need to convert our image to a
UIImage. TheUIImageclass has several different initializers. UseUIImage(named: "some image name")to read an image from the app bundle. UseUIImage(contentsOfFile: "some filepath")to read from the disk. UseUIImage(cgImage: "some cgImage")andUIImage(ciImage: "some ciImage")when you have images already in memory. If you are storing images in aCoreDatastore or somewhere asDatayou can useUIImage(data: "some data"). - However you get a
UIImagethe next task is to convert it to either a.jpgor.pngfile. Generally,.jpgis a better option when working with photographs and.pngproduces higher quality for line art. The example above creates a.jpgat the highest quality possible. - Ask the
FileManagerfor aURLto the user’s documents directory. That is generally a safe place to write files. Because of the way the function is formed, it returns an array ofURLitems. In this case, there is only one, but you still need to remember to specify the.firstitem. - Writing
Dataobject to disk can throw errors, so it is good practice to place it in atry…catchblock of code. TheURLto the user’s documents directory needs to have the actual filename appended. - Any errors that the system throws can be handled here.
In order to create a .png using the imageToSave above, the line would be
let pngData = imageToSave.pngData()The .png filetype does not have any compression settings. The filetype is “lossless”, so it is always compressed as much as possible without losing any data.
Compression Options for JPEG
When generating jpeg data above, we supplied a quality value. The value is a Float between 0.0 and 1.0. The .jpg filetype uses a “lossy” compression algorithm that is specifically designed for photographs.
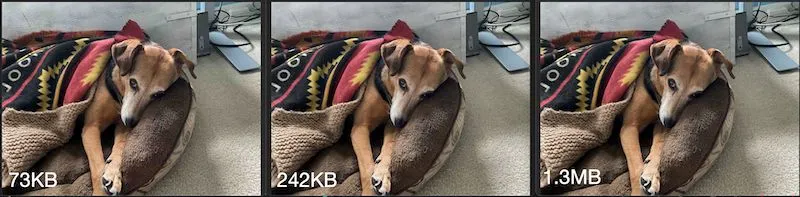
In the image above saving the jpeg with a quality of 1.0 produced the dog on the right and the file is 1.3MB. Saving the jpeg with a quality of 0.0 produced the image on the left and the middle image is produced saving with a quality of 0.6. The file on the left is only about 6% of the size of the original.
Considering what the images are being used for can help you decide on an optimal compression setting for a particular app.
Compressing Data with zlib
Though png and jpeg files are already compressed sometimes you will want to compress other types of files before uploading them (compressing a png, mov or jpeg will often not affect the file size or will make the file larger). A web server will often be able to accept a POST that compresses its body data using gzip. Additionally, some web servers will require that binary data is transformed into a base64EncodedString before uploading. Base64 encoding will make data size grow by about 33%. Using gzip will help mitigate that somewhat. Apple’s implementation of gzip is called .zlib when compressing data. Swift provides some other compression algorithms such as .lzfse which will result in smaller files, but they are not widely adopted.
For example, to encode something as base64 and then compress it with with gzip so you can upload it, we can use code like below
let jsonToUpload = "{"books":[{"title":"The Three Musketeers","author":"Dumas"}]}"
let jsonAsData = jsonToUpload.data(using: .utf8)
let encodedString = jsonAsData?.base64EncodedString()
let compressedString = try? NSData(data: (encodedString?.data(using: .utf8))!).compressed(using: .zlib) as Data
The code above creates a string of data in JSON format. It then encodes the String as a Data object using .utf8 encoding. Using .utf8 is a standard. If the web server you are uploading to requires a different encoding, you can change it. In the final step, the encoded string is compressed using gzip. Notice that the .compressed(using:) method is on NSData not on Data. NSData is an older library, so you convert the compressed NSData object back to Data by casting using as Data.
The above example was just to show syntax. The compressedString will be slightly larger than the encodedString. Based on the kind of data your app works with and the capabilities of the web server, you will need to experiment with how to encode and compress to get the best results.
Transferring Data With a Server
Depending on the original format of the data, your web server may want the .httpBody compressed. You can do that with some code like this:
let someJSONData = Data() //1
var request = URLRequest(url: URL(string: "https://example.com/uploads/")!) //2
request.httpMethod = "POST"
//set the other header variables here using
//request.setValue("value to set", forHTTPHeaderField: "header field name")
if let compressedJSONData = try? NSData(data: someJSONData).compressed(using: .zlib) as Data { //3
  request.httpBody = compressedJSONData
}
let task = URLSession.shared.dataTask(with: request) {data, response, error in
  //check for errors and response data when the task is done
  //response will contain the status and other header messages
  //data will contain any payload the server returns
}
  task.resume() //4
Here is what the code above is doing:
- Get the payload into a
Dataobject. - Create a
URLRequestas avarso that you can configure it. If you create it as aletit will be aGETrequest with default header fields. - Use
gzipto compress the data and if successful, assign it to the.httpBodyof therequest. - Create a data task for the upload. Upon completion, the
data,responseanderrorvariables will have any response from the server. - Actually start the task.
Uploading a Large File
An issue with the code above is that all of the initial data will be in memory. So for a large image or video upload, this may not work. However, Swift does provide a different method that will upload a file directly from the disk, reading into memory only what is needed at the time.
Code to implement that would follow this form.
var request = URLRequest(url: URL(string: "https://example.com/uploads")!)
request.httpMethod = "POST"
//set the other header variables here using
//request.setValue("value to set", forHTTPHeaderField: "header field name")
let documentsDirectory = FileManager.default.urls(for: .documentDirectory, in: .userDomainMask).first
let fileToUpload = documentsDirectory?.appendingPathComponent("the-big-giant-file.mp4")
let uploadTask = URLSession.shared.uploadTask(with: request, fromFile: fileToUpload) {data, response, error in
//get some information from the server when the file has been uploaded
}
uploadTask.resume()
This looks very similar to the previous example but notice that you do not set an .httpBody. There will be header values to set though. Most web servers will want to know how large the file is, authentication credentials, and whether the data is multi-part, or raw or other metadata. These will all be set using .setValue(forHTTPHeaderField:) in the request object.
For larger files, it is often better to use a URLSessionDataDelegate instead of the single closure with data, response, error. When using the delegate, you can write code to monitor the progress of the file transfer as well as respond to authentication challenges and make decisions about caching. You can also implement URLSessionDelegate and URLSessionTaskDelegate methods. All of the delegate methods are options, so you only need to implement ones that are important to your application.
Configuring Background Transfers
Another benefit of using the uploadTask (and its related downloadTask) instead of the dataTask is that you can configure the transfer to continue for a time even if the app goes to the background. In that case, instead of using the URLSession.shared object, you will want to configure a session that has some special properties to allow it to work in the background.
let configuration = URLSessionConfiguration.background(withIdentifier: "some.unique.identifier")
let session = URLSession(configuration: configuration, delegate: self, delegateQueue: nil)
let uploadTask = session.uploadTask(with: request, fromFile: fileToUpload)
Completely configuring and supporting the downloads and backgrounding is covered in this article by Apple. It will require implementing some delegate methods for the session as well as updating some of the methods in the main application delegate. The most important is the handleEventsForBackgroundURLSession which is how the system will wake up your app with information about the upload or download.
Additionally, download tasks can be paused and restarted. The cancel(byProducingResumeData:) method on URLSessionDownloadTask will cancel a download and optionally provide some resume data you can use to resume the download at a later time. You can call this method on the task when the user taps a button or when the app goes to the background or similar. The web server must support byte-range requests and ETag or Last-Modified headers. The documentation for pausing and restarting explains how to pause the download and how to resume using downloadTaks(withResumeData:). There is not a similar structure for pausing and resuming an upload.
Resizing an image
Perhaps the simplest way to make a file smaller is to reduce its dimensions. Using CoreImage you can use the Lanczos resampling algorithm to resize an image while keeping high quality.
let url = Bundle.main.url(forResource: "sleeping-dog", withExtension: "jpeg")
let image = CIImage(contentsOf: url!) //1
let filter = CIFilter(name: "CILanczosScaleTransform") //2
filter?.setValue(image, forKey: kCIInputImageKey)
filter?.setValue(0.5, forKey: kCIInputScaleKey) //3
let result = filter?.outputImage
let converter = UIImage(ciImage: result!) //4
Here is what this code is doing:
- Create a
CIImagefrom aURL. - Create a
CILanczosScaleTransformfilter. - Configure the filter to reduce the image dimensions by 50%.
- Convert the scaled image to a
UIImage.
Recently, Apple has provided a UIGraphicsImageRenderer that will work directly on UIImage objects. The code below will resize a UIImage to 50%. Notice that the UIGraphicsImageRenderer can also use an explicit value for size (unlike the CILanczosScaleTransform)
let imageToSave = UIImage(named: "sleeping-dog.jpeg")! //1
let newSize = imageToSave.size.applying(CGAffineTransform(scaleX: 0.5, y: 0.5)) //2
let renderer = UIGraphicsImageRenderer(size: newSize) //3
let scaledImage = renderer.image { (context) in
  let rect = CGRect(origin: CGPoint.zero, size: newSize)
  imageToSave.draw(in: rect) //4
}
Here is what this code is doing:
- Load the image as a
UIImage. - Scale the size down by half.
- Create a
UIGraphicsImageRendererthat will render in this new size. - Actually draw the image into the renderer at the new size.
In addition to rendering the image back as a UIImage the renderer can create jpegData and pngData which would save a few steps if you are resizing and converting. The full documentation for UIGraphicsImageRenderer explains the details.
Resizing a Video
Though the UIGraphicsImageRenderer is faster, using the older CoreImage resizing has a benefit. CoreImage filters can be applied to video files as a composition. Large video files can be scaled down. The code below will create a composition that will scale a video asset by 50%. Remember that you will need to import AVFoundation to use these tools.
let newAsset = AVAsset(url:Bundle.main.url(forResource: "jumping-man", withExtension: "mov")!) //1
var newSize = <some size that you've calculated> //2
let resizeComposition = AVMutableVideoComposition(asset: newAsset, applyingCIFiltersWithHandler: { request in
  let filter = CIFilter(name: "CILanczosScaleTransform") //3
  filter?.setValue(request.sourceImage, forKey: kCIInputImageKey)
  filter?.setValue(<some scale factor>, forKey: kCIInputScaleKey) //4
  let resultImage = filter?.outputImage
  request.finish(with: resultImage, context: nil)
})
resizeComposition.renderSize = newSize //5
Here’s what the code above is doing to create a new composition:
- Create an
AVAssetfrom aURL. - Create a variable
newSizeto hold the final size. - In the composition, configure the
CIFilterthat will be applied to each frame. - Calculate the scale factor based on the
newSizevariable and the actual size of therequest.sourceImage.extent.size. - Set the
renderSizeproperty of the composition to the new size.
If you don’t set the renderSize then there will be a black letterbox around the video.
With the resizing composition, you can now export the AVAsset as a .mov or .m4v file using an AVExportSession.
let asset = AVAsset(url:Bundle.main.url(forResource: "jumping-man", withExtension: "mov")!) //1
let outputMovieURL = FileManager.default.urls(for: .documentDirectory, in: .userDomainMask).first?.appendingPathComponent("exported.mov") //2
//create exporter
let exporter = AVAssetExportSession(asset: asset, presetName: AVAssetExportPresetHighestQuality)
//configure exporter
exporter?.videoComposition = <the composition you created above> //3
exporter?.outputURL = outputMovieURL!
exporter?.outputFileType = .mov
//export!
exporter?.exportAsynchronously(completionHandler: { [weak exporter] in //4
  DispatchQueue.main.async {
    if let error = exporter?.error {
      print("failed \(error.localizedDescription)")
    } else {
      print("file saved at \(outputMovieURL)") //5
    }
  }
})
Here’s what the code above is doing:
- Load an
AVAssetfrom aURL. - Create a
URLto save the resized movie. - Apply the resizing composition to an
AVAssetExportSession. - Asynchronously export the asset to disk.
- Print the destination
URLof the new movie when it is saved.
Another method to resize a video is to use one of the AVAssetExportSession presets. Apple offers several size and quality presets for export sessions. In the line above that creates the exporter, replace AVAssetExportPresetHighestQuality with one of the other values. There are generic quality presets: AVAssetExportPresetLowQuality, AVAssetExportPresetMediumQuality and there are size presets including: AVAssetExportPreset1280x720 and AVAssetExportPreset640x480. When using one of the presets you do not need to use a composition unless you want to do further manipulation or unless you need a size or quality combination that is not provided by any preset. As with images, experiment with different settings until you get a balance between quality and size that works for you.
Going Further
Some other strategies for working with large files are to chunk data file or split up video files. However, to use this strategy, you will need to coordinate with someone to stitch them back together after they are uploaded or downloaded.
Using the AVAssetExportSession above, you could call it multiple times and pass in a time range perhaps using code like this
let timeRange = CMTimeRangeFromTimeToTime(start: startTime, end: endTime)
//some code to create the exporter
exporter?.timeRange = timeRange
Depending on the video and audio of the AVAsset the splits in the video may be noticable. Because of modern frame rates, the audio would probably be more likely to be noticed. Time ranges can be sub-second, so you would need to experiment. However, iOS would manage the file for you so that the entire AVAsset is never loaded into memory.
It is also possible to split Data objects using .subData(in:) and looping through the bytes of the object. Again, you would need to also write code to stitch them back together later. Additionally, you would likely need to bring the entire Data object into a memory buffer, which might not be desirable.
Another way to handle large video files is to use Apple’s HTTP Live Streaming tools. These create files that you can upload to any web server that is recognized by iOS and Mac devices. The tools will segment the video as well as create multiple versions so that your users with different bandwidth capabilities can see different quality streams. Most Android devices and web browsers will at least be able to see the video, even if they cannot dynamically switch between streams.
Wrapping Up
In this tutorial, you saw some different strategies for shrinking and compressing the large image and video files that an iPhone camera can produce. You also saw some strategies for transferring larger data payloads with a web server. As mentioned in the beginning, consider what sizes the images and videos will display and use that to determine what sizes of images to store. Also, consider storing multiple versions of images or using thumbnails when displaying a gallery or list of images.
Looking to integrate video capabilities into your app? Check out our Video Editor SDK, Short Video Creation, and Camera SDK!