In this tutorial, you will learn how to write a custom CIFilter in Metal and Swift. You can use this filter in any CoreImage pipeline.
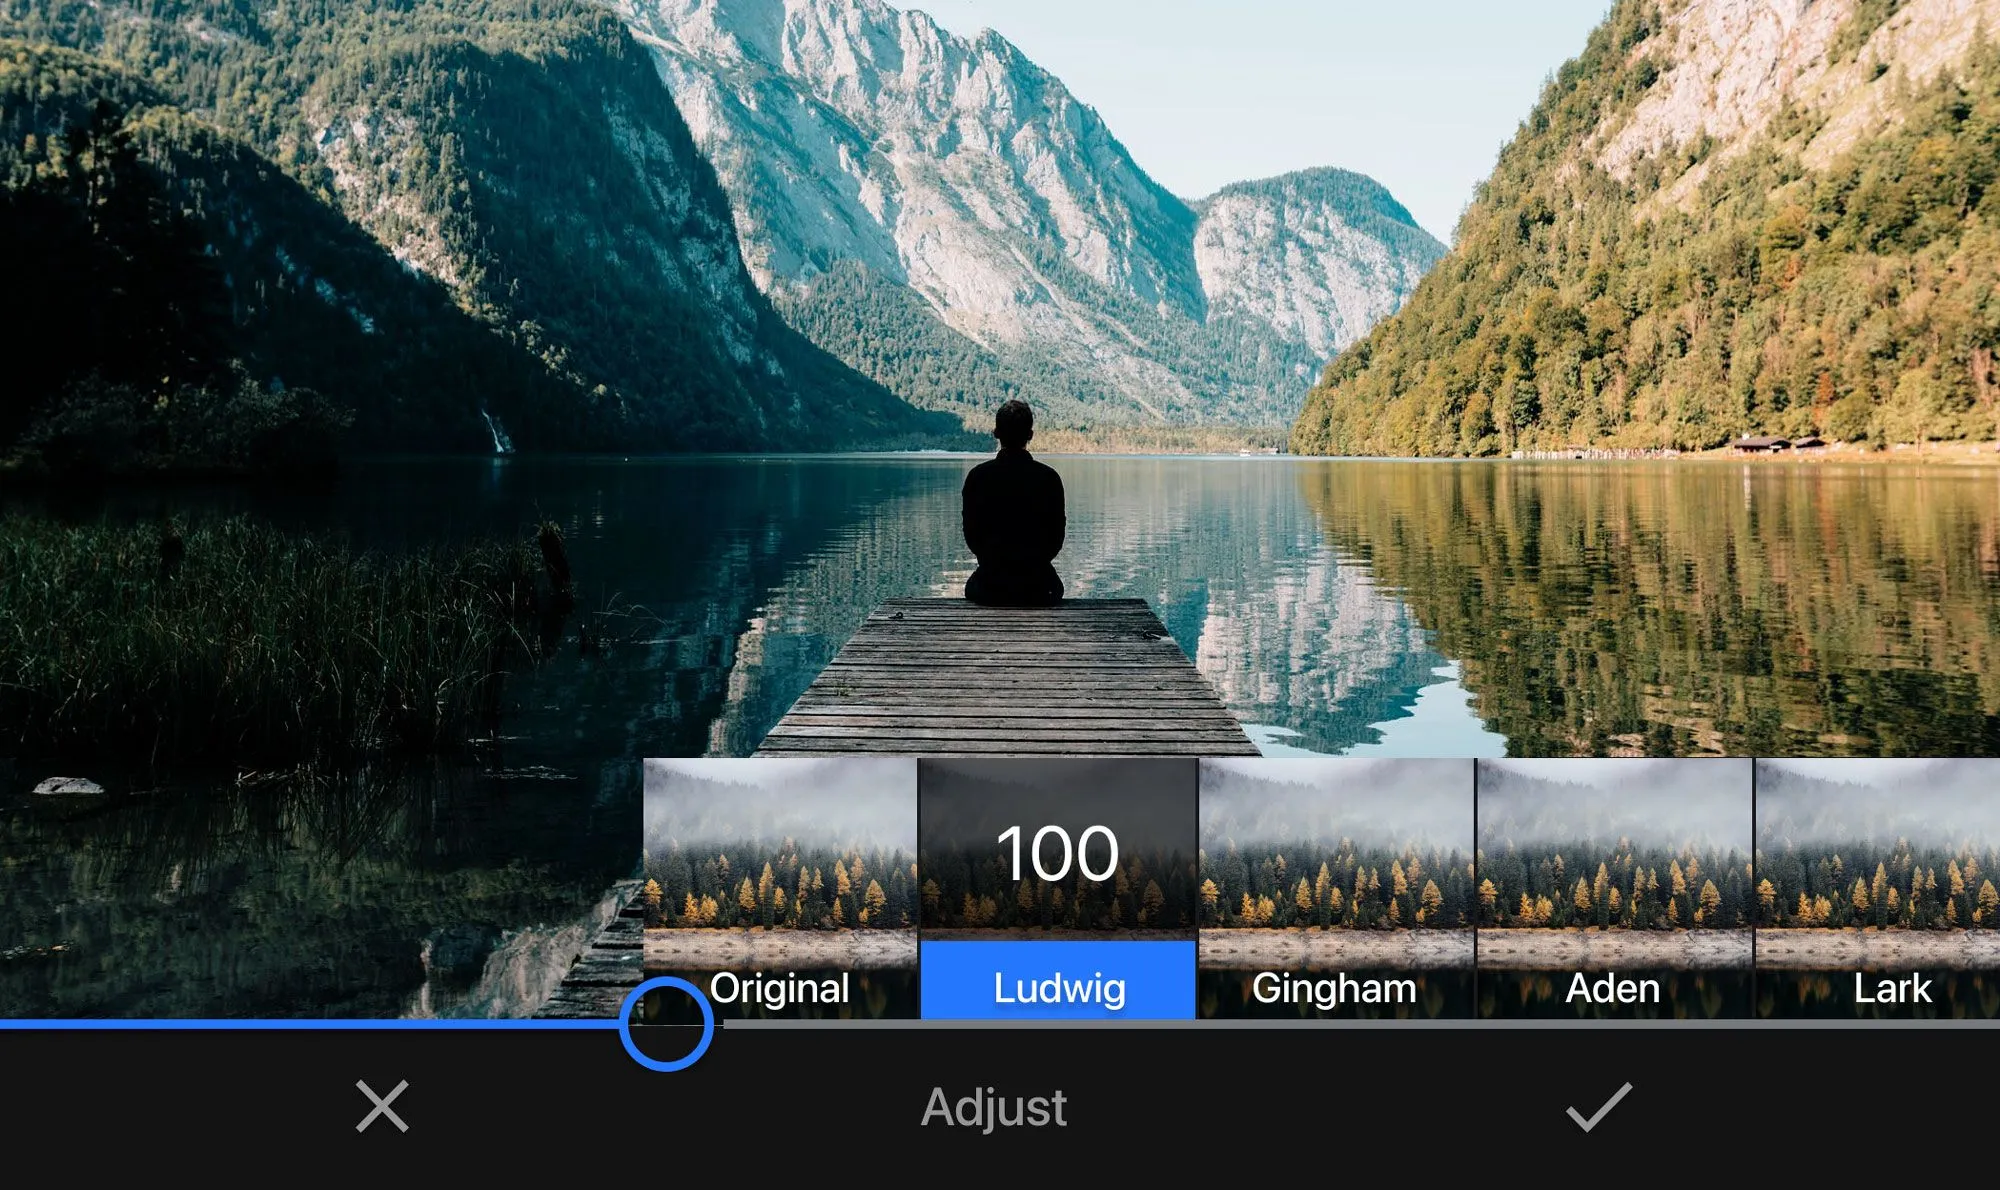
Apple offers over 200 image filters in the CoreImage framework, but sometimes you need a little extra to make your images perfect. Apple provides two ways to create customize image filters. You can chain CIFilters together in a CIFilter subclass or wrap a CIKernel in a CIFilter subclass. Either method creates a filter that CoreImage can execute on the GPU. That makes the filter fast. CoreImage filters can filter live video without impacting the frame rate. Before iOS 11 the only way to write a custom CIKernel was to pass a string containing the code to the GPU at runtime using the OpenGL Shading Language. This had two drawbacks: it was difficult to find errors in the string of commands and the kernel was not compiled until runtime. This tutorial will show you how to add a custom filter with a Metal-based CIKernel to any Swift project in Xcode. The code samples in this tutorial use Xcode 12.5 and Swift 5.
Clone this repository for a sample project and example code that supports this tutorial. The repo also contains some other custom filters, demonstrating other aspects of Metal filters.
Adding Metal Support to an Xcode Project
The first step is to add a Metal source code file to your project.
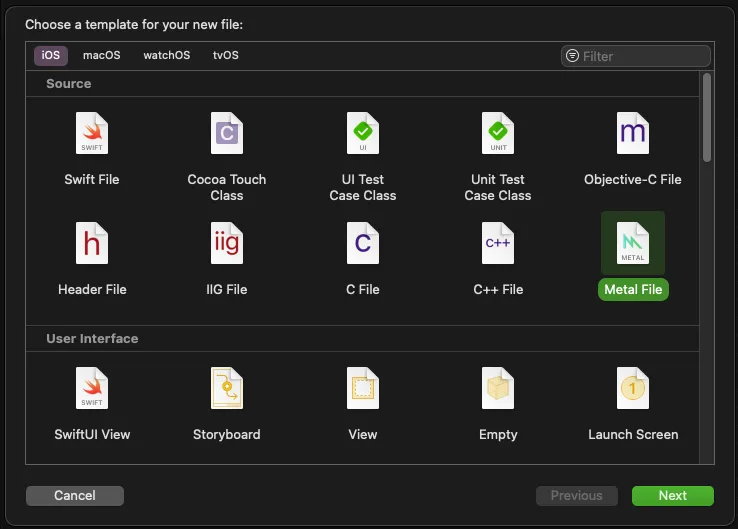
Find the “Metal File” template, select it and click Next. Name the file and save it. At compile time, Xcode combines all of the .metal files in your project into a single .metallib file. So, organize your Metal code into lots of files or just one file as you prefer. The last step before you start writing code is to add compiler flags for CIKernel objects.
In the Build Settings, find the other Metal Compiler Flags and add an entry of -fcikernel.
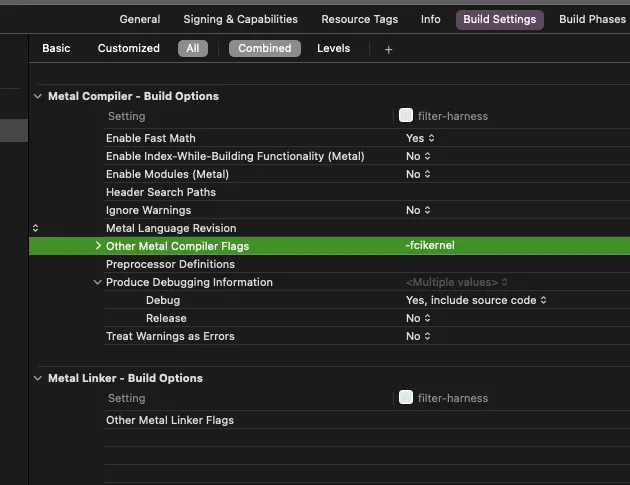
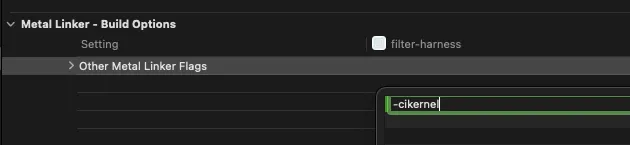
Then find the Other Metal Linker Flags and add an entry of -cikernel.
Important note: any project without .metal files hides the Metal Compiler and Linker sections from build Settings.
Setting Up a Metal File for CoreImage Kernels
Metal is a general-purpose technology for writing code that will execute on the GPU. The compiler flags tell Metal that you will be writing code to work with CoreImage. With a Metal source file in your project and the compiler flags set, you’re finally ready to write some code! Open the Metal file you created above. It should be empty except for
#include <metal_stdlib>
using namespace metal;
Below these lines, import the CoreImage headers by adding:
#include <CoreImage/CoreImage.h>and add a stub for your filter code with:
extern "C" {
  namespace coreimage {
    // KERNEL GOES HERE
  }
}
Prefix your kernel code with extern "C" and the CoreImage namespace. You write kernel code in the Metal Shader Language, which is a variation of C. If you only know Swift, you should be able to rely on Xcode’s code-completion and symbol lookup to help you as you’re learning to write Metal code. In addition to the general language reference, Apple provides a Metal Shading Language for Core Image Kernels document.
The example below creates a CIColorKernel. This kernel is optimized for changing the color value of each pixel in an image. It will change each pixel to a grayscale version of itself. A filter applying his kernel will send the color value of each pixel of the image to the kernel.
float4 grayscaleFilterKernel(sample_t s) { //1
  float gray = (s.r + s.g + s.b) / 3;      //2
  return float4(gray, gray, gray, s.a);    //3
}
Here is how this kernel works:
- The filter provides the color of the current pixel to the kernel as a
sample_ttype. The kernel will return the new color for that pixel as afloat4type. Thesample_ttype is equivalent to afloat4type and is only named differently because of historical convention. Afloat4type contains four float values. In the case of color, they are the red, green, blue and alpha values for the pixel. Each float has a value between zero and 1. - Calculate a grayscale version of the pixel by averaging the three color channels.
- Create a new
float4with the averaged value for the three color channels and the original alpha value for the fourth.
CoreImage also provides a CIWarpKernel class that is optimized for changing the position of each pixel and a CIBlendKernel for blending two images. For more complex tasks, CoreImage also provides a general CIKernel. Apple suggests that chaining together optimized kernels in a pipeline is usually more efficient than trying to write a larger, general kernel. A color-optimized kernel only has access to the color of the current pixel. A transform-optimized kernel can only affect the position of the current pixel. A general kernel can impact color and position as well as read other values from the source image.
Wrapping a `CIKernel` with a `CIFilter`
Now you’ll make a CIFilter subclass as the interface between the Metal code and your Swift code. Every CIFilter has an outputImage variable that returns a CIImage. Generally, input variables for a filter begin with input. The grayscale filter you are making has a single input and a single output. Create a new Swift file in your project and title it “GrayscaleFilter.swift”. Then be sure to import CoreImage by adding
import CoreImageto the top of the file. Then create the filter as a subclass of CIFilter.
class GrayscaleFilter: CIFilter {Next, create a kernel variable as either static or lazy, so that it only gets created one time, regardless of how often it’s called.
static var kernel: CIColorKernel = { () -> CIColorKernel in
    let url = Bundle.main.url(forResource: "default",
                            withExtension: "metallib")! //1
    let data = try! Data(contentsOf: url)
    return try! CIColorKernel(functionName: "grayscaleFilterKernel",
                      fromMetalLibraryData: data) //2
}()- Look in the bundle for the compiled metal code. The metal code will have a filename of “default”.
- The
.metalibmay contain many kernels so use the one called “grayscaleFilterKernel”
Now add a variable to hold the input image.
var inputImage: CIImage?Finally override the outputImage variable.
override var outputImage: CIImage? {
    guard let inputImage = inputImage else { return .none }
    return GrayscaleFilter.kernel.apply(extent: inputImage.extent,
                                   roiCallback: { (index, rect) -> CGRect in
                                                  return rect
                                  }, arguments: [inputImage])
}
The apply function of the kernel takes an extent argument. For a CIImage the extent property is the width and height of the image. The function has an roiCallback that allows you to specify what part of the image the kernel uses for each calculation. For a color filter, you generally just pass back the rect. Finally, pass in any arguments as an array. Notice that there is not any type checking here. It is up to you to pass in the correct types in the correct order.
Using the Filter
With the Metal code wrapped in a CIFilter you can now apply the filter images the same as using one of the built-in filters. Create an instance of the filter, then assign the inputImage variable a CIImage and display the outputImage. Your code might look something like this:
let filter = GrayscaleFilter()
filter.inputImage = image

displayView.image = UIImage(ciImage: (filter.outputImage ?? image) ?? CIImage())
and it can render a grayscale version of an image, like in this example.

Going Further
You can write custom filters and chain them to the built-in filters to invent new effects. Many of the math formulas for effects are available on the Internet. Most are easy to translate into the Metal Shader Language to make them perfect for your application. Writing an entire image or video editing application to showcase your filters is a much larger task. Using an SDK like the IMG.LY PhotoEditorSDK or VideoEditorSDK can help you provide an app that has the features that users will expect in addition to your cool filters.
To add your filter to the PhotoEditorSDK you first wrap your CIFilter with an Effect. For a basic filter, you only need to override the newEffectFilter variable.
import PhotoEditorSDK

class GrayscaleEffect: Effect {
  override var newEffectFilter: CIFilter? {
      GrayscaleFilter()
  }
}
Then add the filter to the Effect.all array when configuring the SDK, using something like
Effect.all = [NoEffect(), GrayscaleEffect(identifier: "grayscaleFilter", displayName: "Best Gray")]Now your filter appears the same as the other 60+ filters that ship with the SDK.

It applies to live camera previews as well as still images.
Wrapping Up
In this tutorial, you learned how to configure Xcode for custom Metal code. You also learned how to create a color filter kernel in Metal and wrap it in a CIFilter. By combining your filters with Apple’s filters in pipelines, you can create unique effects for your next app. Further, using an SDK such as PhotoEditorSDK or VideoEditorSDK allows you to showcase your filters in a full-featured image or video editing application. The PhotoEditor SDK for iOS documentation will give you deeper look into all other image adjustments including, ofcourse, the image filtering we discussed above.
Thanks for reading! We hope that you found this tutorial helpful. Feel free to reach out to us on Twitter with any questions, comments, or suggestions.