In this article, you will learn to compress an image in JavaScript and then upload it to Imgur. Similar to our previous guide on resizing images, and the one on drawing on images, you can accomplish everything with the HTML5 <canvas> element and we will involve any external libraries for this.
Smartphones cameras have become increasingly accurate and enhanced their photo quality for years. Consequently, their file size has grown as well. Since the speed of the average network has not improved at the same pace, it is essential to compress the images before uploading them.
Compressing is about downscaling an image. In other words, you want to reduce either its size or quality or both. By doing so, you can avoid uploading large images, saving the end-user time and money.
Compressing an Image With <canvas>
You can clone the GitHub repository that supports this article with the following commands:
git clone https://github.com/Tonel/how-to-compress-an-image-in-javascript-imglyThen, you can try the demo application by opening the index.html file in your browser.
Otherwise, keep following this step-by-step tutorial and learn how to build the demo application.
1. Implementing the Compression Logic
You can compress an image by solely using the HTML <canvas> element. This is a powerful image manipulation tool that allows you to achieve many results, as we have already explored in our blog.
Now, let’s delve into how to compress an image with canvas:
function compressImage(imgToCompress, resizingFactor, quality) {
  // resizing the image
  const canvas = document.createElement('canvas');
  const context = canvas.getContext('2d');

  const originalWidth = imgToCompress.width;
  const originalHeight = imgToCompress.height;

  const canvasWidth = originalWidth * resizingFactor;
  const canvasHeight = originalHeight * resizingFactor;

  canvas.width = canvasWidth;
  canvas.height = canvasHeight;

  context.drawImage(
    imgToCompress,
    0,
    0,
    originalWidth * resizingFactor,
    originalHeight * resizingFactor
  );

  // reducing the quality of the image
  canvas.toBlob(
    (blob) => {
      if (blob) {
        // showing the compressed image
        resizedImage.src = URL.createObjectURL(resizedImageBlob);
      }
    },
    'image/jpeg',
    quality
  );
}
This function is an extension of the resizeImage() function defined in this article. So, follow the link to that tutorial to learn more about it.
What is new here are the last few lines, which take care of reducing the quality of the uploaded image based on the quality parameter. As you can see, the last part of the compressImage()is based on the toBlob() function. This transforms the image stored in the canvas into a Blob object and compresses it based on the last parameter passed to the function. This last parameter represents the quality of the target image file.
Just like resizingFactor, quality must contain a Number between 0 and 1.
Also, since the toBlob() function returns a Blob object, you can store it in a global variable. Then, you can use the blob object representing the compressed image file to upload it to your server. Let’s see how.
2. Uploading an Image to Imgur
First, you need an Imgur account. If you already have one, log in here. Otherwise, create a new account for free here.
Now, register an application here to have access to the Imgur API program. Fill out the form as follows:
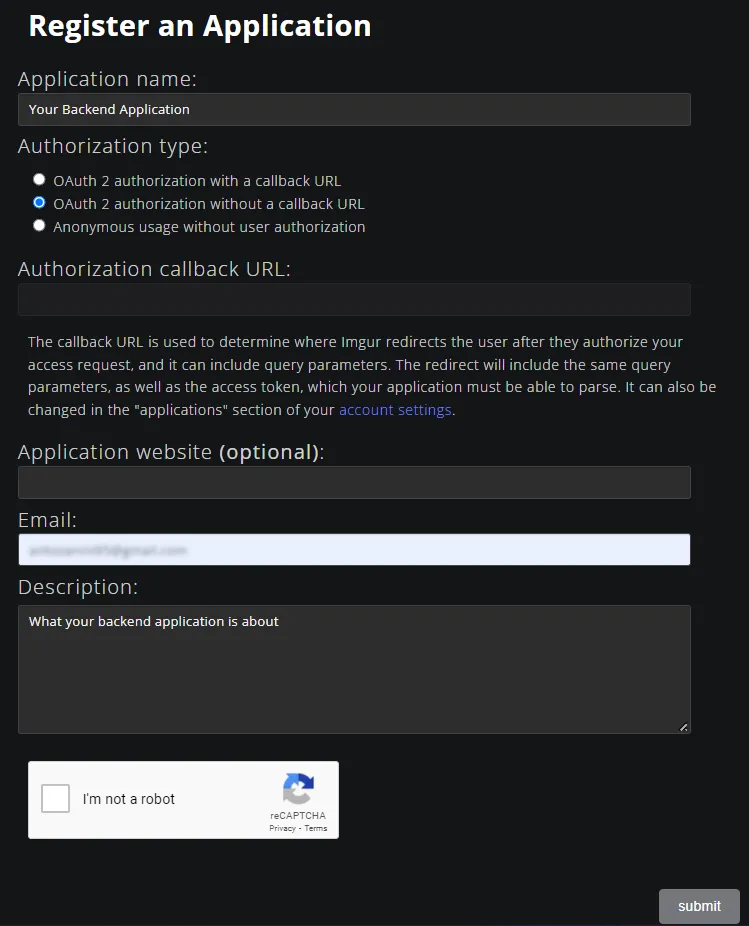
Then, click on “Submit” and you should get access to this page.
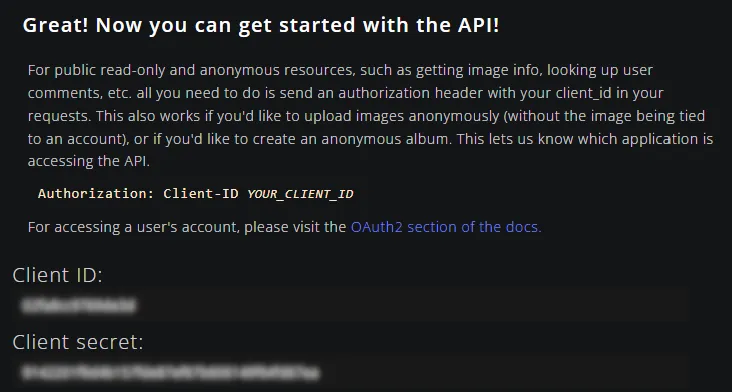
Store your Client-ID in a safe place. You will need it later.
Now, you have everything required to start uploading images to your Imgur application.
Uploading an image to Imgur in JavaScript is easy and can be achieved with just a bunch of lines of code, as below:
// compressedImageBlob represents the compressed image Blob to upload
const formdata = new FormData();
formdata.append('image', compressedImageBlob);

fetch('https://api.imgur.com/3/image/', {
  method: 'POST',
  headers: {
    Accept: 'application/json',
    Authorization: 'Client-ID YOUR_CLIENT_ID',
  },
  body: formdata,
}).then((response) => {
  if (response?.status === 403) {
    console.error('Unvalid Client-ID!');
  } else if (response?.status === 200) {
    // retrieving the URL of the image
    // just uploaded to Imgur
    response.json().then((jsonResponse) => {
      console.log(`URL: ${jsonResponse.data?.link}`);
    });
  } else {
    console.error(response);
  }
});
Replace YOUR_CLIENT_ID with the Client-ID retrieved before, and you should now be able to use this snippet to upload your images to Imgur.
3. Putting It All Together
Now it is time to see the compressImage() function in action through a simple example.
<!DOCTYPE html>
<html>
  <body>
    <h1>Compress and Resize an Image</h1>
    <p>Upload an image and compress it or use the following demo image</p>
    <input id="upload" type="file" accept="image/*" />
    <div>
      <h2>Original Image</h2>
      <img
        style="margin-top: 5px;"
        id="originalImage"
        src="demo.jpg"
        crossorigin="anonymous"
      />
    </div>
    <div style="margin-top: 5px;">
      <span>Resizing: </span>
      <input type="range" min="1" max="100" value="80" id="resizingRange" />
    </div>
    <div style="margin-top: 5px; margin-left: 8px;">
      <span>Quality: </span>
      <input type="range" min="1" max="100" value="80" id="qualityRange" />
    </div>
    <h2>Compressed Image</h2>
    <div><b>Size:</b> <span id="size"></span></div>
    <img id="compressedImage" />
    <div>
      <button id="uploadButton">Upload to Imgur</button>
    </div>
    <script src="src/index.js"></script>
  </body>
</html>
const fileInput = document.querySelector('#upload');
const originalImage = document.querySelector('#originalImage');
const compressedImage = document.querySelector('#compressedImage');
const resizingElement = document.querySelector('#resizingRange');
const qualityElement = document.querySelector('#qualityRange');
const uploadButton = document.querySelector('#uploadButton');
let compressedImageBlob;
let resizingFactor = 0.8;
let quality = 0.8;
// initializing the compressed image
compressImage(originalImage, resizingFactor, quality);
fileInput.addEventListener('change', async (e) => {
const [file] = fileInput.files;
// storing the original image
originalImage.src = await fileToDataUri(file);
// compressing the uplodaded image
originalImage.addEventListener('load', () => {
compressImage(originalImage, resizingFactor, quality);
});
return false;
});
resizingElement.oninput = (e) => {
resizingFactor = parseInt(e.target.value) / 100;
compressImage(originalImage, resizingFactor, quality);
};
qualityElement.oninput = (e) => {
quality = parseInt(e.target.value) / 100;
compressImage(originalImage, resizingFactor, quality);
};
uploadButton.onclick = () => {
// uploading the compressed image to
// Imgur (if present)
if (compressedImageBlob) {
const formdata = new FormData();
formdata.append('image', compressedImageBlob);
fetch('https://api.imgur.com/3/image/', {
method: 'POST',
headers: {
Accept: 'application/json',
Authorization: 'Client-ID YOUR_CLIENT_ID',
},
body: formdata,
}).then((response) => {
if (response?.status === 403) {
alert('Unvalid Client-ID!');
} else if (response?.status === 200) {
// retrieving the URL of the image
// just uploaded to Imgur
response.json().then((jsonResponse) => {
alert(`URL: ${jsonResponse.data?.link}`);
});
alert('Upload completed succesfully!');
} else {
console.error(response);
}
});
} else {
alert('Rezind and compressed image missing!');
}
};
function compressImage(imgToCompress, resizingFactor, quality) {
// showing the compressed image
const canvas = document.createElement('canvas');
const context = canvas.getContext('2d');
const originalWidth = imgToCompress.width;
const originalHeight = imgToCompress.height;
const canvasWidth = originalWidth * resizingFactor;
const canvasHeight = originalHeight * resizingFactor;
canvas.width = canvasWidth;
canvas.height = canvasHeight;
context.drawImage(
imgToCompress,
0,
0,
originalWidth * resizingFactor,
originalHeight * resizingFactor
);
// reducing the quality of the image
canvas.toBlob(
(blob) => {
if (blob) {
compressedImageBlob = blob;
compressedImage.src = URL.createObjectURL(compressedImageBlob);
document.querySelector('#size').innerHTML = bytesToSize(blob.size);
}
},
'image/jpeg',
quality
);
}
function fileToDataUri(field) {
return new Promise((resolve) => {
const reader = new FileReader();
reader.addEventListener('load', () => {
resolve(reader.result);
});
reader.readAsDataURL(field);
});
}
// source: https://stackoverflow.com/a/18650828
function bytesToSize(bytes) {
var sizes = ['Bytes', 'KB', 'MB', 'GB', 'TB'];
if (bytes === 0) {
return '0 Byte';
}
const i = parseInt(Math.floor(Math.log(bytes) / Math.log(1024)));
return Math.round(bytes / Math.pow(1024, i), 2) + ' ' + sizes[i];
}The input element allows users to upload an image. This is then passed to the compressImage() function along with the resizingFactor and quality values retrieved from the respective range input HTML elements. This function takes care of compressing the image, displaying it, and storing its Blob representation to the global compressedImageBlob variable. Finally, compressedImageBlob is uploaded to Imgur when the “Upload to Imgur” button is clicked.
Notice that these two snippets are what allow you to implement the live example you can find at the beginning of the article.
Final Considerations
Compressing an image in Vanilla JavaScript is easy. You can achieve this with no extra libraries and in a dozen of lines of code. At the same time, the resizing part of the process relies on an image interpolation algorithm that changes according to the browser in use. This can lead to different results based on the end-user’s browser. Also, compressing while preserving quality is always tricky and can easily become a grueling goal to achieve.
If you want to avoid this stress, consider adopting a commercial and browser-consistent solution like PhotoEditorSDK. This library provides access to a wide set of tools that allow you to manipulate your images in many ways and with an advanced and easy-to-use UI.
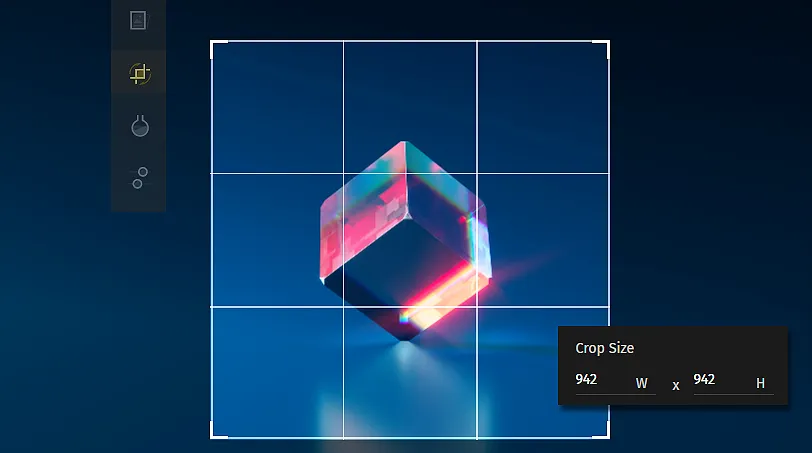
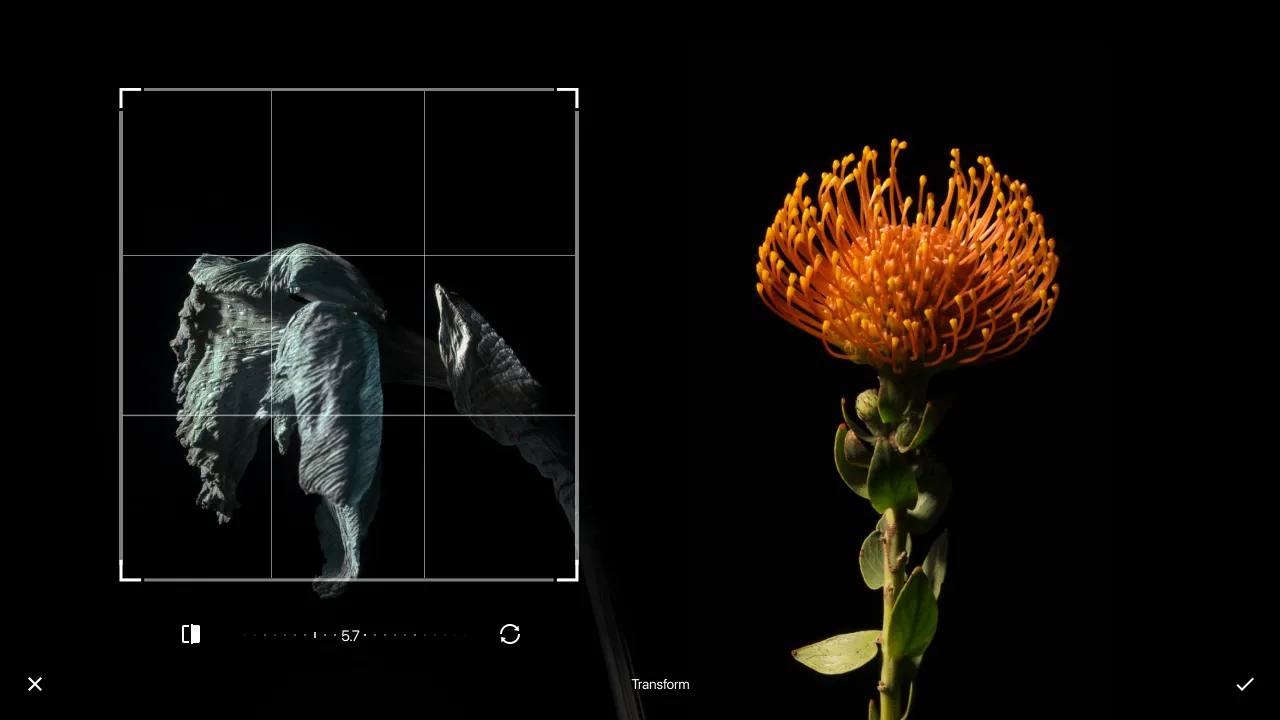
Resizing an Image with PhotoEditor SDK
First, read this article from the official documentation to get started with PhotoEditorSDK in HTML and JavaScript. Then, you can use the transform tool to resize your image, as shown below:
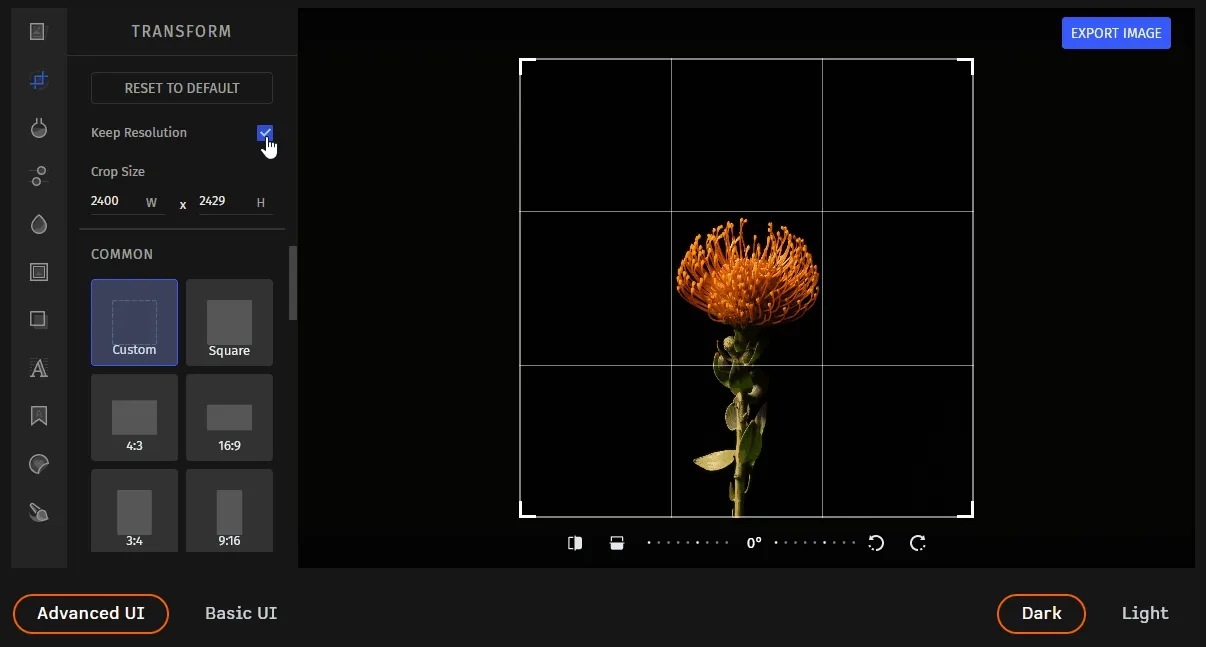
Check out this feature on the PhotoEditorSDK demo page.
Conclusion
In this article, we learned how to downscale an image in JavaScript before uploading it to your server. In detail, we resized and reduced the quality of an uploaded image before uploading it to Imgur. Everything was achieved by using only the HTML5 <canvas> element. This is a powerful tool supported by most browsers that allows you to resize and change the quality of an image with just a few lines of code. On the other hand, this process may not be browser-consistent. That is why we also introduced a commercial and more reliable solution – such as PhotoEditorSDK.
Thanks for reading! We hope that you found this article helpful. Feel free to reach out to us on Twitter with any questions, comments, or suggestions. To stay in the loop with our latest articles and case studies, subscribe to our Newsletter.