In this article, you will learn to add a text and image overlay to a video with JavaScript in React Native. All you need is React Native Video, the correct styling rules, and just a few lines of code.
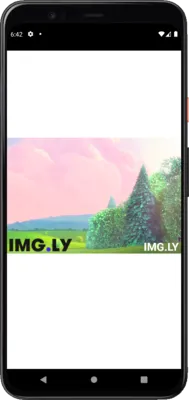
By following this guide, you will easily achieve a logo and text overlay:
First, let’s learn how to implement a React Native component that allows you to add an overlay image and overlay text to a video.
What is React Native Video?
Mobile apps come with several native interfaces and features. This is what makes React Native different from React, which is based on browser rendering. So, <div> becomes <View>, <p> becomes <Text>, and so on. In particular, React Native supports only a limited amount of components. You can find the entire list here.
To this day, React Native does not have a native <Video> component. That is why react-native-video was born - a widely used library without considering alternatives. This 500kB package equips you with everything you need to get started with videos in React Native.
Prerequisites
Here is the list of all the prerequisites for the demo application you are going to build:
- Node.js and npm 7+
react-native>= 0.6xreact-native-video>= 5.x
You can add react-native-video to your project’s dependencies by launching the following npm command:
npm install react-native-videoOr if you are a yarn user:
yarn add react-native-videoThen, follow this guide to learn how to link react-native-video to your project. This step is not required for Android users with React Native 0.60 and above.
Adding Overlay Image and Text to a Video in React Native
You can clone the GitHub repository supporting this article and launch the following commands to try the demo application:
git clone https://github.com/Tonel/how-to-add-overlays-to-videos-in-react-native-imgly
cd how-to-add-overlays-to-videos-in-react-native-imgly
npm i
npm start
The project is a React Native Create App project, and you can learn more about how it works and how to run it here.
Otherwise, keep following this step-by-step tutorial and learn how to build a React Native component for adding overlays to a video.
1. Initializing a React Native Project
Create React Native App is the officially supported and easiest way to create an empty and working React Native application. Install it globally with the following command:
npm install -g create-react-native-appNow, you can initialize a new project called react-native-video-overlays-demo with the following command:
create-react-native-app react-native-video-overlays-demoThe react-native-video-overlays-demo folder should now contain a demo project with the following file structure:
react-native-video-overlays-demo
├── .buckconfig
├── .gitattributes
├── .gitignore
├── App.js
├── app.json
├── babel.config.js
├── index.js
├── metro.config.js
├── package.json
├── package-lock.json
├── yarn.lock
├── android
│   └── ...
└── ios
    └── ...
Enter the react-native-video-overlays-demo folder:
cd react-native-video-overlays-demoThen launch the development server with one of the following commands:
- for launching an Expo app
npm start- for Android development on your phone or an emulator
npm run android- for iOS development on your phone or an emulator
npm run ios- for
react-native-webdevelopment
npm run web2. Defining a Component to Add Overlays on a Video
Let’s see how to build a VideoWithOverlays component that allows you to add overlays such as text and an image to a video. You can implement it as follows:
import React, { useEffect, useState } from 'react';
import { Image, StyleSheet, Text, View } from 'react-native';
import Video from 'react-native-video';

export default function VideoWithOverlays({
  videoComponentProps,
  text,
  imageSrc,
}) {
  const {
    video,
    overlayText,
    videoWithOverlays,
    overlayTextView,
    overlayImageView,
    overlayImage,
  } = styles;

  const [height, setHeight] = useState(0);
  const [overlayHeight, setOverlayHeight] = useState(0);

  useEffect(() => {
    // setting the overlay height to 10px starting
    // from the bottom of the video
    setOverlayHeight(height / 2 + height / 3 - 10);
  }, [height]);

  return (
    <View style={videoWithOverlays}>
      <Video
        {...videoComponentProps}
        style={video}
        onLayout={(event) => {
          const { height } = event.nativeEvent.layout;
          setHeight(height);
        }}
      />
      <View style={{ ...overlayTextView, top: overlayHeight }}>
        {text && <Text style={overlayText}>{text}</Text>}
      </View>
      <View style={{ ...overlayImageView, top: overlayHeight }}>
        {imageSrc && (
          <Image style={overlayImage} source={imageSrc} resizeMode="contain" />
        )}
      </View>
    </View>
  );
}

const styles = StyleSheet.create({
  overlayTextView: {
    position: 'relative',
    alignItems: 'flex-end',
    justifyContent: 'flex-end',
    right: 5,
  },
  overlayImageView: {
    position: 'relative',
    alignItems: 'flex-start',
    justifyContent: 'flex-end',
    left: 5,
  },
  overlayImage: {
    position: 'absolute',
    height: 40,
  },
  overlayText: {
    fontSize: 25,
    fontWeight: 'bold',
    color: 'white',
  },
  video: {
    position: 'absolute',
    top: 0,
    left: 0,
    bottom: 0,
    right: 0,
    marginTop: '50%',
  },
  videoWithOverlays: {
    position: 'absolute',
    top: 0,
    left: 0,
    bottom: 0,
    right: 0,
  },
});
The react-native-video Video component is used to play the video and its props are exposed thanks to the videoComponentProps prop. Then, after being placed into the layout, its height depending on the size of the device screen is stored in the height variable. This is used to calculate the height the overlays should be placed at in the useEffect hook. In detail, the overlays are placed at 10px from the bottom edge of the video.
The first internal View represents the optional text overlay. The overlay logic depends entirely on the custom overlayTextView and overlayText StyleSheet fields, representing the CSS classes responsible for displaying the text passed as a prop with text as an overlay. By default, the text overlay is placed in the bottom-right corner of the video.
The second internal View represents the optional image overlay. The overlay logic depends entirely on the custom overlayImageView and overlayImage StyleSheet fields, representing the CSS classes taking care of showing the image passed as a prop with imageSrc as an overlay. By default, the image overlay is placed in the bottom-left corner of the video. As you can see, both overlays are optional.
3. Putting It All Together
Let’s see the VideoWithOverlays component defined above in action. All you need to do is replace the App.js file with this:
import React from 'react';
import { StyleSheet, View } from 'react-native';
import VideoWithOverlays from './src/components/VideoWithOverlays/VideoWithOverlays';
export default function App() {
// a static image stored into the assets folder
const imgLy = require('./src/assets/images/IMG_LY.png');
return (
<View style={styles.container}>
<VideoWithOverlays
videoComponentProps={{
// replace this free video source with your video
source: {
uri: 'https://commondatastorage.googleapis.com/gtv-videos-bucket/sample/BigBuckBunny.mp4',
},
}}
// overlay text
text={'IMG.LY'}
// overlay image
imageSrc={imgLy}
/>
</View>
);
}
const styles = StyleSheet.create({
container: {
flex: 1,
backgroundColor: '#fff',
alignItems: 'center',
justifyContent: 'center',
},
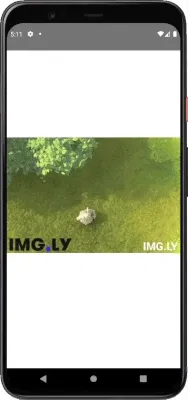
});Here, <VideoWitOverlays> is initialized with a free video source retrieved from a public URL and two overlays. The text overlay states “IMG.LY” and it is placed in the bottom-right corner of the video. While the image overlay represents the IMG.LY logo and is placed in the bottom-left corner of the video. This is a screenshot of the VideoWitOverlays in action:
Final Considerations
Adding overlays elements to a video in React Native is not complex and takes just a few lines of code. On the other hand, the approach presented above is just a frontend trick and does not modify the video. You are just showing it behind text or an image, giving the illusion to the users that it is a single source of content.
If you wanted to let users modify their videos by adding overlays or other elements and then export them, this would involve complex logic and require an advanced UI. Building such a React Native component is a time-consuming task that represents a waste of energy. If that is your goal, you should take into consideration a complete and ready-to-use SDK solution, such as VideoEditorSDK. This would provide your users with the ability to add overlays and use many other cool features.
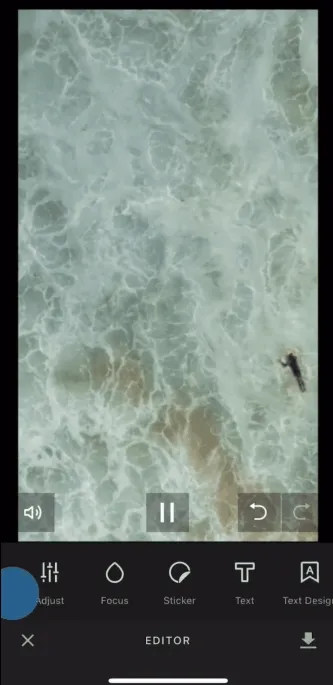
Add Overlays to a Video With React Native module for VideoEditor SDK
Visit this page from the official documentation to learn how to get started with VideoEditorSDK in React Native. Then, load your video and start editing it by adding overlays, text, and stickers. Follow the previous links to learn more about each feature.
Download our free mobile demo app from the App Store or Google Play, and try an extensive set of tools to edit videos.
Conclusion
In this tutorial, we learned how to define a React Native component that allows you to reproduce a video and add overlays. Specifically, we used react-native-video and defined everything required to place text or an image on your video. However, if you intend to export your edit, you will have to build a complex video editing application. In this scenario, you will want to consider a fully-featured, cutting-edge, and easy-to-adopt solution – such as VideoEditorSDK.
Looking for more video capabilities? Check out our solution for Short Video Creation, and Camera SDK!
Thanks for reading! We hope that you found this article helpful. Feel free to reach out to us on Twitter with any questions, comments, or suggestions.