Package repeatable editor behavior in a custom Web plugin that can be applied
to any CE.SDK instance with cesdk.addPlugin().
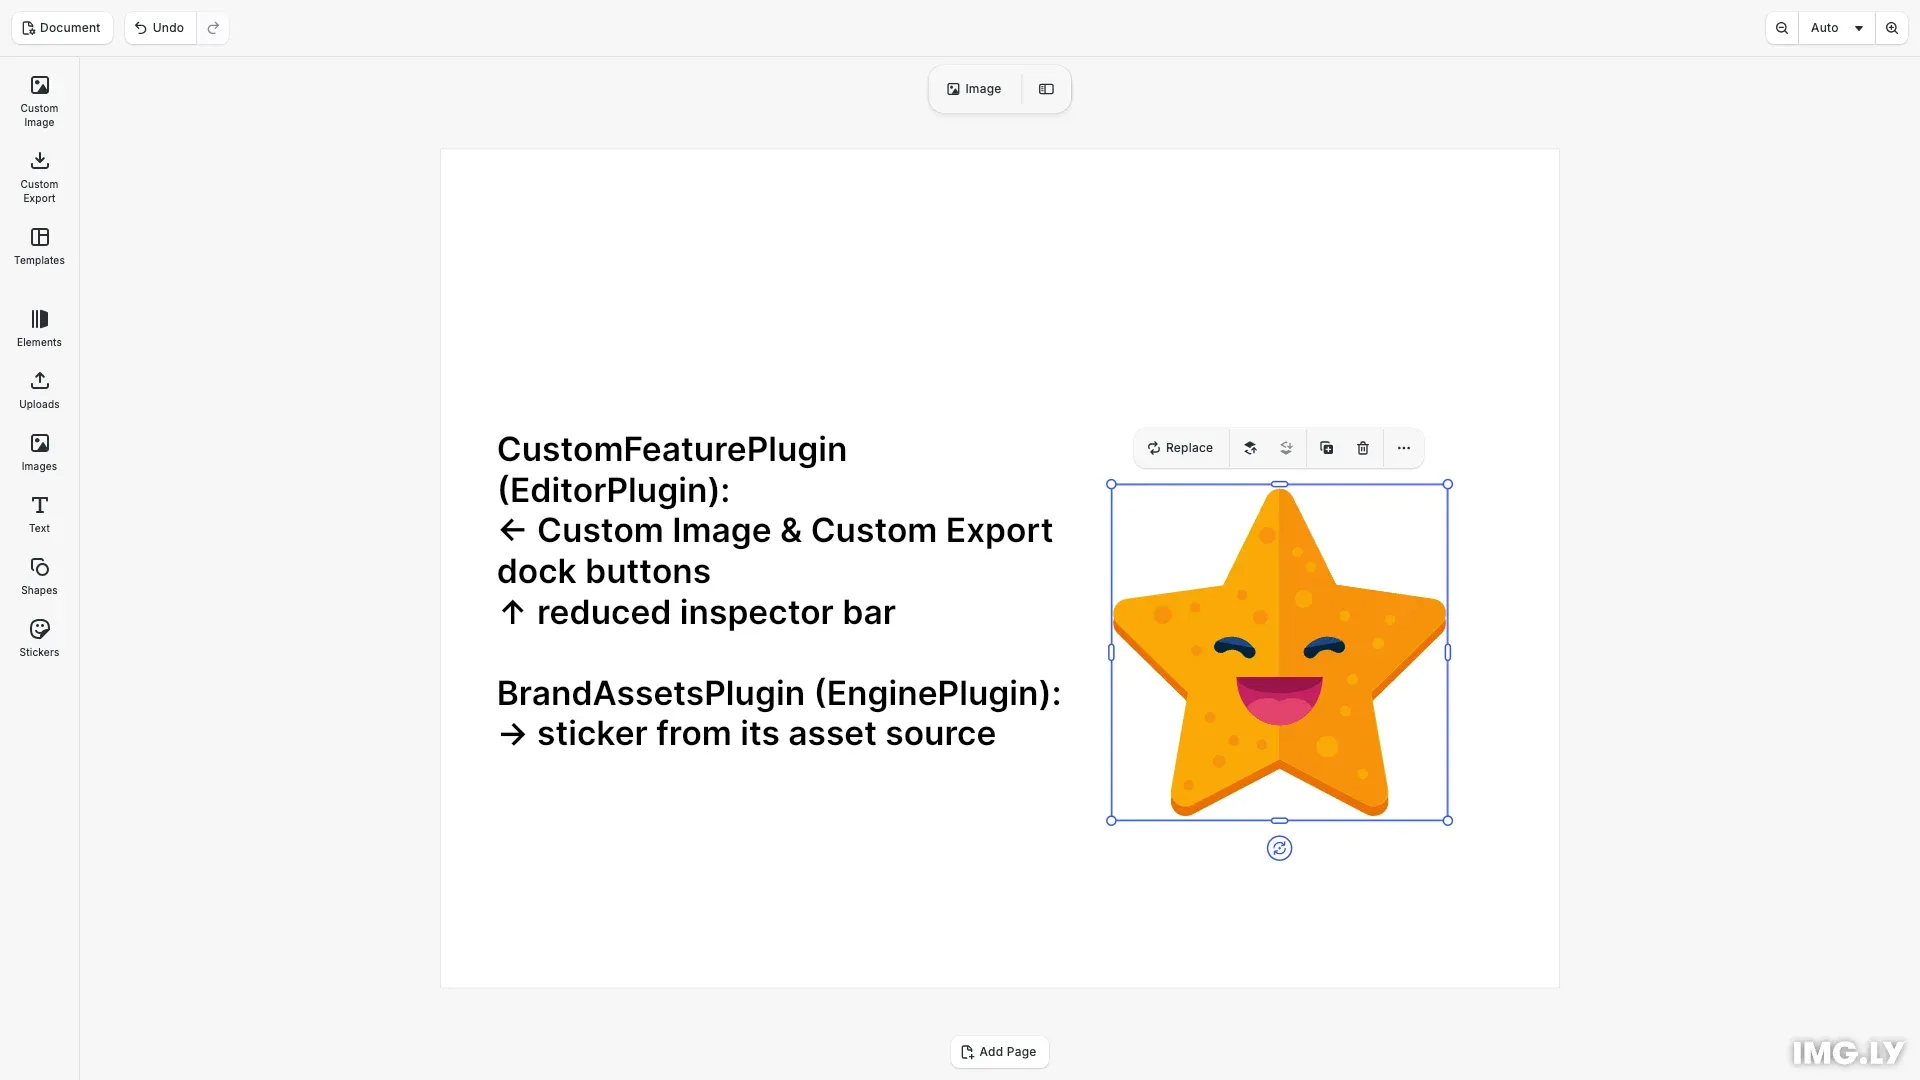
A custom plugin groups callbacks, UI component changes, settings, and options into one unit that travels between projects. On the Web, a plugin implements the EditorPlugin interface and receives the CE.SDK instance and engine when it’s applied — the same mechanism official @imgly/plugin-* packages and the editor configs use.
This guide covers deciding when a plugin is the right abstraction, creating a plugin class with options, applying it after the base editor setup, overriding the export action, extending the dock, replacing the inspector bar, and extending engine functionality with a second, engine-level plugin.
When to Use Plugins#
Start with inline configuration, or adapt a Starter Kit, and create a custom plugin only when the same configuration needs to be reused across multiple editors or products. The Plugin Architecture concept page covers this decision model in detail.
What the Example Does#
The example builds two plugins. CustomFeaturePlugin is an editor plugin applied on top of the design editor configuration:
- It replaces the built-in export action with its own export flow.
- It adds two custom buttons at the top of the existing dock, one of them triggering the export action.
- It replaces the inspector bar with a focused set of controls.
- It exposes
randomImageURLandshowDockButtonas plugin options.
BrandAssetsPlugin is an engine plugin that extends engine functionality with a custom asset source. Because it only needs the engine, it also runs in headless setups.
Create the Plugin#
On the Web, a custom plugin is a class implementing EditorPlugin with a stable name, a version, and one initialize function. Options are passed through the constructor and stored for use during initialization:
class CustomFeaturePlugin implements EditorPlugin {  name = 'custom-feature';
  version = '1.0.0';
  private options: Required<CustomFeaturePluginOptions>;
  constructor(options: CustomFeaturePluginOptions = {}) {    this.options = {      randomImageURL:        options.randomImageURL ??        'https://img.ly/static/ubq_samples/sample_1.jpg',      showDockButton: options.showDockButton ?? true    };  }
CE.SDK calls initialize once when the plugin is applied and passes an EditorPluginContext containing the cesdk instance and the engine. Everything the plugin sets up — actions, UI components, settings, asset sources — happens inside this function. initialize can be async; cesdk.addPlugin() awaits it before resolving.
Register Configuration Parameters#
Options let the same plugin behave differently in different editors. Use a typed options object with defaults instead of hardcoding product-specific values:
interface CustomFeaturePluginOptions { /** Image added to the page by the custom dock button. */ randomImageURL?: string; /** Whether the plugin adds its dock button. */ showDockButton?: boolean;}Apply the Plugin#
Apply the plugin after the base editor configuration. The order matters: base editor setup first, reusable plugin second, app-specific edits last. initialize receives cesdk and engine in its context:
// Apply the editor plugin after the base editor setupawait cesdk.addPlugin( new CustomFeaturePlugin({ randomImageURL: 'https://img.ly/static/ubq_samples/sample_1.jpg' }));Overriding the Export Action#
A plugin can own a workflow completely. Registering exportDesign replaces the built-in export behavior, so the navigation bar’s export button now runs the plugin’s flow. Overriding means the plugin must provide the complete behavior for that action:
// Replace the built-in export behavior. The plugin now owns the// complete export flow triggered by the navigation bar button.cesdk.actions.register('exportDesign', async (exportOptions) => { const { blobs, options } = await cesdk.utils.export({ mimeType: 'image/png', ...exportOptions }); await cesdk.utils.downloadFile(blobs[0], options.mimeType); cesdk.ui.showNotification({ message: 'Export handled by CustomFeaturePlugin', type: 'info' });});Extending the Dock#
Component customization follows the same decision as callbacks: extend when the plugin adds controls, replace when it owns the region. Here the plugin registers a component with two buttons — one adds an image, the other runs the overridden export action — then reads the current dock order with cesdk.ui.getComponentOrder() and puts the component first. Existing entries stay untouched:
// Register the custom dock buttonsif (this.options.showDockButton) {  cesdk.ui.registerComponent('customFeature.dock', ({ builder }) => {    builder.Button('customFeature.dock.image', {      label: 'Custom Image',      icon: '@imgly/Image',      onClick: async () => {        await cesdk.engine.block.addImage(this.options.randomImageURL, {          size: { width: 400, height: 300 }        });      }    });    builder.Button('customFeature.dock.export', {      label: 'Custom Export',      icon: '@imgly/Download',      onClick: () => {        cesdk.actions.run('exportDesign');      }    });  });
  // Extend the existing dock order instead of replacing it —  // the plugin's buttons go first, existing entries stay  const order = cesdk.ui.getComponentOrder({ in: 'ly.img.dock' });  cesdk.ui.setComponentOrder({ in: 'ly.img.dock' }, [    'customFeature.dock',    ...order  ]);}
Replacing the Inspector Bar#
For the inspector bar, the plugin intentionally sets a complete component order instead of extending the existing one. Replacement is appropriate when the plugin needs a focused editor surface with only approved controls:
// Replace the inspector bar with a focused set of approved controlscesdk.ui.setComponentOrder({ in: 'ly.img.inspector.bar' }, [ 'ly.img.spacer', 'ly.img.fill.inspectorBar', 'ly.img.separator', 'ly.img.inspectorToggle.inspectorBar']);Extending the Engine with a Plugin#
Not every plugin needs the editor. An engine plugin implements EnginePlugin — the same contract with name, version and initialize, but its context contains only the engine. Use this shape when a plugin extends engine functionality such as asset sources, and it stays usable in headless setups:
// An engine plugin only receives the engine in its context, so it also// runs in headless setups. This one extends engine functionality with// an asset source providing a single sticker asset.class BrandAssetsPlugin implements EnginePlugin {  name = 'brand-assets';
  version = '1.0.0';
  initialize({ engine }: EnginePluginContext): void {    engine.asset.addLocalSource('brand-assets');    engine.asset.addAssetToSource('brand-assets', {      id: 'brand-sticker',      label: { en: 'Brand Sticker' },      meta: {        uri: 'https://cdn.img.ly/assets/v3/ly.img.sticker/images/emoticons/imgly_sticker_emoticons_star.svg',        thumbUri:          'https://cdn.img.ly/assets/v3/ly.img.sticker/images/emoticons/imgly_sticker_emoticons_star.svg',        blockType: '//ly.img.ubq/graphic',        fillType: '//ly.img.ubq/fill/image',        mimeType: 'image/svg+xml'      }    });  }}
Engine plugins are registered on the engine instead of the editor:
// Engine plugins attach to the engine — the same call works in// headless setups where no editor existsconst engine = cesdk.engine;await engine.addPlugin(new BrandAssetsPlugin());The Plugin Architecture concept page explains when to choose which layer.
Troubleshooting#
- A dock or inspector item disappears: The plugin replaced a component order instead of extending it. Use
cesdk.ui.getComponentOrder()as the source when adding controls. - Export behavior runs twice: The plugin both delegates and performs the full export. Choose extension or replacement per action, then document that choice.
- Plugin options don’t apply: The option is read before the plugin is constructed with it. Pass options through the constructor and read them inside
initialize. - The custom dock button does nothing: The component was registered but not placed. Add its ID to the dock order with
cesdk.ui.setComponentOrder()orcesdk.ui.insertOrderComponent().
Next Steps#
- Plugin Architecture - How plugins fit together in CE.SDK
- Customize the Dock - Dock customization in depth
- Customize the Inspector Bar - Inspector bar customization in depth
- Register a New Component - Custom UI components