Create structured compositions using stack layouts that automatically arrange pages vertically or horizontally with consistent spacing.
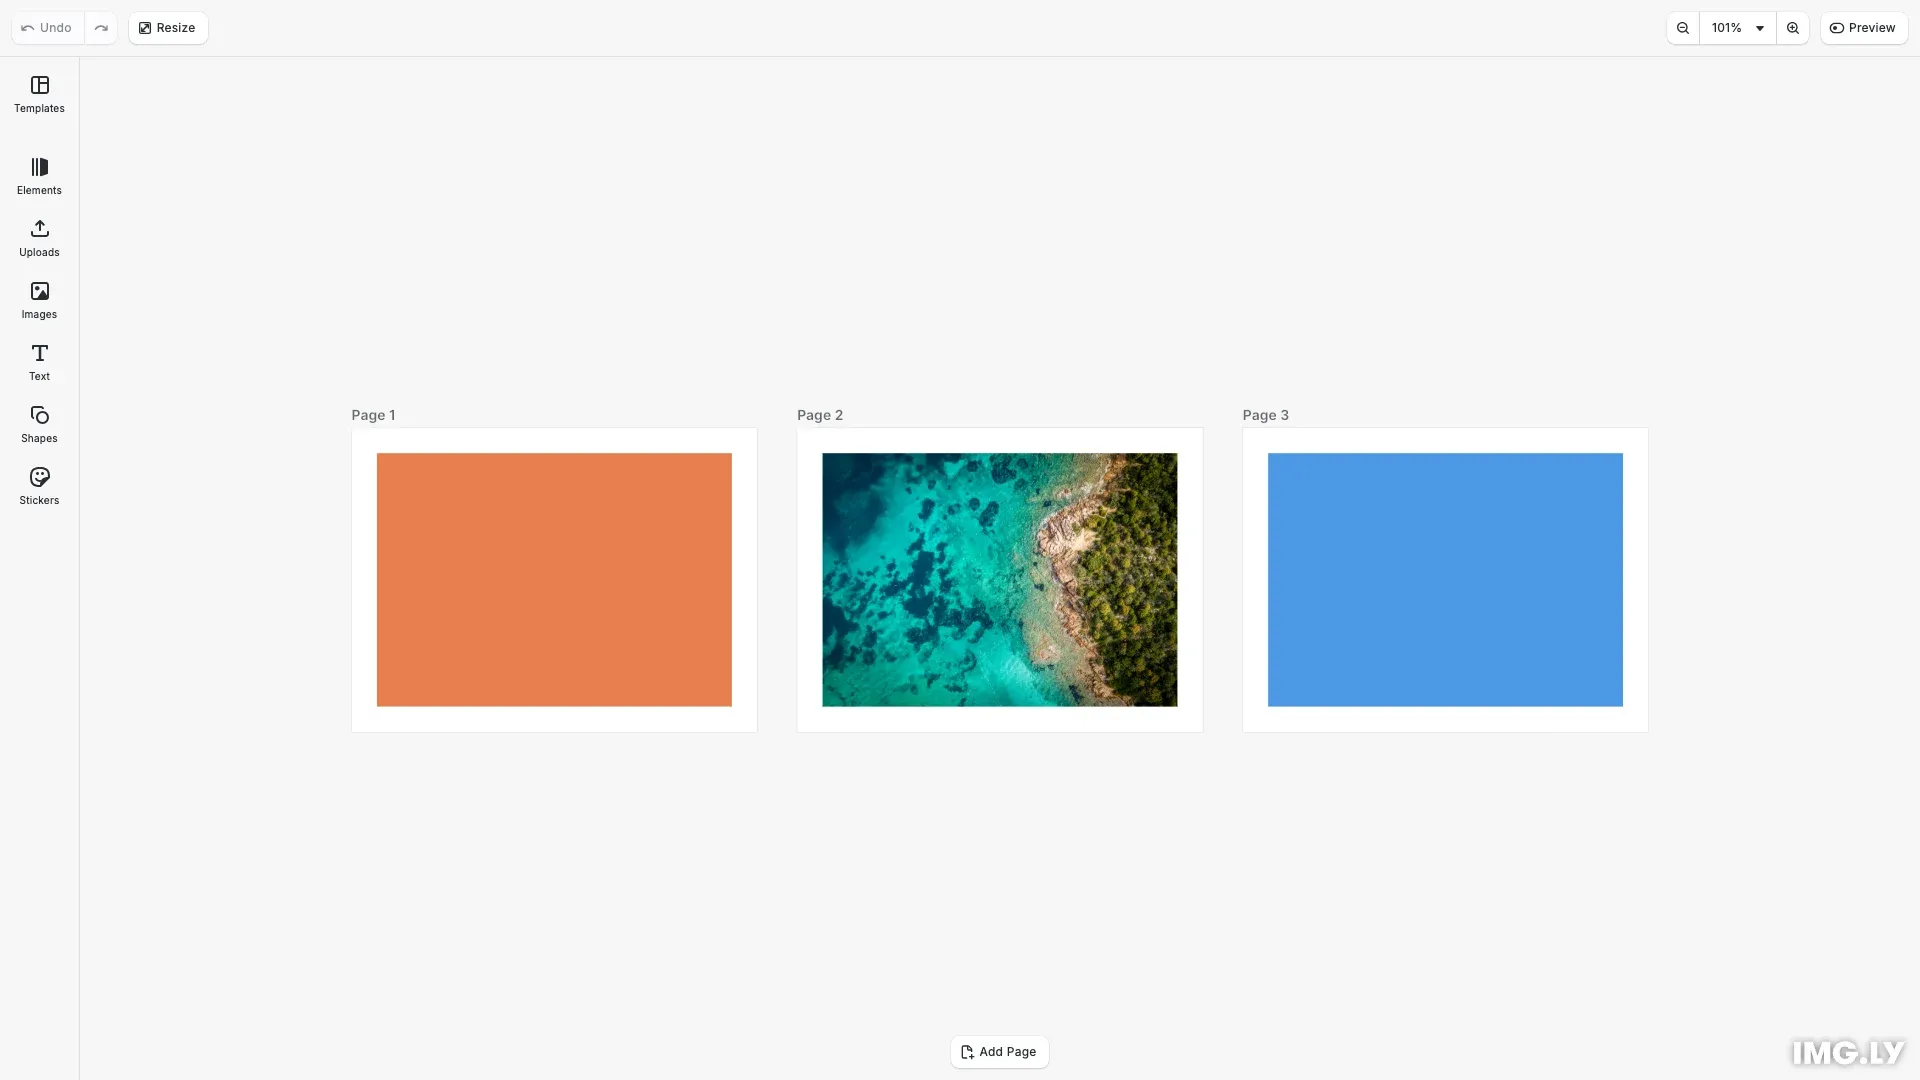
Stack layouts arrange pages automatically with consistent spacing. Vertical stacks arrange pages top-to-bottom, while horizontal stacks arrange them left-to-right. This eliminates manual positioning for compositions like photo collages, product catalogs, or social media carousels.
This guide covers how to:
- Create vertical and horizontal stack layouts
- Add pages and blocks to stacks
- Configure spacing between stacked pages
- Reorder pages within a stack
- Switch between stack and free layouts
Create a Vertical Stack Layout#
Vertical stacks arrange pages from top to bottom. Create a scene with VerticalStack layout, then add pages to the stack container.
// Create a scene with vertical stack layout// Pages arrange top-to-bottom automaticallyengine.scene.create('VerticalStack');
// Get the stack container created with the sceneconst [stack] = engine.block.findByType('stack');
// Create two pages that will stack verticallyconst page1 = engine.block.create('page');engine.block.setWidth(page1, 400);engine.block.setHeight(page1, 300);engine.block.appendChild(stack, page1);
const page2 = engine.block.create('page');engine.block.setWidth(page2, 400);engine.block.setHeight(page2, 300);engine.block.appendChild(stack, page2);
// Configure spacing between stacked pagesengine.block.setFloat(stack, 'stack/spacing', 20);engine.block.setBool(stack, 'stack/spacingInScreenspace', true);
When you create a scene with VerticalStack layout, CE.SDK automatically creates a stack container. Pages added to this container are positioned vertically with the configured spacing. The spacingInScreenspace property ensures spacing remains consistent regardless of zoom level.
Add Blocks to Pages#
Each page can contain multiple blocks. Create blocks with shapes and fills, position them within the page, then append them to the page.
// Add image content to page 1const imageUri = 'https://img.ly/static/ubq_samples/sample_1.jpg';const block1 = await engine.block.addImage(imageUri, {  size: { width: 350, height: 250 }});engine.block.setPositionX(block1, 25);engine.block.setPositionY(block1, 25);engine.block.appendChild(page1, block1);
// Add a colored rectangle to page 2const block2 = engine.block.create('graphic');const shape2 = engine.block.createShape('rect');engine.block.setShape(block2, shape2);engine.block.setWidth(block2, 350);engine.block.setHeight(block2, 250);engine.block.setPositionX(block2, 25);engine.block.setPositionY(block2, 25);const fill2 = engine.block.createFill('color');engine.block.setColor(fill2, 'fill/color/value', {  r: 0.3,  g: 0.6,  b: 0.9,  a: 1.0});engine.block.setFill(block2, fill2);engine.block.appendChild(page2, block2);
Blocks require a shape and fill to be visible. Use addImage() for image content, or create graphic blocks with custom shapes and color fills. Position blocks within their parent page using setPositionX() and setPositionY().
Switch to Horizontal Layout#
Change the layout direction at any time using setLayout(). Horizontal stacks arrange pages left-to-right instead of top-to-bottom.
// Switch to horizontal stack layout// Pages now arrange left-to-rightengine.scene.setLayout('HorizontalStack');
// Verify the layout typeconst currentLayout = engine.scene.getLayout();console.log('Current layout:', currentLayout);
Horizontal layouts work well for carousels, timelines, and horizontal galleries. Existing pages automatically reposition when you change the layout type.
Add Pages to Existing Stacks#
Add new pages to an existing stack at any time. Pages automatically appear at the end of the stack with proper spacing.
// Add a new page to the existing stack// The page automatically appears at the endconst page3 = engine.block.create('page');engine.block.setWidth(page3, 400);engine.block.setHeight(page3, 300);engine.block.appendChild(stack, page3);
// Add content to the new pageconst block3 = engine.block.create('graphic');const shape3 = engine.block.createShape('rect');engine.block.setShape(block3, shape3);engine.block.setWidth(block3, 350);engine.block.setHeight(block3, 250);engine.block.setPositionX(block3, 25);engine.block.setPositionY(block3, 25);const fill3 = engine.block.createFill('color');engine.block.setColor(fill3, 'fill/color/value', {  r: 0.9,  g: 0.5,  b: 0.3,  a: 1.0});engine.block.setFill(block3, fill3);engine.block.appendChild(page3, block3);
The stack container manages positioning automatically. You can add content to the new page before or after appending it to the stack.
Reorder Pages#
Change page order using insertChild() to place a page at a specific index within the stack.
// Reorder pages using insertChild// Move page3 to the first positionengine.block.insertChild(stack, page3, 0);
// Verify the new orderconst pageOrder = engine.block.getChildren(stack);console.log('Page order after reordering:', pageOrder);
Removing a page from its current position and reinserting it at index 0 moves it to the first position. All other pages shift to accommodate the change.
Change Stack Spacing#
Adjust spacing between pages using the stack/spacing property on the stack block.
// Update spacing between stacked pagesengine.block.setFloat(stack, 'stack/spacing', 40);
// Verify the spacing valueconst updatedSpacing = engine.block.getFloat(stack, 'stack/spacing');console.log('Updated spacing:', updatedSpacing);
// Choose what the value means. When true, the spacing is a screen-pixel// distance that stays constant as the user zooms. When false, it is a// distance in design units. Exports always read design units.engine.block.setBool(stack, 'stack/spacingInScreenspace', false);
Spacing updates immediately and pages reposition automatically. Use getFloat() to verify the current spacing value.
A second property, stack/spacingInScreenspace, decides what that number means:
| Value | Meaning |
|---|---|
true (default) |
The gap is a screen-pixel distance. It stays visually constant as the user zooms, so pages keep the same on-screen separation at any zoom level. |
false |
The gap is a distance in design units, so it scales with the rest of the document. |
The distinction applies to the canvas preview only. Exports always interpret the gap in design units, whatever the property is set to.
Switching the property never converts the number. A gap of 40 stays 40 and is reinterpreted in the other space, which changes how far apart the pages appear.
Adjust the gap from the editor UI#
Users can reach both properties without writing code. Deselect everything to open the Document inspector, then set the scene to a horizontal or vertical layout. Two rows appear below the layout switch:
- Gap writes
stack/spacing. Its unit label follows the row below, showingpxfor screen pixels and the scene’s design unit otherwise. - Gap Unit writes
stack/spacingInScreenspace, offering Screen Pixels and Design Units.
Both rows are hidden in free layout, which has no stack to space, and in depth-stacked layouts, where pages overlap. To hide them from your users, disable the ly.img.scene.layout.spacing feature — see Disable or Enable Features.
Switch to Free Layout#
For manual positioning, switch to Free layout. Pages keep their positions but stop auto-arranging.
// Check current layout typeconst layout = engine.scene.getLayout();
// Convert to free layout for manual positioningengine.scene.setLayout('Free');
// Now position pages manuallyconst [page] = engine.block.findByType('page');engine.block.setPositionX(page, 100);engine.block.setPositionY(page, 200);
Free layout gives full control over page positions. Use this when you need precise positioning that stack layouts cannot provide.
Troubleshooting#
Pages not arranging automatically — Verify the scene layout type is VerticalStack or HorizontalStack using getLayout().
Spacing not applying — Check that you’re setting spacing on the stack block, not the scene. Use findByType('stack') to get the stack container.
Pages overlapping — Ensure pages are direct children of the stack container. Nested pages won’t auto-arrange properly.
Can’t position manually — Stack layouts override manual positions. Switch to Free layout for manual control.
Wrong stacking order — Child order determines position. Use insertChild() to move pages to specific positions.
API Reference#
| Method | Description |
|---|---|
engine.scene.create(layout) |
Create a scene with specified layout ('Free', 'VerticalStack', 'HorizontalStack') |
engine.scene.setLayout(layout) |
Change the layout type of the current scene |
engine.scene.getLayout() |
Get the current layout type |
engine.block.findByType('stack') |
Find the stack container block |
engine.block.setFloat(id, 'stack/spacing', value) |
Set spacing between stacked pages |
engine.block.getFloat(id, 'stack/spacing') |
Get current spacing value |
engine.block.setBool(id, 'stack/spacingInScreenspace', value) |
Set whether spacing is in screen pixels |
engine.block.appendChild(parent, child) |
Add a page to the stack |
engine.block.insertChild(parent, child, index) |
Insert a page at a specific position |
engine.block.getChildren(id) |
Get child blocks in order |
Next Steps#
- Auto-resize — Make blocks fit parent containers
- Manual Positioning — Position blocks in free layouts
- Layer Hierarchies — Organize blocks in hierarchical structures