Timeline editing is the heart of any professional video creation tool. With CE.SDK, you can build video editors that use a timeline model. Each scene contains tracks and clips that align precisely over time. Developers can either launch and customize the prebuilt VideoEditor UI (which already includes a timeline, but is iOS only) or build a custom headless timeline using the Engine APIs.
What You’ll Learn#
- How the CE.SDK timeline hierarchy works (
Scene → Page → Track → Clip). - How to create and organize video tracks programmatically.
- How to trim and arrange video clips in a timeline.
- How to generate thumbnails for a timeline view.
- How to connect timeline scenes to export or playback features.
When You’ll Use It#
- You want to build a custom video editing interface that arranges clips.
- You want to integrate the prebuilt VideoEditor but still understand how it works under the hood.
- You need to trim or rearrange clips programmatically before export.
- You’re adding thumbnail visualization or building a playback scrubber.
Understanding the Timeline Hierarchy#
CE.SDK organizes time-based video projects into a structured hierarchy:
Scene└── Page (timeline segment) ├── Track (parallel layer) │ ├── Clip (video or audio content) │ ├── Clip …- Scene: the root container of your video project.
- Page: a timeline segment (often a full video composition).
- Track: a parallel layer for clips (like separate video or audio lanes).
- Clip: an individual media item placed on a track.
Using the Prebuilt Timeline Editor#
The prebuilt VideoEditor component includes a fully interactive timeline UI for arranging, trimming, and syncing clips. It handles playback synchronization, audio alignment, and real-time preview automatically.
import IMGLYEngineimport SwiftUI
struct VideoEditorDemo: View {  private let engineSettings = EngineSettings(license: "<your license key>")
  var body: some View {    NaviationStack {      VideoEditorView(engineSettings)        .imgly.OnCreate { engine in        //optional: configure the editor or load your own scene        }    }  }}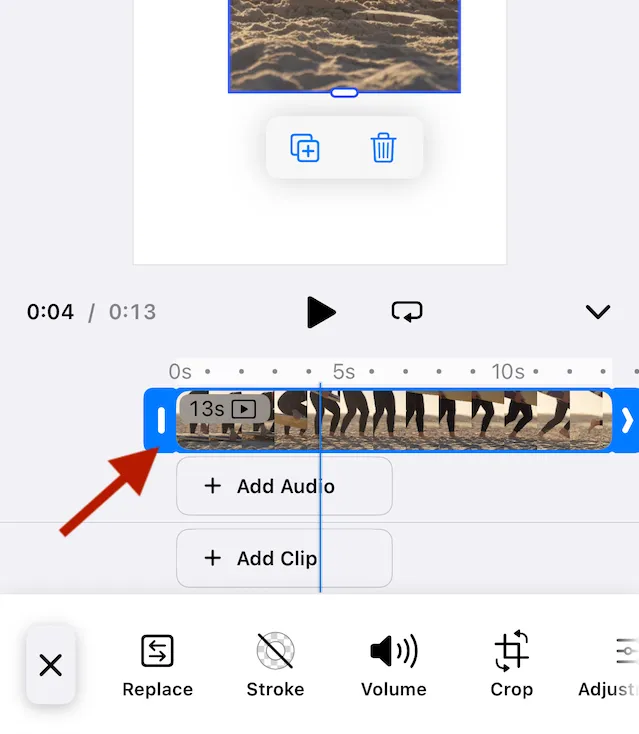
The prebuilt timeline editor is ideal for apps that need a fast, ready-to-use UI with minimal setup. The prebuilt editors are iOS only. For more custom control, or when using macOS or Catalyst, follow the next sections to work directly with the Engine timeline API.
Creating a Timeline Programmatically#
When you’re building a custom UI, create a timeline structure directly through the block API.
let scene = try engine.scene.createVideo()let page = try engine.block.create(.page)
try engine.block.appendChild(to: scene, child: page)
// Always set a realistic frame sizetry engine.block.setWidth(page, value: 1080)try engine.block.setHeight(page, value: 1920)
// Create a video tracklet track = try engine.block.create(.track)try engine.block.appendChild(page, child: track)
// Insert a video cliplet clip = try engine.block.create(.graphic)let fill = try engine.block.createFill(.video)try engine.block.setString(fill, key: "fill/video/fileURI", value: fileURL.absoluteString)try engine.block.setFill(clip, fill)try engine.block.appendChild(track, child: clip)
You can repeat this process for all clips and tracks, allowing for multi-layered compositions that include:
- background video
- overlays
- captions
When you append a clip to a track, CE.SDK automatically places the new clip directly after the last clip in that track. This gives you a continuous, gap-free sequence, so playback flows cleanly from one clip to the next without extra timing math.
If you need gaps or overlaps, either:
- Place the clips in separate tracks.
- Disable automatic offset management for the track and fully control offsets yourself.
// Disable automatic offset management for this tracktry engine.block.setBool(videoTrack,property: "track/automaticallyManageBlockOffsets",value: false)
// Manage playback/timeOffset on each clip manuallytry engine.block.setFloat(aRoll,property: "playback/timeOffset",value: 0.0)
try engine.block.setFloat(overlayClip,property: "playback/timeOffset",value: 3.0)
try engine.block.setFloat(clip, key: "timeline/start", value: 12.5)
Multi-Track Example (Video + Overlay + Audio)#
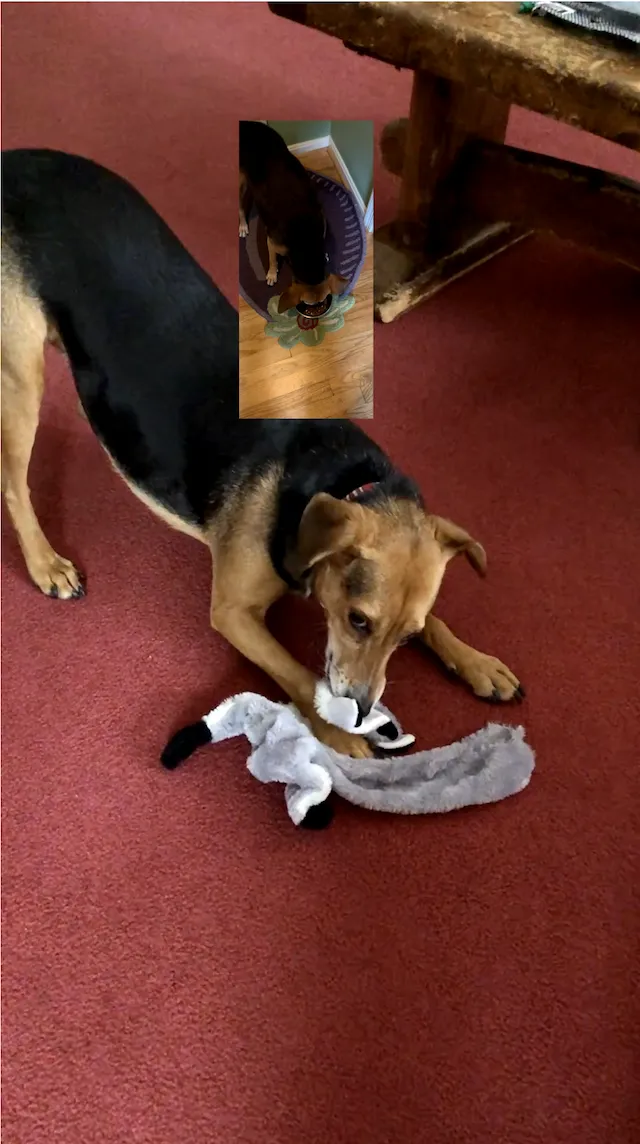
You can build layered timelines by adding tracks to the same page. Each track maintains its own sequence of clips. The following code creates two video tracks to create a picture-in-picture display with an audio track accompaniment. The variables primaryURL, overlayURL and, audioURL resolve to .mp4 and .m4a assets.
// Create a video scene and pagelet scene = try engine.scene.createVideo()let page = try engine.block.create(.page)try engine.block.appendChild(to: scene, child: page)
// Set page dimensions and durationtry engine.block.setWidth(page, value: 1080)try engine.block.setHeight(page, value: 1920)
// Focus the canvas on this pagetry await engine.scene.zoom(to: page)
// A‑roll primary video tracklet videoTrack = try engine.block.create(.track)try engine.block.appendChild(page, child: videoTrack)
let aRoll = try engine.block.create(.graphic)try engine.block.setShape(aRoll, shape: engine.block.createShape(.rect))
let aRollFill = try engine.block.createFill(.video)try engine.block.setString(aRollFill, key: "fill/video/fileURI", value: primaryURL.absoluteString)
try engine.block.setFill(aRoll, aRollFill)try engine.block.appendChild(videoTrack, child: aRoll)
let rollDuration = try engine.block.getAVResourceTotalDuration(aRollFill)try engine.block.setDuration(aRoll, duration: rollDuration)
try engine.block.fillParent(videoTrack)
// Overlay track (B‑roll or picture-in-picture)let overlayTrack = try engine.block.create(.track)try engine.block.appendChild(page, child: overlayTrack)
let overlayClip = try engine.block.create(.graphic)try engine.block.setShape(overlayClip, shape: engine.block.createShape(.rect))
let overlayFill = try engine.block.createFill(.video)try engine.block.setString(overlayFill, key: "fill/video/fileURI", value: overlayURL.absoluteString)try engine.block.setFill(overlayClip, overlayFill)
// Position overlay visuallytry engine.block.setPositionX(overlayClip, value: 400)try engine.block.setPositionY(overlayClip, value: 200)try engine.block.setWidth(overlayClip, value: 225)try engine.block.setHeight(overlayClip, value: 500)
try engine.block.appendChild(overlayTrack, child: overlayClip)
let duration = try engine.block.getAVResourceTotalDuration(overlayFill)try engine.block.setDuration(overlayClip, duration: duration)

// Audio bed tracklet audioTrack = try engine.block.create(.track)try engine.block.appendChild(page, child: audioTrack)
let audioClip = try engine.block.create(.audio)try engine.block.setString(audioClip, key: "audio/fileURI", value: audioURL.absoluteString)try engine.block.appendChild(audioTrack, child: audioClip)
//Set duration of composition to be the same as the longer cliptry engine.block.setDuration(page, duration: max(rollDuration, duration))
//Start playingtry engine.block.setPlaying(page, enabled: true)
Trimming and Clip Duration#
The duration of the page block controls the length of the final composition. If you don’t set a duration for clips, they truncate after a few seconds. Setting a duration for a clip that’s longer than the video asset for that clip causes the asset to loop. Setting a duration for a page that’s longer than the duration of its clips results in a blank screen. Use getAVResourceTotalDuration() on audio clips or video fills to get the duration of the underlying source media.
CE.SDK gives you fine control over:
- trim start
- trim length
- timeline position
Each clip can define how much of its source video to display and where it begins in the composition’s timeline.
Assume aRoll is a .graphic block and aRollFill is its .video fill.
// Skip the first 2 seconds of the sourcetry engine.block.setFloat(aRollFill,property: "playback/trimOffset",value: 2.0)
// Play only 5 seconds after the trim offsettry engine.block.setFloat(aRollFill,property: "playback/trimLength",value: 5.0)
Use playback/timeOffset on the clip block to move it along the track:
// Start this clip 10 seconds into the tracktry engine.block.setFloat(aRoll,property: "playback/timeOffset",value: 10.0)Timeline Playback Control#
You can preview playback using the Scene API after you’ve placed and trimmed clips. The prebuilt editor handles this automatically, but if you’re implementing a custom player, use the functions shown in Control Audio and Video.
That guide covers:
- Play, pause, and seek.
- Playback speed and looping.
- Current playback time queries.
- Synchronization across different tracks.
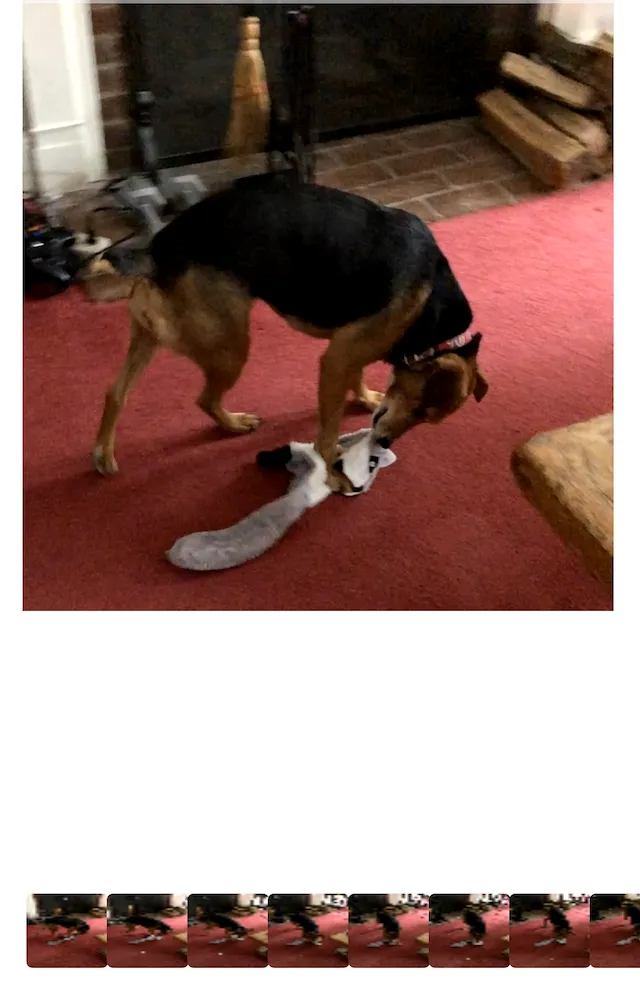
Generating Timeline Thumbnails#
You can render thumbnails directly from any video clip using CE.SDK’s asynchronous thumbnail generator.
@State private var thumbnails: [UIImage] = []

let stream = await MainActor.run {  engine.block.generateVideoThumbnailSequence(    id, // id can be a video fill OR a video clip block.    thumbnailHeight: 45,    timeRange: 0.0...3.0, // timeRange is relative to the design block’s playback/timeOffset.    numberOfFrames: 10  )}
for try await thumb in stream {  await MainActor.run {    thumbnails.append(UIImage(cgImage: thumb.image))  }}
Each emitted image corresponds to a frame sample along the clip’s timeline.
You can display these in a LazyHStack or ScrollView to create a scrubber or timeline strip.
Generate Audio waveforms in a similar way using generateAudioThumbnailSequence. This function emits an async stream of AudioThumbnail structs, which contain normalized audio samples (0…1). You can use the samples to render a waveform in a custom SwiftUI view. The function signature and async stream behavior mirror video thumbnails. Only the output data differs.
// Generate audio “thumbnails” (sample chunks) for an audio block (or a video fill with audio)let stream = await MainActor.run { engine.block.generateAudioThumbnailSequence( audioClip, // or a video fill id samplesPerChunk: 512, timeRange: 0.0...10.0, // seconds numberOfSamples: 8_192, // total samples to generate numberOfChannels: 1 // 1 = mono, 2 = stereo (interleaved L/R) )}Exporting the Timeline#
To export a timeline, you export the page block as a video file. exportVideo returns an async stream of export events, so you can report progress and receive the final video data.
// Export a page to MP4 using default optionslet stream = try await engine.block.exportVideo(page)
for try await event in stream {  if case .finished(let data) = event {    let url = FileManager.default.temporaryDirectory.appendingPathComponent("export.mp4")    try data.write(to: url)    print("Exported:", url)  } else if case .progress(let progress) = event {      print("Export progress:", progress)  }}
CE.SDK supports standard formats (MP4, MOV, WebM, and audio-only tracks).
Troubleshooting#
| Symptom | Likely Cause | Solution |
|---|---|---|
| Clips overlap or play out of order | Misaligned timeline/start values | Ensure each clip’s start time is unique and sequential |
| Trim changes ignored | Trim start + duration exceed source length | Use engine.block.getFloat(key:) to confirm clip duration |
| Thumbnails are blank | Resource not loaded yet | Call engine.resource.load(for:) before renderThumbnails() |
| No thumbnails, no error | Canvas not mounted / playback active / second request in progress | Check that there is an active Canvas and that playback is paused. Check that you don’t have overlapping calls to the thumbnail generator |
| Playback stutters | Too many parallel HD tracks | Reduce simultaneous tracks or use compressed preview |
Next Steps#
- Use Control Audio and Video to play, pause, seek, loop, and adjust volume or speed for timeline content.
- Add Captions to place timed text that stays in sync with video and audio.