The CE.SDK provides a flexible architecture that allows you to extend its capability to meet your specific needs.
This guide demonstrates how to integrate a custom background removal feature into the Photo Editor. You can use the same approach to all other editor solutions and all other types of image processing.
What You’ll Learn#
- How to add a custom “Remove Background” button to the CE.SDK dock.
- How to pull the current image from the engine, run background removal, and write the result back.
- Implementation (iOS 17+) VNGenerateForegroundInstanceMaskRequest for general subject cut-outs.
- How to keep the UI responsive and handle errors gracefully.
When To Use It#
- Want a one-tap “Remove BG” action in the editor UI.
- Prefer on-device processing (no uploads) for latency, privacy, or offline.
- Need to plug in your own image editing logic (Apple Vision, a third-party library, or your own API).
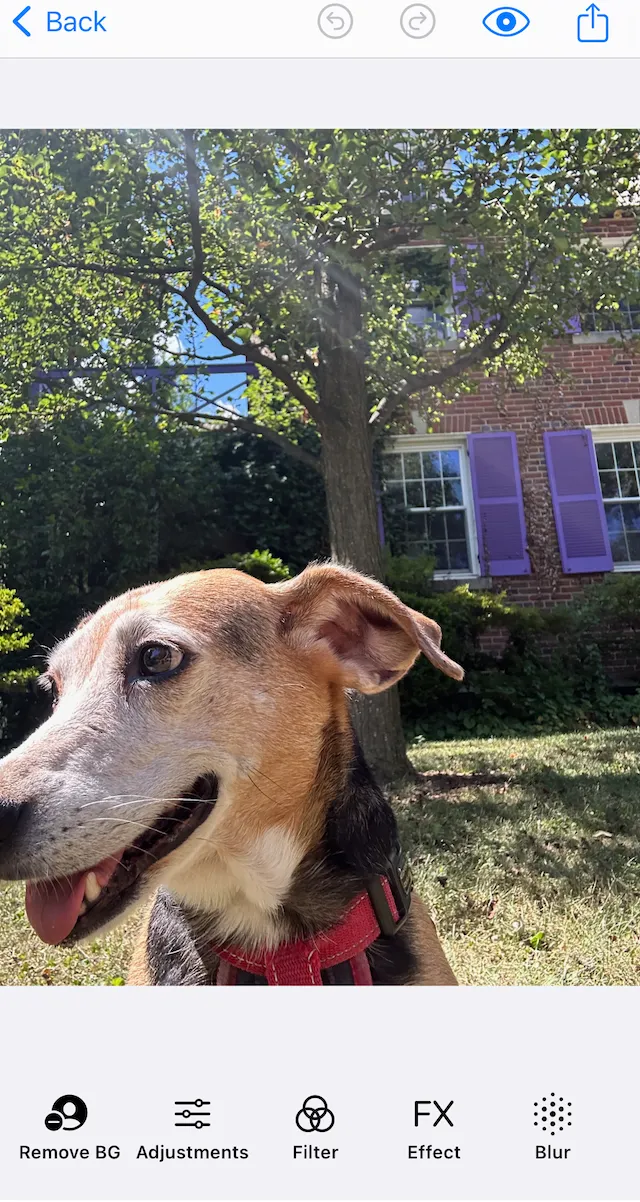
Adding a Button To the Dock#
You can learn more about adding buttons in the customize dock guide. For this guide, you’ll use a basic example to add a single button to the main dock of the Photo Editor.
PhotoEditor(.init(license: "<your license key>")) .imgly.modifyDockItems { context, items in items.addFirst { Dock.Button( id: "ly.img.backgroundRemoval", action: { context in Task { await performBackgroundRemoval(context: context) } }, label: { _ in Label("Remove BG", systemImage: "person.crop.circle.fill.badge.minus") } ) } }
The preceding code:
- Creates an instance of a
Dock.Button. - Adds it to the main dock of the editor in the leftmost space.
The button has the following properties:
idactionlabel
This is a common pattern for buttons in SwiftUI. The context property of .modifyDockItems has a reference to the engine and the loaded assets.
In the next few sections you’ll learn the steps to do the extraction. Put together, they become the body of the performBackgroundRemoval(context:) that the button calls.
Extracting the Image#
A block that displays an image has an imageFill which contains the URL of the underlying image. The next step in removing the background is to extract the image data. In the Photo Editor the scene’s page has the fill. In other scenarios, your code could either:
-
Look for the currently selected block.
-
Use some other method to find the fill.
After extraction, the image gets converted to a
UIImagefor theVisionframework to use.
// Get the current page (canvas) from the sceneguard let currentPage = try engine.scene.getCurrentPage() else {  return}
// Validate that the page contains an imagelet imageFill = try engine.block.getFill(currentPage)let fillType = try engine.block.getType(imageFill)guard fillType == FillType.image.rawValue else { return}
// Set block into loading statetry engine.block.setState(imageFill, state: .pending(progress: 0.5))
// Step 1: Extract image data from blocklet imageData = try await extractImageData(from: imageFill, engine: engine)
// Step 2: Convert to UIImage for processingguard let originalImage = UIImage(data: imageData) else {  try engine.block.setState(imageFill, state: .ready)  return}
Below is an example function to actually extract the data and return it to the background removal function.
/// Extracts image data from a design blockprivate func extractImageData(from block: DesignBlockID, engine: Engine) async throws -> Data {  // I could also use here to check if the block is using a sourceSet  let imageFileURI = try engine.block.getString(block, property: "fill/image/fileURI")  guard let url = URL(string: imageFileURI) else {    return  }
  let (data, _) = try await URLSession.shared.data(from: url)  return data}
Processing the Image#
With a UIImage, now your code can process the image using a background removal algorithm, or any image processing you can create. This guide uses a BackgroundRemover.swift structure that you’ll find at the end of the guide. Check the comments in the code about the Vision implementation.
guard let cutout = await BackgroundRemover.removeWithForegroundInstanceMask(from: originalImage) else { try engine.block.setState(imageFill, state: .ready) return}Replace the Image in the Editor#
With a processed image, the last step is to update the "fill/image/imageFileURI" with the new image:
- Write the image to disk.
- Return the URL.
- Update the original image block with the new fill.
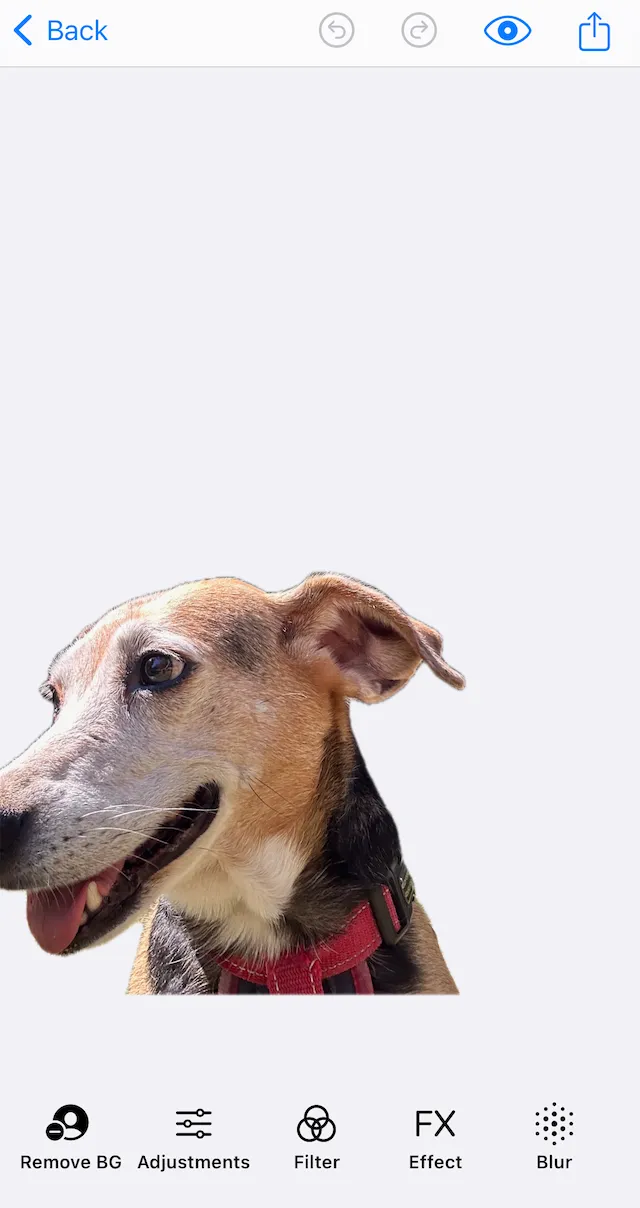
This replaces the old image with the new one seamlessly.
let processedImageURL = try saveImageToCache(cutout)
try await engine.block.addImageFileURIToSourceSet(  imageFill,  property: "fill/image/sourceSet",  uri: processedImageURL,)
An implementation of saveImageToCache(_ image:) might look like this:
private func saveImageToCache(_ image: UIImage) throws -> URL {  guard let imageData = image.pngData() else {    return  }
  let cacheURL = try FileManager.default    .url(for: .cachesDirectory, in: .userDomainMask, appropriateFor: nil, create: false)    .appendingPathComponent(UUID().uuidString, conformingTo: .png)
  try imageData.write(to: cacheURL)  return cacheURL}
Complete Function#
Here is the complete function for the background removal processing described in the guide. In production code, you’d want to make the guard statements throw instead of just returning.
func performBackgroundRemoval(context: Dock.Context) async {  do {    let engine = context.engine    guard let currentPage = try engine.scene.getCurrentPage() else { return }
    let imageFill = try engine.block.getFill(currentPage)    let fillType = try engine.block.getType(imageFill)    guard fillType == FillType.image.rawValue else { return }    try engine.block.setState(imageFill, state: .pending(progress: 0.5))
    // Step 1: Extract image data from block    let imageData = try await extractImageData(from: imageFill, engine: engine)
    // Step 2: Convert to UIImage for processing    guard let originalImage = UIImage(data: imageData) else {      try engine.block.setState(imageFill, state: .ready)      return    }
    // Step 3: Remove the background    guard let cutout = await BackgroundRemover.removeWithForegroundInstanceMask(from: originalImage) else {      try engine.block.setState(imageFill, state: .ready)      return    }
    // Step 4: Save the new image    let processedImageURL = try saveImageToCache(cutout)
    // Step 5: Replace the original image with the new one without background    try await engine.block.addImageFileURIToSourceSet(      imageFill,      property: "fill/image/sourceSet",      uri: processedImageURL,    )
    /*Optional, replace the entire source set instead. This keeps variants in check.    try engine.block.setSourceSet(        imageFill,        property: "fill/image/sourceSet",        sourceSet: [          .init(uri: processedImageURL, width: UInt32(Int(cutout.size.width)), height: UInt32(Int(cutout.size.height)))        ]      )    */    // Set block into ready state again    try engine.block.setState(imageFill, state: .ready)  } catch {
}}Troubleshooting#
❌ Button is enabled for non-image content:
Guard by checking the FillType of the block before doing any work. Optionally, disable the button dynamically by inspection the current selection.
❌ Mask looks jagged or haloed:
Try dilating and then slightly blurring (CIMorphologyMaximum then CIGaussianBlur(σ≈1.0)) the mask before composting in the BackgroundRemoval.swift file.
❌ Performance is poor on large images:
Downscale the image to a smaller size, generate the mask, then upscale the mask and image back to the original resolution before compositing.
❌ Code doesn’t run as expected, or crashes:
Ensure that you are testing with a device. Some Vision requests may not return expected masks in the simulator. Always test on device.
BackgroundRemover.swift#
Here is a full, annotated implementation of the Vision functions that form the background removal code.
//////  Performs on-device background removal using Apple’s Vision framework (iOS 17+).//  Designed for use within CE.SDK or any app needing a quick subject cut-out.////  The Vision framework performs semantic segmentation of the foreground,//  returning an instance mask (a grayscale alpha mask) that identifies//  the main subjects in the image. We then composite the original image//  over a transparent background using Core Image.////  © IMG.LY Documentation Example – Detailed Version//
import Visionimport CoreImageimport CoreImage.CIFilterBuiltinsimport UIKit
/// A helper struct providing one static method for background removal./// This version uses the Vision framework’s new/// `VNGenerateForegroundInstanceMaskRequest` (iOS 17+)/// for general-purpose subject segmentation.struct BackgroundRemover {
  /// Removes the background from a given UIImage using Vision.  ///  /// - Parameter uiImage: The source image to process.  /// - Returns: A new UIImage with the detected foreground preserved  ///   and the background made transparent, or `nil` if the operation fails.  ///  /// ### Implementation overview  /// 1. Convert the UIImage to a Core Image (CIImage) for Vision and Core Image processing.  /// 2. Run Vision’s `VNGenerateForegroundInstanceMaskRequest`  ///    to produce an instance segmentation mask.  /// 3. Merge all detected instances into a single grayscale alpha mask.  /// 4. Composite the original image over a transparent background using that mask as alpha.  ///  @MainActor  static func removeWithForegroundInstanceMask(from uiImage: UIImage) async -> UIImage? {    // Convert the UIKit UIImage into a Core Image representation    // which Vision and Core Image APIs operate on.    guard let ciImage = CIImage(image: uiImage) else {      print("❌ Failed to create CIImage from UIImage.")      return nil    }
    // 1️⃣ Create the Vision request that produces foreground instance masks.    //    Each “instance” represents one segmented subject (e.g., person, pet, object).    let request = VNGenerateForegroundInstanceMaskRequest()
    // 2️⃣ Create a Vision request handler that can process our image.    //    VNImageRequestHandler wraps the input image and orchestrates the request execution.    let handler = VNImageRequestHandler(ciImage: ciImage)
    do {      // 3️⃣ Perform the Vision request synchronously.      //    This will analyze the image and populate `request.results`.      try handler.perform([request])
      // 4️⃣ Retrieve the segmentation results.      //    We only handle the first result because each request can return multiple.      guard let result = request.results?.first else {        print("❌ No mask results returned by Vision.")        return nil      }
      // 5️⃣ Merge all detected instances into one combined alpha mask.      //    This creates a single-channel image (grayscale) that encodes      //    the combined “foreground subject” region.      //      //    You can also choose to keep only specific instances (e.g., top confidence).      let mergedMask = try result.generateScaledMaskForImage(        forInstances: result.allInstances, // all detected subjects        from: handler                       // reference to the original image handler      )
      // 6️⃣ Convert the mask’s pixel buffer into a CIImage for compositing.      let maskCIImage = CIImage(cvPixelBuffer: mergedMask)
      // 7️⃣ Blend the original image over a transparent background using the mask.      //    This step is handled by a Core Image filter in `composite(ciImage:alphaMask:)`.      return composite(ciImage: ciImage, alphaMask: maskCIImage)
    } catch {      // If Vision throws an error (invalid image, unsupported format, etc.)      print("❌ Vision background removal failed: \(error.localizedDescription)")      return nil    }  }
  // MARK: - Core Image compositing
  /// Composites the original image over a transparent background,  /// using the segmentation mask as the alpha channel.  ///  /// - Parameters:  ///   - ciImage: The source image as a CIImage.  ///   - alphaMask: The grayscale mask from Vision,  ///                where white = subject (fully visible) and black = background (transparent).  /// - Returns: A UIImage with the background removed.  private static func composite(ciImage: CIImage, alphaMask: CIImage) -> UIImage? {
    // Vision’s mask output might not match the original image size.    // Here, we scale it to align perfectly with the input image dimensions.    let scaleX = ciImage.extent.width / alphaMask.extent.width    let scaleY = ciImage.extent.height / alphaMask.extent.height    let resizedMask = alphaMask.transformed(by: CGAffineTransform(scaleX: scaleX, y: scaleY))
    // Core Image needs a rendering context for filter operations.    // The CIContext can reuse GPU/CPU resources for faster repeated processing.    let context = CIContext()
    // 1️⃣ Create a Core Image filter to composite the subject over transparency.    //    `CIBlendWithMask` takes three images:    //    - inputImage: the content we want to keep (our photo)    //    - backgroundImage: what’s behind it (transparent color)    //    - maskImage: controls per-pixel opacity (white=opaque, black=transparent)    let filter = CIFilter.blendWithMask()
    // Provide the three required inputs.    filter.inputImage = ciImage    filter.backgroundImage = CIImage(color: .clear).cropped(to: ciImage.extent)    filter.maskImage = resizedMask
    // 2️⃣ Render the filtered output into a new CGImage.    guard      let output = filter.outputImage,      let cg = context.createCGImage(output, from: output.extent)    else {      print("❌ Failed to create CGImage from composited output.")      return nil    }
    // 3️⃣ Convert the rendered CGImage back into a UIImage    //     that can be displayed or saved in UIKit-based workflows.    return UIImage(cgImage: cg, scale: UIScreen.main.scale, orientation: .up)  }}