Let users add images from their device into the editor. Register an upload-capable asset source, surface it in the asset library with an “+ Add” button, and post-process each file with the onUpload handler before it appears.
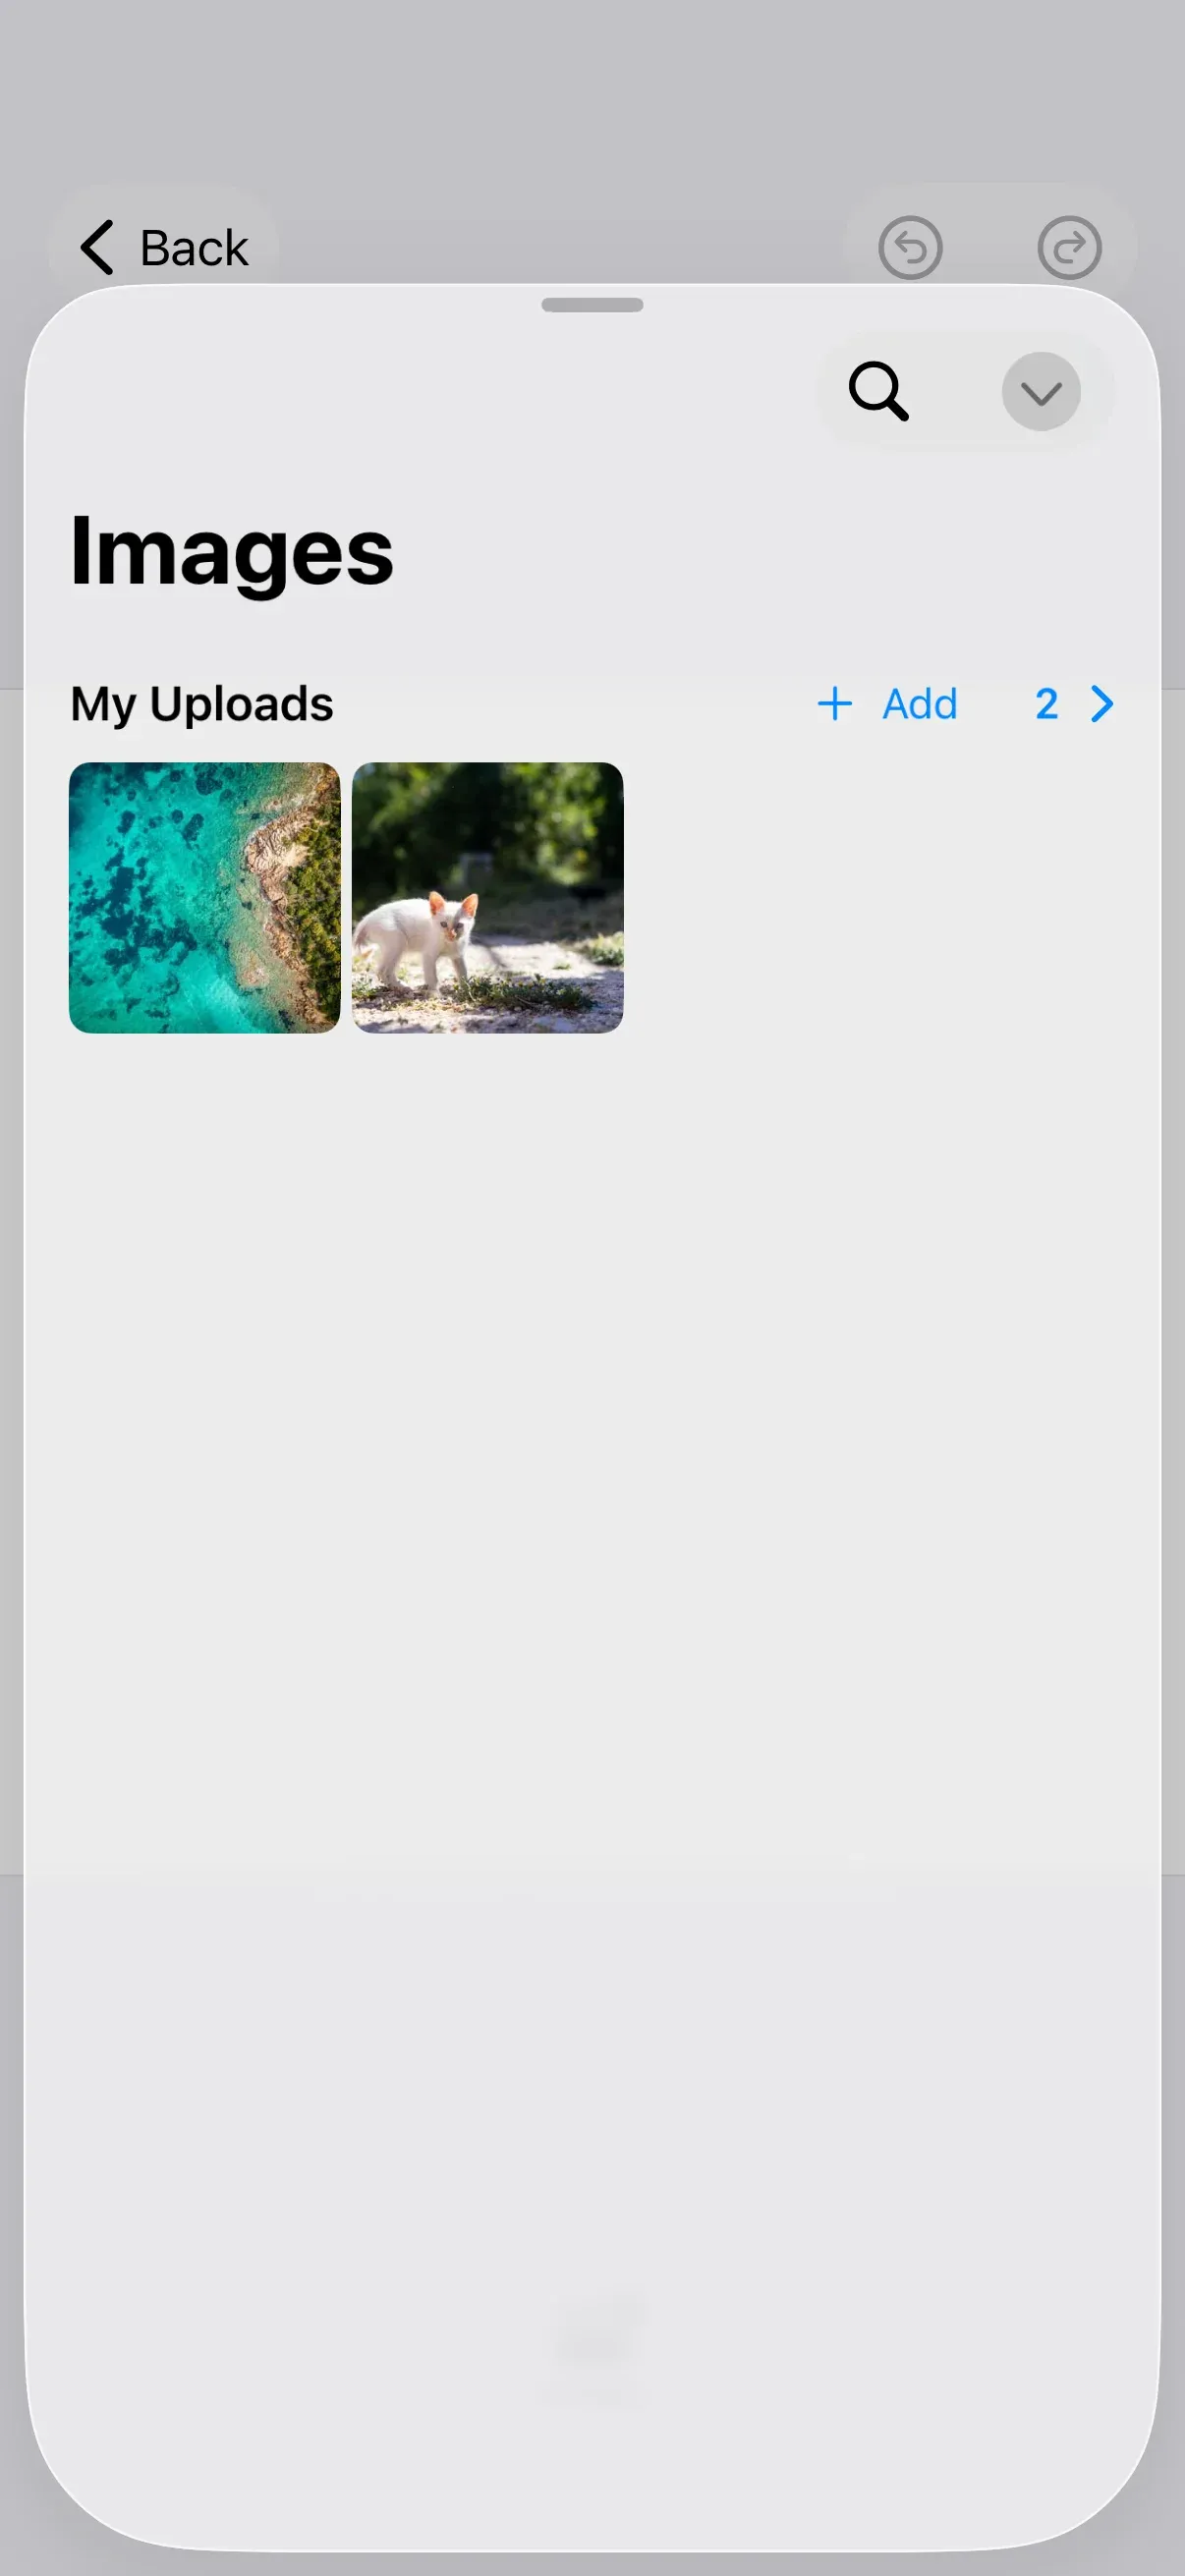
User uploads flow through the editor’s asset library. An .imageUpload (or .videoUpload / .audioUpload) section shows an “+ Add” button that opens the system picker, camera, or Files app. When the user selects a file, the editor creates an AssetDefinition for it, passes it to your onUpload handler, and adds the returned asset to the section’s source.
This guide builds on GuideEditorConfiguration, a small helper class the iOS guides repository ships as a minimal baseline. Substitute your own editor configuration class—the onCreate, assetLibrary, dock, and onUpload builders are available on every configuration. The Configuration guide covers how EditorConfiguration and EngineSettings set up the editor as a whole, and the Asset Library Basics guide covers the source–library–dock layering this guide extends.
Register the Upload Source#
Register a local source in the configuration’s onCreate callback, where the engine is available before the editor presents its UI. Pass supportedMimeTypes to record the file types this source accepts. The upload button itself comes from the .imageUpload section you add in the next step.
// Register a local source for image uploads. These are the image// formats CE.SDK renders on iOS, matching the SDK's built-in image// upload source. (The photo picker delivers HEIC/HEIF photos as// JPEG, so they need no entry here.)try engine.asset.addLocalSource( sourceID: Self.uploadSourceID, supportedMimeTypes: [ "image/jpeg", "image/png", "image/svg+xml", "image/gif", "image/apng", "image/bmp", ],)The system photo picker offers all images (or all videos for a video source), so supportedMimeTypes doesn’t narrow what the picker shows. To restrict finer file types—or validate by size, dimensions, or content—inspect the file in the onUpload handler below and throw to reject it.
Show Uploads in the Asset Library#
The asset library decides which categories (tabs) appear and which sections sit inside them. Use categories to define the library explicitly, and back a section with .imageUpload(id:title:source:) so it renders the “+ Add” button on top of the source’s existing assets. The source ID must match the sourceID you registered above. The button’s Take Photo option opens the camera, which needs the permission key covered in Camera Permission.
// Surface the upload source in the Images tab. `.imageUpload` renders// the "+ Add" button that opens the system picker, camera, or Files.builder.assetLibrary { assetLibrary in assetLibrary.categories([ .init( id: AssetLibraryCategory.ID.images, title: .imgly.localized("ly_img_editor_asset_library_title_images"), icon: Image(systemName: "photo"), sections: [ .imageUpload( id: "my-uploads-section", title: "My Uploads", source: .init(id: Self.uploadSourceID), ), ], ), ])}categories replaces the editor’s default library, so include every category your app needs. To add an upload section to the default categories instead, use assetLibrary.modify { … }. For tab ordering and fully custom libraries, see Customize the Asset Library.
Add the images dock button so users can reach the library. GuideEditorConfiguration starts with an empty dock, so dock.items sets the complete list—include every button your app needs.
// Add the images dock button so users can open the library.builder.dock { dock in dock.items { _ in Dock.Buttons.imagesLibrary() }}Handle Uploads with onUpload#
No matter which entry point the user picks—photo picker, camera, or Files—the editor calls onUpload with an AssetDefinition before adding it to the source. The handler receives the engine, the sourceID that initiated the upload, the asset, and an existing closure that forwards the asset through any other registered handlers.
AssetDefinition is immutable, so build a new one to change it. This handler keeps the upload’s own label, tags each file so it stays searchable, and calls persistUpload to move the file into permanent storage—the helper is shown in the next section.
builder.onUpload { _, sourceID, asset, existing in var meta = asset.meta ?? [:] if let persistedURI = try persistUpload(asset.meta?["uri"], sourceID: sourceID) { meta["uri"] = persistedURI // Persist the thumbnail too. Reuse the copy when it points at the same // file as the media; otherwise copy it separately so the library keeps a // light preview instead of decoding the full-size image. if asset.meta?["thumbUri"] == asset.meta?["uri"] { meta["thumbUri"] = persistedURI } else if let persistedThumb = try persistUpload(asset.meta?["thumbUri"], sourceID: sourceID) { meta["thumbUri"] = persistedThumb } } let updated = AssetDefinition( id: asset.id, groups: asset.groups, meta: meta, payload: asset.payload, label: asset.label, tags: ["en": ["upload"]], ) return try await existing(updated)}Without an onUpload handler, the editor adds the asset to the source and inserts it onto the canvas using the temporary file URI it created—which may be gone the next time the app launches. Persisting the file in the handler is what keeps uploads around; the next section covers persistUpload. Use the sourceID to branch when several upload sources share one handler.
Persist Uploaded Assets#
The AssetDefinition the editor hands you references the selected file in temporary storage. To make an upload reappear on the next launch, copy the file into a directory your app owns—or send it to your server—and point meta["uri"] at the permanent location before returning.
/// Copies a local file out of temporary storage into the app's Documents directory/// so it survives across launches, returning the new file URL string. Returns `nil`/// for anything that isn't a local file — an already-remote asset needs no copy.private func persistUpload(_ uri: String?, sourceID: String) throws -> String? {  guard let uri, let sourceURL = URL(string: uri), sourceURL.isFileURL else { return nil }
  let uploadsDirectory = try FileManager.default    .url(for: .documentDirectory, in: .userDomainMask, appropriateFor: nil, create: true)    .appendingPathComponent("cesdk-uploads/\(sourceID)", isDirectory: true)  try FileManager.default.createDirectory(at: uploadsDirectory, withIntermediateDirectories: true)
  let fileExtension = sourceURL.pathExtension.isEmpty ? "jpg" : sourceURL.pathExtension  let destination = uploadsDirectory    .appendingPathComponent(UUID().uuidString)    .appendingPathExtension(fileExtension)  try FileManager.default.copyItem(at: sourceURL, to: destination)  return destination.absoluteString}
Store the returned definition’s metadata alongside the file—in UserDefaults, a database, or your backend—and re-register each saved asset with engine.asset.addAsset(to:asset:) in onCreate on startup. onUpload is async, so run large copies or network transfers with await and keep your own progress UI in your app; the handler reports no progress of its own. Replace the local copy with your storage client’s upload call to return a permanent CDN or backend URL instead.
Camera Permission#
The upload “+ Add” menu includes a Take Photo option that opens the system camera. Add NSCameraUsageDescription to your app’s Info.plist, or iOS terminates the app the first time a user taps it:
<key>NSCameraUsageDescription</key><string>Allow access to the camera to add photos to your designs.</string>The photo picker and Files options need no usage-description key.
API Reference#
Methods#
| Method | Description |
|---|---|
engine.asset.addLocalSource(sourceID:supportedMimeTypes:) |
Register a local source; supportedMimeTypes records the file types the source accepts. |
engine.asset.addAsset(to:asset:) |
Add an AssetDefinition to a registered source (used to seed or re-register persisted uploads). |
builder.assetLibrary { assetLibrary in … } |
Enter asset library configuration on the editor configuration builder. |
assetLibrary.categories([…]) |
Define the library’s categories explicitly (replaces the editor defaults). |
assetLibrary.modify { categories in … } |
Adjust the editor’s default categories instead of replacing them. |
AssetLibrarySection.imageUpload(id:title:source:) |
An image section that shows the “+ Add” upload button, backed by an asset source ID. |
builder.dock { dock in … } |
Enter dock configuration on the editor configuration builder. |
Dock.Buttons.imagesLibrary() |
Predefined dock button that opens the images tab of the asset library. |
builder.onUpload { engine, sourceID, asset, existing in … } |
Transform each uploaded AssetDefinition before it is added to its source. |
AssetDefinition(id:groups:meta:payload:label:tags:) |
Construct an asset definition; the type is immutable, so build a new one to change a field. |
Troubleshooting#
- Upload button not visible: The section must be an
.imageUpload(or.videoUpload/.audioUpload) section, and itssourceID must match a source you registered withaddLocalSource. - App crashes on “Take Photo”: Add
NSCameraUsageDescriptiontoInfo.plist. Without it, iOS terminates the app when the camera opens. - Uploads disappear after relaunch: Files start in temporary storage. Persist them to your Documents directory or backend and re-register the saved definitions on startup.
- Picker offers a file type you don’t want: The system picker filters only by broad media type (all images or all videos), so validate finer file types inside the
onUploadhandler and throw to reject anything unsupported. - iCloud-backed photos load slowly: Some files download from iCloud first. Do the copy or upload with
awaitand surface progress in your own UI.
Next Steps#
- Import From Remote Source - Connect the editor to server-backed or third-party asset sources.
- Customize the Asset Library - Change library tabs, sections, and source ordering for your editor.