CE.SDK treats all insertable content as assets—images, videos, audio, stickers, shapes, templates, and text presets flow through a unified asset system. The asset library is the editor UI that lets users browse and insert that content.
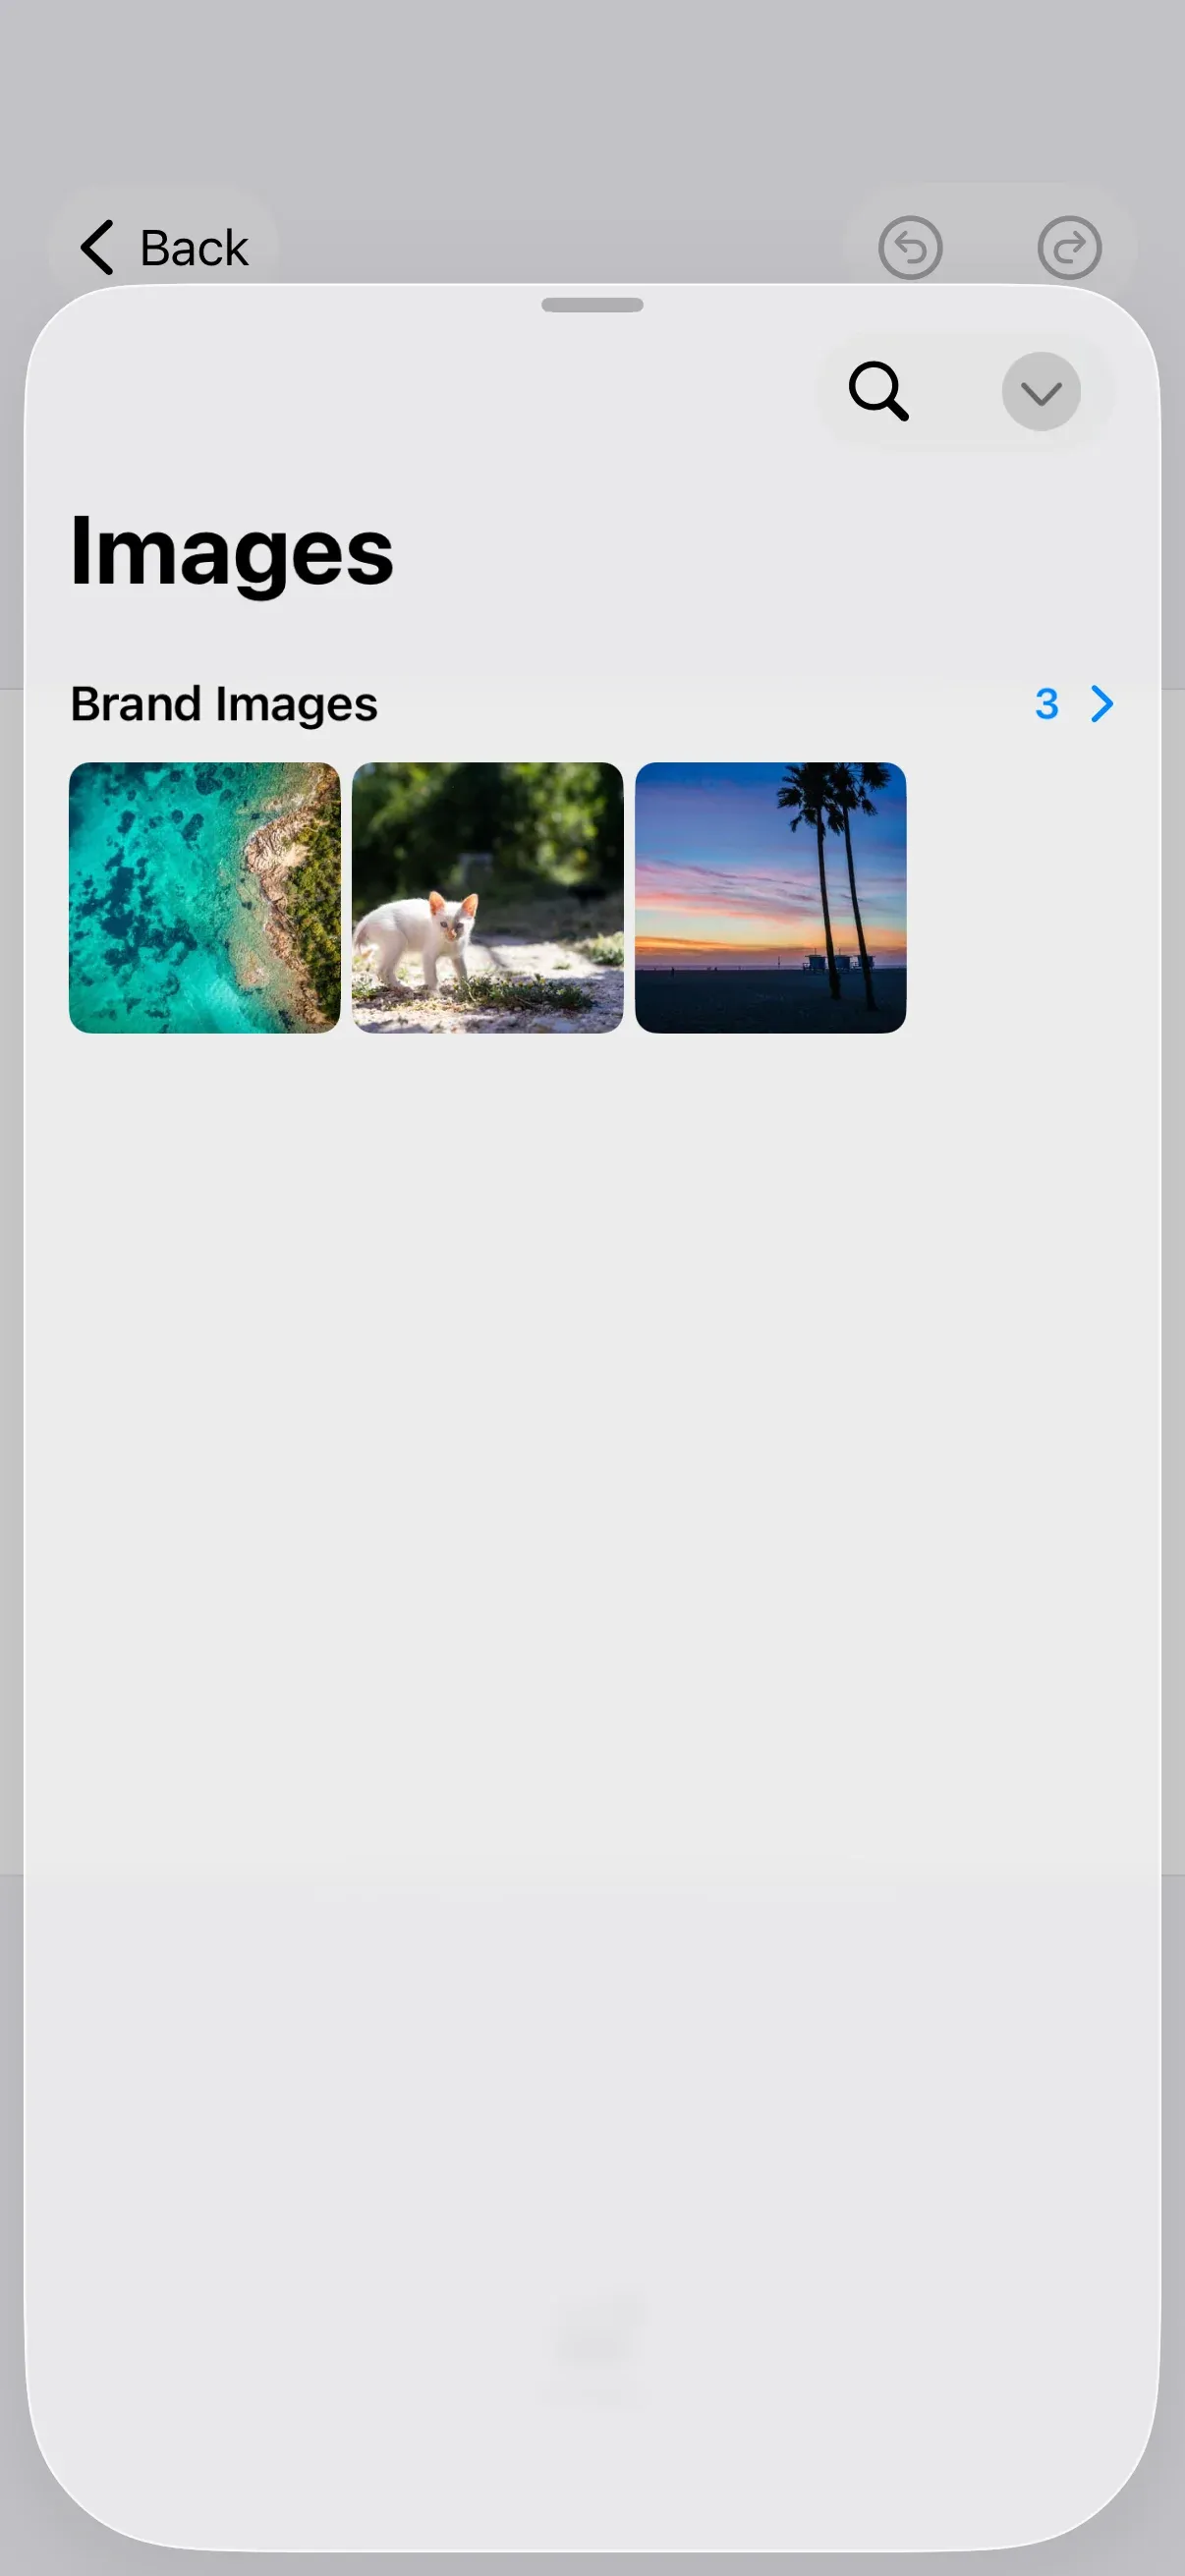
The asset library connects the engine to the editor UI through three layers:
┌─────────────────────────────────────────────────────────────┐│ Editor UI ││ ┌─────────────┐ opens a tab of ┌──────────────────────┐ ││ │ Dock Button │ ───────────────▶ │ Asset Library │ ││ │ │ │ (categories) │ ││ └─────────────┘ └──────────┬───────────┘ ││ │ queries │├──────────────────────────────────────────────│──────────────┤│ Engine ▼ ││ ┌──────────────────────┐ ││ │ Asset Source │ ││ │ (engine.asset) │ ││ └──────────────────────┘ │└─────────────────────────────────────────────────────────────┘You configure all three layers on the same EditorConfiguration builder—the same place you configure the dock, navigation bar, inspector bar, and canvas menu. The Configuration guide covers how EditorConfiguration and EngineSettings set up the editor as a whole.
The example wraps the editor in GuideEditorConfiguration, a small helper class the iOS guides repository ships as a minimal baseline. Substitute your own editor configuration class—the onCreate, assetLibrary, and dock builders are available on every configuration, so the rest of the calls stay the same.
This guide covers:
- Registering an asset source with the engine
- Surfacing that source in the asset library UI
- Adding a dock button so users can open the library
Layer 1: Asset Source#
Asset sources are the data layer—they provide the assets the library displays and handle insertion into the scene. Register them on the engine. The example uses engine.asset.addLocalSource(sourceID:) to create an in-memory source, then engine.asset.addAsset(to:asset:) to populate it with a few images.
Register asset sources in the configuration’s onCreate callback, where the engine is available before the editor presents its UI.
let sourceID = "brand-images"try engine.asset.addLocalSource(sourceID: sourceID)
// Borrow a few images from CE.SDK's bundled `ly.img.image` content,// resolving them against the engine's `basePath` setting (initialized// from `EngineSettings.baseURL`) so they follow your asset host. You// could register a whole source from a manifest with// `addLocalAssetSourceFromJSON`; the assets are added one by one here// to keep the mechanics explicit.let basePath = try engine.editor.getSettingString("basePath")let images = [  (id: "sample-1", label: "Sample 1", fileName: "sample_1.jpg", width: "2500", height: "1667"),  (id: "sample-2", label: "Sample 2", fileName: "sample_2.jpg", width: "2500", height: "1667"),  (id: "sample-3", label: "Sample 3", fileName: "sample_3.jpg", width: "1667", height: "2500"),]for image in images {  try engine.asset.addAsset(    to: sourceID,    asset: AssetDefinition(      id: image.id,      meta: [        "uri": "\(basePath)/ly.img.image/images/\(image.fileName)",        "thumbUri": "\(basePath)/ly.img.image/thumbnails/\(image.fileName)",        // `fillType` makes the inserted block an image fill (the engine        // would otherwise default to a solid color); `width`/`height`        // set the aspect ratio before the image finishes loading.        "fillType": "//ly.img.ubq/fill/image",        "width": image.width,        "height": image.height,      ],      label: ["en": image.label],    ),  )}
The example borrows a few images from CE.SDK’s bundled ly.img.image asset content. Each AssetDefinition carries the full-size uri, a smaller thumbUri for the library preview (the engine ships matching thumbnails under ly.img.image/thumbnails/), a fillType so the inserted block gets an image fill, and the source width/height so the block is added at the right aspect ratio before the image finishes downloading. Only uri is strictly required—the engine defaults the block to a graphic and can sniff the type from the data—but fillType (otherwise the fill defaults to a solid color) and width/height give the correct result without an extra round trip. Both URIs are resolved against the engine’s basePath setting—initialized from EngineSettings(baseURL:)—so they follow whatever asset host you configure. The sourceID you choose here ("brand-images") is the handle the asset library uses to reference this source in the next layer.
Adding assets one by one keeps the mechanics explicit. To register an entire source from a manifest instead, use engine.asset.addLocalAssetSourceFromJSON(_:) with a content.json.
For more on creating asset sources, including custom AssetSource implementations and the asset metadata schema, see Asset Concepts.
Layer 2: Asset Library#
The asset library is the UI definition that decides how sources are presented—which categories (the tabs in the library) appear and which sections sit inside them. Configure it on the assetLibrary builder. Use categories to define the library’s categories explicitly.
builder.assetLibrary { assetLibrary in assetLibrary.categories([ .init( id: AssetLibraryCategory.ID.images, title: .imgly.localized("ly_img_editor_asset_library_title_images"), icon: Image(systemName: "photo"), sections: [ .image(id: "brand-images", title: "Brand Images", source: .init(id: "brand-images")), ], ), ])}Each AssetLibraryCategory becomes a tab, and its sections hold the rows of assets. .image(id:title:source:) adds a section that queries the source registered in Layer 1—the id passed to source: must match the sourceID used with addLocalSource. Using AssetLibraryCategory.ID.images as the category id ties it to the images dock button in Layer 3.
To add a section to the editor’s default categories instead of replacing them, use assetLibrary.modify { … }. For tab ordering, building a fully custom library, and the rest of the configuration surface, see Customize.
Layer 3: Dock#
The dock is the bottom toolbar where users reach content libraries. The example adds Dock.Buttons.imagesLibrary() and writes out its default action to show how the dock connects to the library.
builder.dock { dock in dock.items { _ in // `imagesLibrary()` needs no arguments; its default action is written // out here to show how the dock reaches the UI. Tapping it sends an // `openSheet` event whose content is `context.assetLibrary.imagesTab` — // the images tab of the library from Layer 2 — surfacing "Brand Images". Dock.Buttons.imagesLibrary(action: { context in context.eventHandler.send(.openSheet(type: .libraryAdd { context.assetLibrary.imagesTab })) }) }}When tapped, the button sends an openSheet event whose content is context.assetLibrary.imagesTab—the images tab of the asset library you configured in Layer 2. This is the link that ties the three layers together: the dock action opens the library (Layer 2), which in turn queries the asset source (Layer 1). context.assetLibrary is the resolved library, so the sheet shows the “Brand Images” section and its images.
action is the customization hook every predefined button exposes—alongside title, icon, isEnabled, and isVisible—so you can adapt any button in the dock. It’s where you change what a button does: the example passes imagesLibrary’s default action verbatim to make the link visible, but you would override it to send the user somewhere else, such as a different tab or a custom sheet. dock.items sets the complete list of dock buttons, so include every button your app needs. To open the full asset library instead of a single tab, use Dock.Buttons.assetLibrary(). The Dock guide covers customizing these parameters and the full set of available buttons.
Managing Asset Sources#
Inspect which sources are registered with engine.asset.findAllSources(), which returns the IDs of every source the asset library can query. Use engine.asset.removeSource(sourceID:) to unregister one.
let registeredSources = engine.asset.findAllSources()print("Registered asset sources:", registeredSources)API Reference#
Methods#
| Method | Description |
|---|---|
engine.asset.addLocalSource(sourceID:) |
Register an in-memory asset source the editor can populate at runtime. |
engine.asset.addAsset(to:asset:) |
Add an AssetDefinition to a registered source. |
engine.asset.findAllSources() |
List the IDs of all registered asset sources. |
engine.asset.removeSource(sourceID:) |
Unregister an asset source. |
builder.assetLibrary { assetLibrary in … } |
Enter asset library configuration on the editor configuration builder. |
assetLibrary.categories([…]) |
Define the library’s categories explicitly (replaces the editor defaults). |
assetLibrary.modify { categories in … } |
Adjust the editor’s default categories instead of replacing them. |
AssetLibraryCategory(id:title:icon:sections:) |
A category (tab) holding asset sections. |
AssetLibrarySection.image(id:title:source:) |
A titled image section backed by an asset source ID. |
builder.dock { dock in … } |
Enter dock configuration on the editor configuration builder. |
Dock.Buttons.imagesLibrary() |
Predefined dock button that opens the images tab of the asset library. |
Next Steps#
- Customize — Tabs, custom libraries, and asset library builders.
- Thumbnails — Configure thumbnail images and previews for assets in the asset library.
- Refresh Assets — Trigger asset reloads when source content changes.
- Asset Concepts — Create and configure engine-level asset sources.