CE.SDK controls editing access through roles and scopes, enabling template workflows where designers create locked layouts and end-users customize only permitted elements.
CE.SDK uses a two-tier permission system: roles define user types with preset permissions, while scopes control specific capabilities. This enables workflows where templates can be prepared by designers and safely customized by end-users.
This guide covers:
- The four user roles and their purposes
- How scopes control editing capabilities
- The permission resolution hierarchy
- Common template workflow patterns
Roles#
Roles define user types with different default permissions:
| Role | Purpose | Default Access |
|---|---|---|
| Creator | Designers building templates | Full access to all operations |
| Adopter | End-users customizing templates | Limited by block-level scopes |
| Viewer | Preview-only users | Read-only access |
| Presenter | Slideshow/video presenters | Read-only with playback controls |
Creators set the block-level scopes that constrain what Adopters can do. This separation enables brand consistency while allowing personalization.
// Roles define user types: 'Creator', 'Adopter', 'Viewer', 'Presenter'const role = engine.editor.getRole();console.log('Current role:', role); // 'Creator'Scopes#
Scopes define specific capabilities organized into categories:
- Text: Editing content and character formatting
- Fill/Stroke: Changing colors and shapes
- Layer: Moving, resizing, rotating, cropping
- Appearance: Filters, effects, shadows, animations
- Lifecycle: Deleting and duplicating elements
- Editor: Adding new elements and selecting
Global vs Block-Level Scopes#
Global scopes apply editor-wide and determine whether block-level settings are checked:
'Allow'— Always permit the operation'Deny'— Always block the operation'Defer'— Check block-level scope settings
Block-level scopes control permissions on individual blocks. These settings only take effect when the corresponding global scope is set to 'Defer'.
// Configure scopes when role changes (role change resets to defaults)engine.editor.onRoleChanged(() => { // Set global scopes to 'Defer' so block-level scopes take effect engine.editor.setGlobalScope('editor/select', 'Defer'); engine.editor.setGlobalScope('layer/move', 'Defer'); engine.editor.setGlobalScope('text/edit', 'Defer'); engine.editor.setGlobalScope('lifecycle/destroy', 'Defer');});To lock a specific block, disable its scopes:
// Lock the block - Adopters cannot select, edit, or move itengine.block.setScopeEnabled(lockedText, 'editor/select', false);engine.block.setScopeEnabled(lockedText, 'text/edit', false);engine.block.setScopeEnabled(lockedText, 'layer/move', false);engine.block.setScopeEnabled(lockedText, 'lifecycle/destroy', false);Permission Resolution#
Permissions resolve in this order:
- Role defaults — Each role has preset global scope values
- Global scope — If
'Allow'or'Deny', this is the final answer - Block-level scope — If global is
'Defer', check the block’s settings
Use isAllowedByScope() to check the final computed permission for any block and scope combination:
// Check resolved permissions (role + global + block scopes)const canEditLocked = engine.block.isAllowedByScope( lockedText, 'text/edit');const canEditEditable = engine.block.isAllowedByScope( editableText, 'text/edit');// As Creator: both return true (Creators bypass restrictions)console.log( 'Can edit locked:', canEditLocked, 'Can edit editable:', canEditEditable);Template Workflow Pattern#
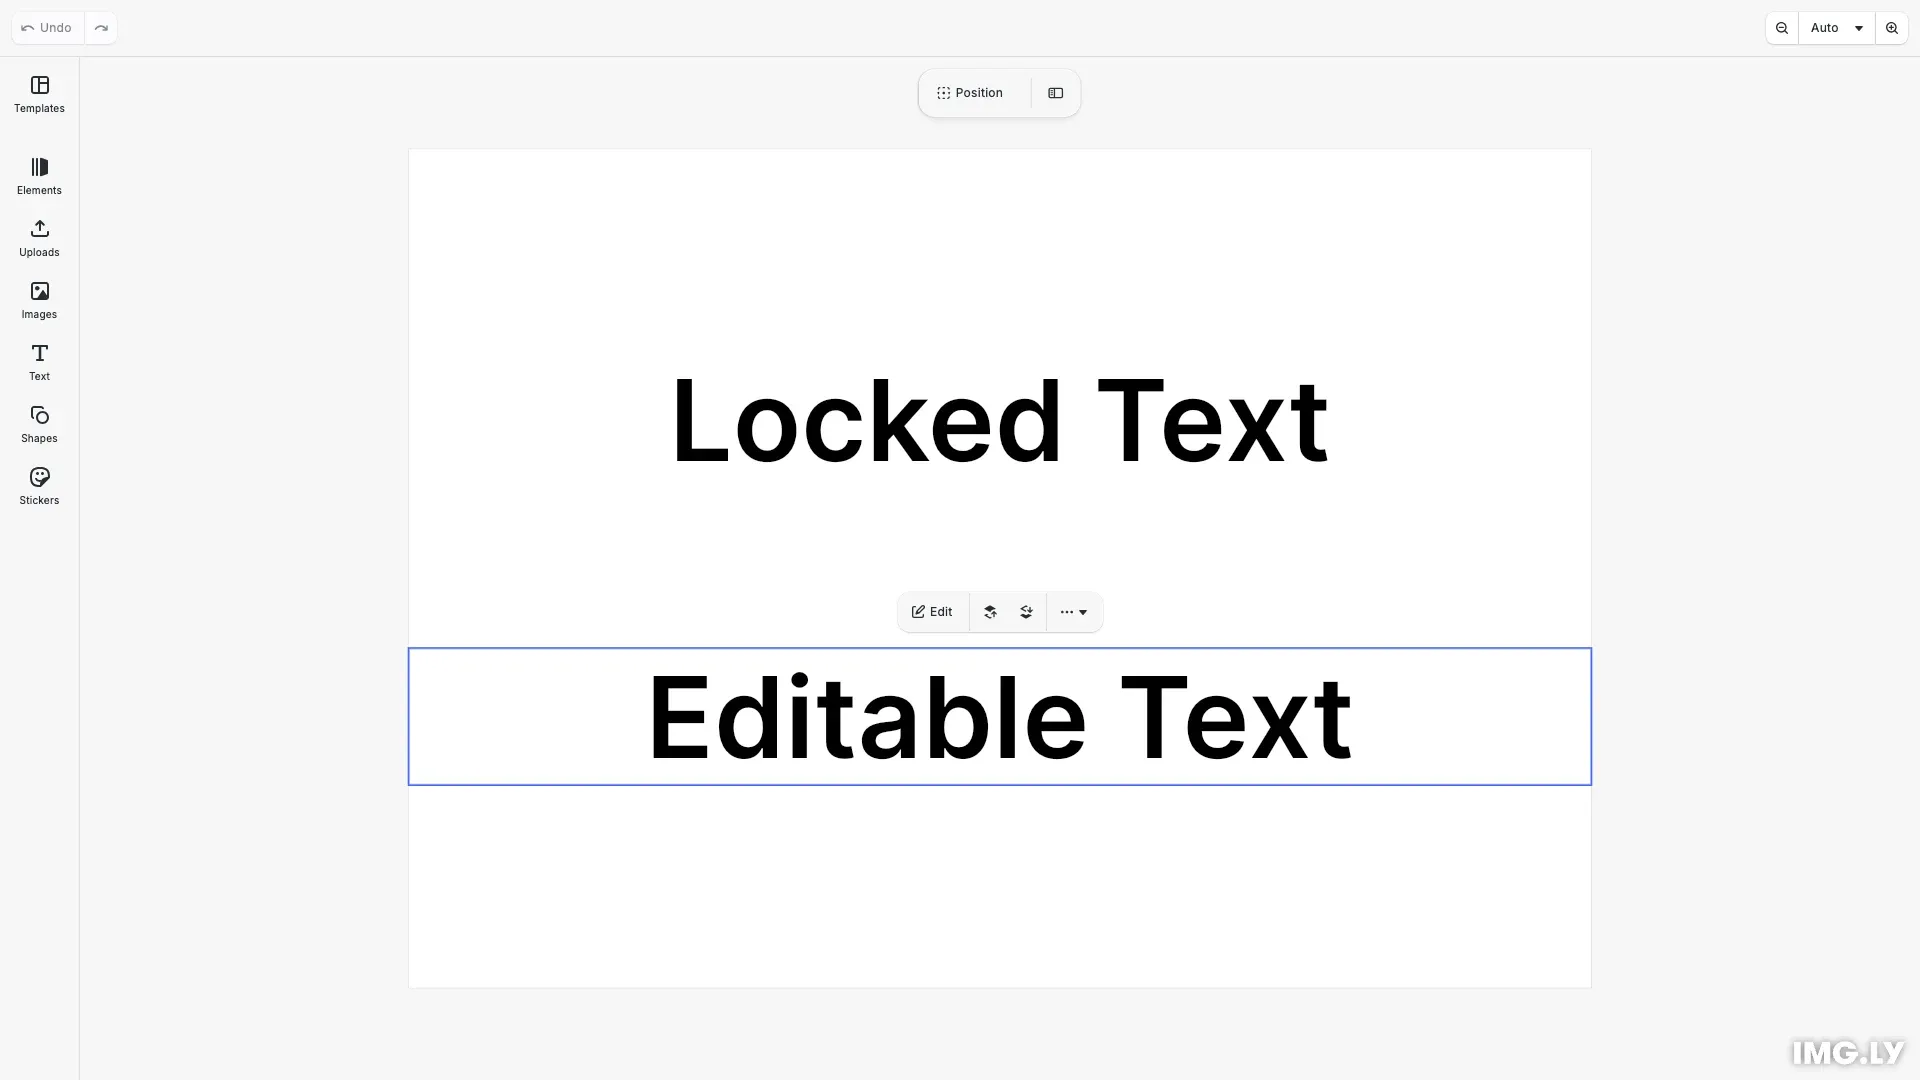
A typical template workflow:
- Designer (Creator) creates the template layout
- Designer locks brand elements using block scopes
- Designer keeps personalization fields editable
- End-user (Adopter) opens the template
- End-user edits only permitted elements
- End-user exports the personalized result
This pattern ensures brand consistency while enabling personalization.
Implementation Guides#
For detailed implementation, see these guides:
Lock Design Elements — Step-by-step instructions for locking specific elements in templates
Set Editing Constraints — Configure which properties users can modify