Extend CE.SDK with one-click editing actions using official plugins for background removal, vectorization, QR codes, and cutouts.
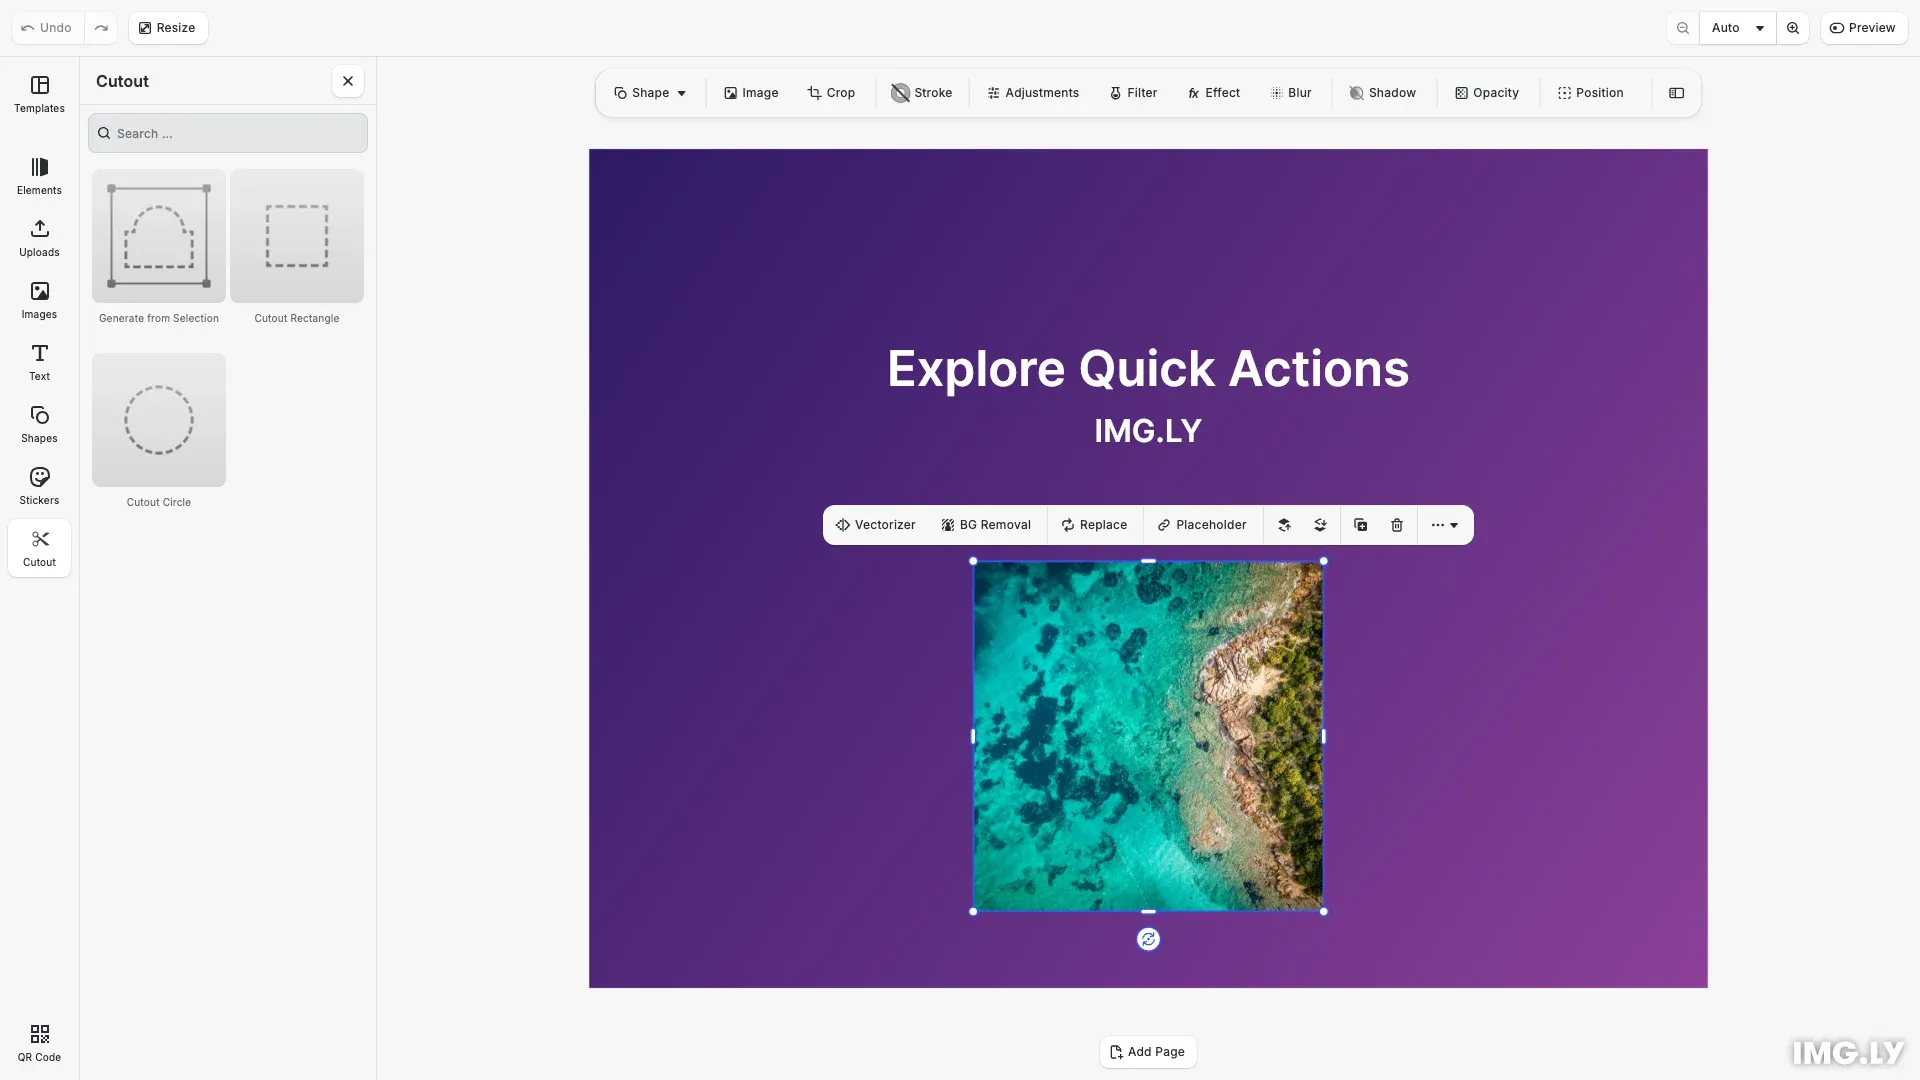
Quick actions are single-click operations that appear in the canvas menu when users select a block. CE.SDK provides official plugins that add image processing capabilities like background removal, vectorization, and QR code generation. These plugins integrate directly with the editor UI and execute their operations immediately when clicked.
This guide demonstrates how to install and configure quick action plugins, add asset libraries to the dock, and optimize plugin loading for production use.
Plugin Overview#
This guide covers four official plugins that extend CE.SDK with quick actions:
| Plugin | Use Case |
|---|---|
| Background Removal | Remove backgrounds from product photos |
| Vectorizer | Convert logos to scalable vectors |
| QR Code | Generate trackable QR codes for marketing |
| Cutout Library | Add die-cut shapes for print production |
Adding Quick Action Plugins#
Each plugin adds a button to the canvas menu that appears when users select compatible blocks. Install the plugin package, then call cesdk.addPlugin() to register it with the editor.
Installing the Plugins#
The background removal plugin requires onnxruntime-web for its machine learning model. The vectorizer and QR code plugins have no additional dependencies.
npm install @imgly/plugin-background-removal-web @imgly/plugin-vectorizer-web @imgly/plugin-qr-code-web onnxruntime-web@1.21.0yarn add @imgly/plugin-background-removal-web @imgly/plugin-vectorizer-web @imgly/plugin-qr-code-web onnxruntime-web@1.21.0pnpm add @imgly/plugin-background-removal-web @imgly/plugin-vectorizer-web @imgly/plugin-qr-code-web onnxruntime-web@1.21.0Background Removal#
Removes backgrounds from images using AI-powered segmentation. Runs entirely in-browser via WebAssembly.
// Add background removal plugin with canvas menu buttonawait cesdk.addPlugin( BackgroundRemovalPlugin({ ui: { locations: ['canvasMenu'] } }));Vectorization#
Converts raster images to scalable vector graphics. Useful for logos and illustrations that need to scale without quality loss.
// Add vectorizer plugin with canvas menu buttonawait cesdk.addPlugin( VectorizerPlugin({ ui: { locations: 'canvasMenu' } }));QR Code Generation#
Generates QR codes with customizable content and styling.
npm install @imgly/plugin-qr-code-webRegister the plugin:
// Add QR code plugin (adds canvas menu button automatically)await cesdk.addPlugin(QRCodePlugin());Add the generator panel to the dock for creating new codes:
// Add QR code generator to the dockcesdk.ui.setComponentOrder({ in: 'ly.img.dock' }, [ ...cesdk.ui.getComponentOrder({ in: 'ly.img.dock' }), 'ly.img.spacer', 'ly.img.generate-qr.dock']);Adding Cutout Library to Dock#
Provides die-cut shapes for print production workflows like stickers, packaging, and labels.
npm install @imgly/plugin-cutout-library-webRegister the plugin to load the cutout asset source:
// Add cutout library plugin for print workflows (dock only, no canvas menu)await cesdk.addPlugin(CutoutLibraryPlugin());Add the library to the dock using setComponentOrder() with the entry’s icon from getAssetLibraryEntry():
// Add cutout library to the dock for easy accessconst cutoutAssetEntry = cesdk.ui.getAssetLibraryEntry( 'ly.img.cutout.entry');cesdk.ui.setComponentOrder({ in: 'ly.img.dock' }, [ ...cesdk.ui.getComponentOrder({ in: 'ly.img.dock' }), { id: 'ly.img.assetLibrary.dock', label: 'Cutout', key: 'ly.img.assetLibrary.dock', icon: cutoutAssetEntry?.icon, entries: ['ly.img.cutout.entry'] }]);Users can add rectangular or elliptical cutouts, or create custom shapes from paths. Cutout boundaries export as die-cut lines in PDF output.
Performance Best Practices#
Plugins that use machine learning models download their model files on first use. Consider these optimizations when adding multiple plugins:
- Lazy load plugins - Use dynamic
import()to defer loading until the user needs the feature. This reduces initial bundle size and speeds up editor startup. - Preload models during idle time - Call
requestIdleCallback()to initialize plugins after the editor renders. The models cache locally for subsequent operations. - Register plugins in priority order - The canvas menu displays buttons in registration order. Add frequently-used plugins first so their buttons appear in prominent positions.
- Track initialization state - Maintain a boolean flag to prevent adding the same plugin multiple times if your initialization code can run more than once.
Troubleshooting#
Canvas menu button missing - Verify that addPlugin() completes before the scene loads. Plugins register their UI components during initialization.
Background removal slow on first use - The plugin downloads approximately 30MB of model data on first use. Subsequent operations use the cached model.
Cutout shapes not appearing in export - Cutout paths only render in PDF exports. Check that your export configuration includes the PDF format.
Dock entry not visible - Ensure setComponentOrder() runs after the plugin initializes. The asset library entry must exist before it can be added to the dock.
API Reference#
| Method | Description |
|---|---|
cesdk.addPlugin(plugin) | Registers a plugin and runs its initialization |
cesdk.ui.setComponentOrder({ in: 'ly.img.dock' }, order) | Sets which components appear in the dock sidebar |
cesdk.ui.getComponentOrder({ in: 'ly.img.dock' }) | Returns the current dock component configuration |
cesdk.ui.getAssetLibraryEntry(id) | Retrieves an asset library entry by its ID |
cesdk.ui.setComponentOrder({ in: 'ly.img.canvas.menu' }, order) | Sets which components appear in the canvas menu |
cesdk.ui.getComponentOrder({ in: 'ly.img.canvas.menu' }) | Returns the current canvas menu configuration |
Next Steps#
- Remove Background - Configure background removal model and processing options
- Vectorize - Adjust vectorization accuracy and performance settings
- Add a Custom Panel - Build panels for operations that need configuration
- Register a New Component - Create custom UI components for the canvas menu
- Add a Custom Feature - Package functionality into reusable plugins