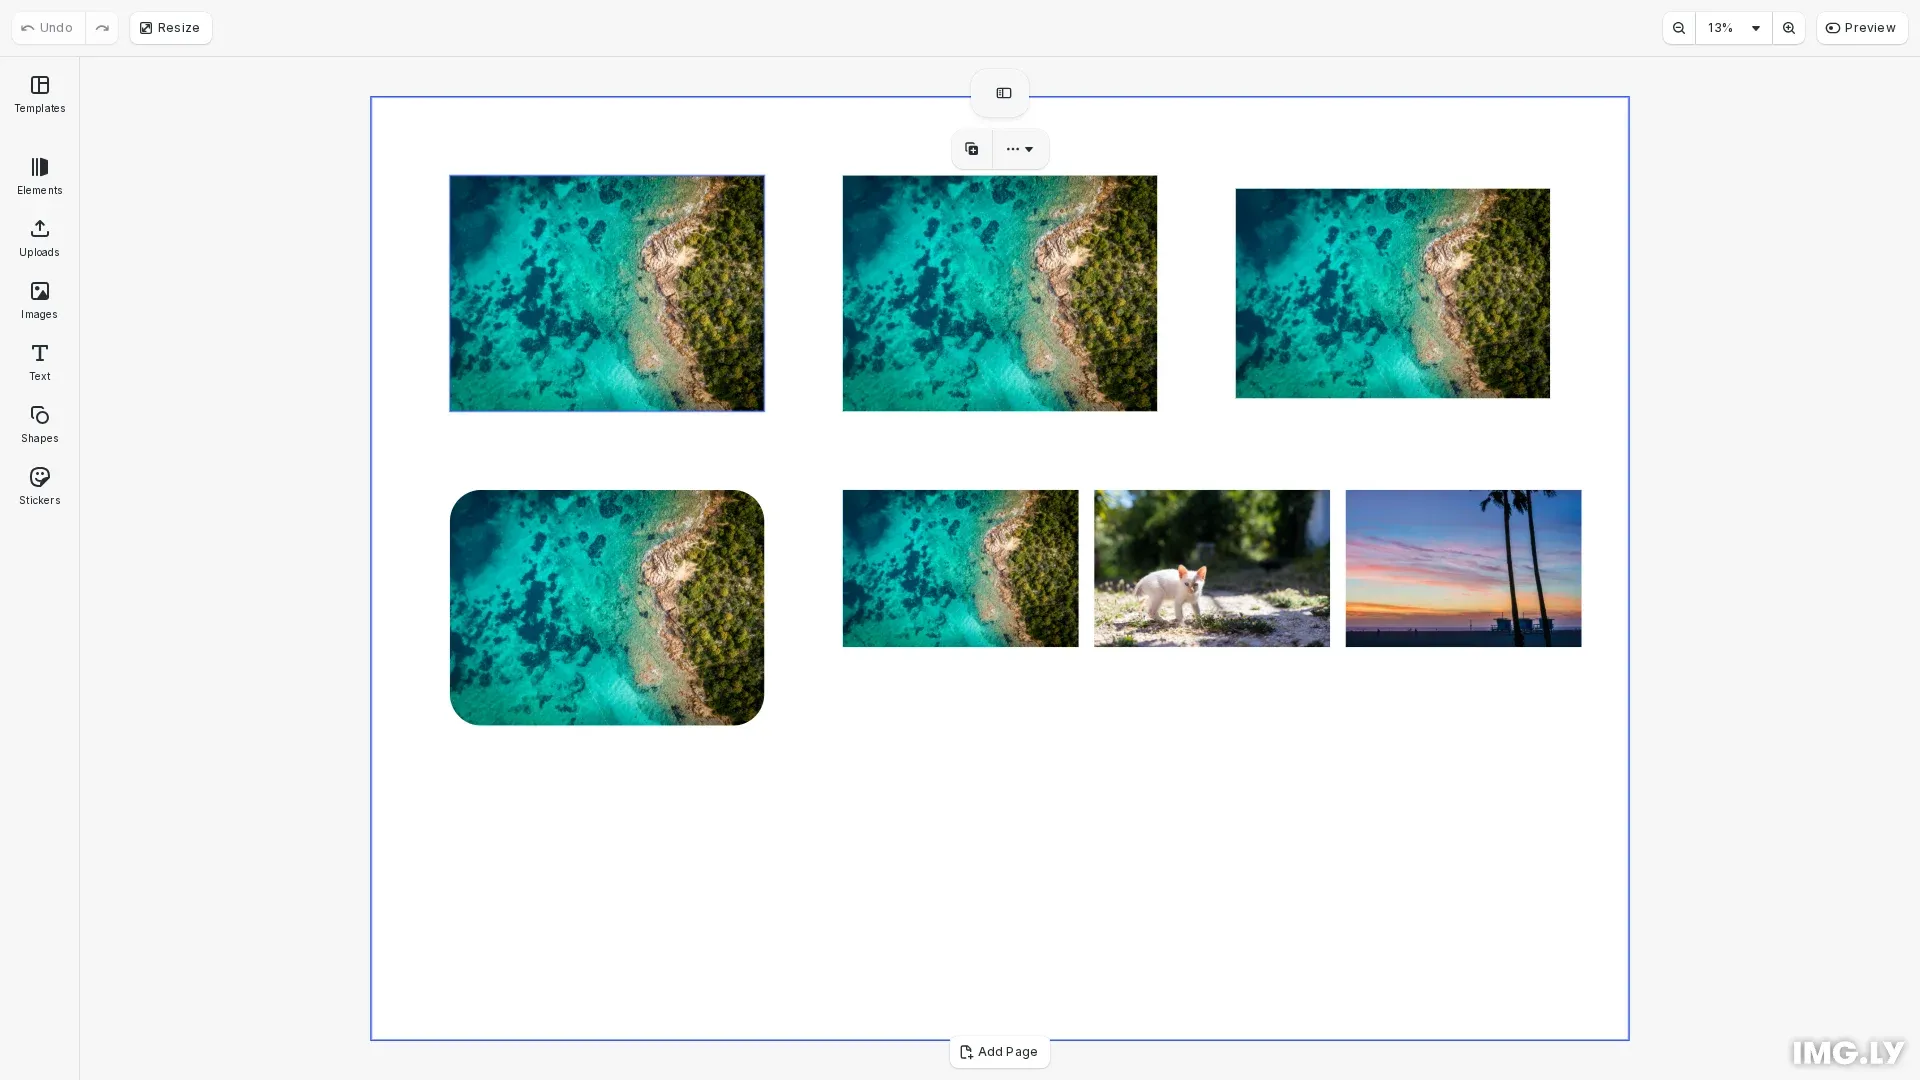
Insert images into your designs programmatically using CE.SDK’s engine API.

Images in CE.SDK are graphic blocks with image fills attached. The engine supports multiple image formats including PNG, JPEG, WebP, GIF, and SVG. You can insert images using either the convenience API for quick setup or manual construction for fine-grained control over the image block components.
This guide covers how to add images using the convenience API, manually construct image blocks, configure content fill modes, apply corner radius, and work with multiple images.
Initialize CE.SDK#
We start by initializing CE.SDK and creating a scene with a page to hold our images.
// Initialize CE.SDK with Design mode and load asset sourcesawait cesdk.addDefaultAssetSources();await cesdk.addDemoAssetSources({  sceneMode: 'Design',  withUploadAssetSources: true});await cesdk.createDesignScene();
const engine = cesdk.engine;const page = engine.block.findByType('page')[0];
// Set page dimensionsengine.block.setWidth(page, 800);engine.block.setHeight(page, 600);
Using the Convenience API#
The addImage() method provides a quick way to insert images. It automatically creates a graphic block with a rect shape and image fill. You can configure size, position, corner radius, and other properties through the options parameter.
// Add an image using the convenience API// This automatically creates a graphic block with rect shape and image fillconst imageBlock = await engine.block.addImage(imageUrl, { size: { width: 200, height: 150 }, x: 50, y: 50});engine.block.appendChild(page, imageBlock);console.log('✓ Added image using convenience API');Manual Image Construction#
For control over individual components, we can manually construct a graphic block with a rect shape and image fill. This approach lets you configure each component separately.
We create a graphic block with create('graphic'), attach a rectangular shape with createShape('rect'), and create an image fill with createFill('image'). The image source is set using setString() with the fill/image/imageFileURI property.
// Manually construct an image block for more controlconst manualBlock = engine.block.create('graphic');
// Create and attach a rectangular shapeconst shape = engine.block.createShape('rect');engine.block.setShape(manualBlock, shape);
// Create and configure the image fillconst fill = engine.block.createFill('image');engine.block.setString(fill, 'fill/image/imageFileURI', imageUrl);engine.block.setFill(manualBlock, fill);
// Set dimensions and positionengine.block.setWidth(manualBlock, 200);engine.block.setHeight(manualBlock, 150);engine.block.setPositionX(manualBlock, 300);engine.block.setPositionY(manualBlock, 50);engine.block.appendChild(page, manualBlock);console.log('✓ Added image using manual construction');
Set Content Fill Mode#
The content fill mode controls how images scale within their bounds. Use setContentFillMode() to choose between different scaling behaviors:
- Contain: Preserves aspect ratio and fits the image within the bounds
- Cover: Preserves aspect ratio and fills the bounds completely
- Crop: Allows custom crop area
Check supportsContentFillMode() before setting to ensure the block supports this feature.
// Set content fill mode to control how images scale within bounds// 'Contain' preserves aspect ratio and fits within bounds// 'Cover' preserves aspect ratio and fills boundsconst containBlock = await engine.block.addImage(imageUrl, {  size: { width: 200, height: 150 },  x: 550,  y: 50});engine.block.appendChild(page, containBlock);
if (engine.block.supportsContentFillMode(containBlock)) {  engine.block.setContentFillMode(containBlock, 'Contain');  console.log('✓ Applied Contain fill mode');}
Apply Corner Radius#
Add rounded corners to image blocks using the cornerRadius option in the convenience API. This creates a visually softer appearance for your images.
// Apply corner radius to create rounded corners on an imageconst roundedBlock = await engine.block.addImage(imageUrl, { size: { width: 200, height: 150 }, x: 50, y: 250, cornerRadius: 20});engine.block.appendChild(page, roundedBlock);console.log('✓ Added image with rounded corners');Working with Multiple Images#
Insert multiple images by iterating over an array of image URLs. Each image gets its own graphic block with calculated positioning to arrange them on the page.
// Insert multiple images with calculated positioningconst imageUrls = [  'https://img.ly/static/ubq_samples/sample_1.jpg',  'https://img.ly/static/ubq_samples/sample_2.jpg',  'https://img.ly/static/ubq_samples/sample_3.jpg'];
for (let i = 0; i < imageUrls.length; i++) {  const block = await engine.block.addImage(imageUrls[i], {    size: { width: 150, height: 100 },    x: 300 + i * 160,    y: 250  });  engine.block.appendChild(page, block);}console.log('✓ Added multiple images');
Next Steps#
After inserting an image, you can:
API Reference#
| Method | Description |
|---|---|
engine.block.addImage(url, options?) | Convenience API to create an image block with automatic setup |
engine.block.create('graphic') | Create a graphic block container for images |
engine.block.createShape('rect') | Create a rectangular shape for the image |
engine.block.setShape(block, shape) | Attach shape to graphic block |
engine.block.createFill('image') | Create an image fill |
engine.block.setFill(block, fill) | Apply fill to block |
engine.block.setString(fill, property, value) | Set image source URI via fill/image/imageFileURI |
engine.block.setWidth(block, width) | Set block width |
engine.block.setHeight(block, height) | Set block height |
engine.block.setPositionX(block, x) | Set horizontal position |
engine.block.setPositionY(block, y) | Set vertical position |
engine.block.supportsContentFillMode(block) | Check if block supports content fill mode |
engine.block.setContentFillMode(block, mode) | Set content fill mode (Contain, Cover, Crop) |
engine.block.appendChild(parent, child) | Add block to parent |