Build compositions entirely through code using CE.SDK’s APIs for automation, batch processing, and custom interfaces.
CE.SDK provides a complete API for building designs through code. Instead of relying on user interactions through the built-in UI, you can create scenes, add blocks like text, images, and shapes, and position them programmatically. This approach enables automation workflows, batch processing, server-side rendering, and integration with custom interfaces.
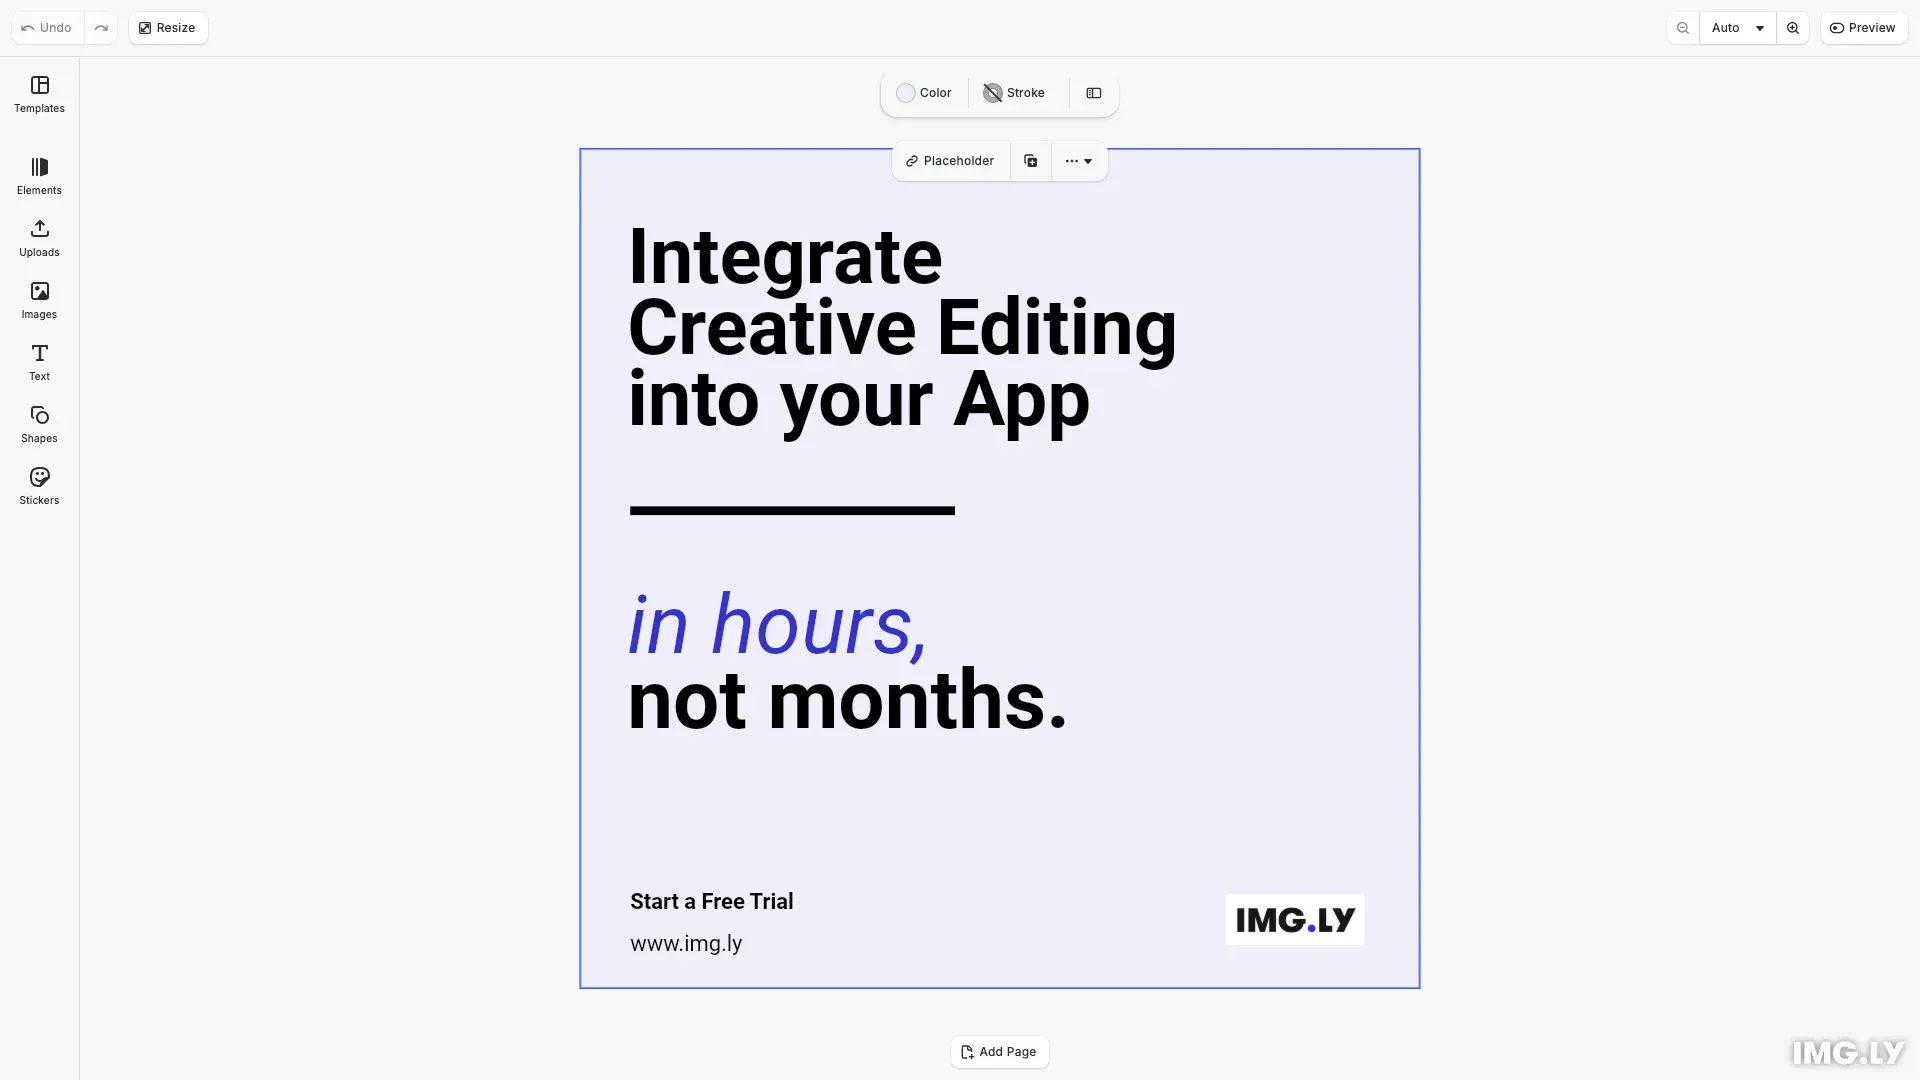
This guide covers how to create a scene structure with social media dimensions, set background colors, add text with mixed styling, line shapes, images, and export the finished composition.
Initialize CE.SDK#
We start by initializing CE.SDK and loading the asset sources. The asset source plugins (imported from @cesdk/cesdk-js/plugins) provide access to fonts, images, and other assets.
await cesdk.addPlugin(new DesignEditorConfig());
// Add asset source pluginsawait cesdk.addPlugin(new BlurAssetSource());await cesdk.addPlugin(new ColorPaletteAssetSource());await cesdk.addPlugin(new CropPresetsAssetSource());await cesdk.addPlugin(new UploadAssetSources({ include: ['ly.img.image.upload'] }));await cesdk.addPlugin(  new DemoAssetSources({    include: [      'ly.img.templates.blank.*',      'ly.img.templates.presentation.*',      'ly.img.templates.print.*',      'ly.img.templates.social.*',      'ly.img.image.*'    ]  }));await cesdk.addPlugin(new EffectsAssetSource());await cesdk.addPlugin(new FiltersAssetSource());await cesdk.addPlugin(new PagePresetsAssetSource());await cesdk.addPlugin(new StickerAssetSource());await cesdk.addPlugin(new TextAssetSource());await cesdk.addPlugin(new TextComponentAssetSource());await cesdk.addPlugin(new TypefaceAssetSource());await cesdk.addPlugin(new VectorShapeAssetSource());
Create Scene Structure#
We create the foundation of our composition with social media dimensions (1080x1080 pixels for Instagram). A scene contains one or more pages, and pages contain the design blocks.
await cesdk.actions.run('scene.create', { page: { width: 1080, height: 1080, unit: 'Pixel' }});const engine = cesdk.engine;const scene = engine.scene.get()!;The cesdk.actions.run('scene.create') method creates a new design scene with a page. We set the page dimensions using setWidth() and setHeight().
Set Page Background#
We set the page background using a color fill. This demonstrates how to create and assign fills to blocks.
// Set page background to light lavender colorconst backgroundFill = engine.block.createFill('color');engine.block.setColor(backgroundFill, 'fill/color/value', { r: 0.94, g: 0.93, b: 0.98, a: 1.0});engine.block.setFill(page, backgroundFill);We create a color fill using createFill('color'), set the color via setColor() with the fill/color/value property, then assign the fill to the page.
Add Text Blocks#
Text blocks allow you to add and style text content. We demonstrate three different approaches to text sizing and styling.
Create Text and Set Content#
Create a text block and set its content with replaceText():
// Add main headline text with bold Roboto fontconst headline = engine.block.create('text');engine.block.replaceText( headline, 'Integrate\nCreative Editing\ninto your App');engine.block.setFont( headline, ROBOTO_TYPEFACE.fonts[0].uri, ROBOTO_TYPEFACE);engine.block.setFloat(headline, 'text/lineHeight', 0.78);Style Entire Text Block#
Apply styling to the entire text block using toggleBoldFont() and setTextColor():
// Make headline boldif (engine.block.canToggleBoldFont(headline)) { engine.block.toggleBoldFont(headline);}engine.block.setTextColor(headline, { r: 0.0, g: 0.0, b: 0.0, a: 1.0 });Enable Automatic Font Sizing#
Configure the text block to automatically scale its font size to fit within fixed dimensions:
// Set fixed container size and enable automatic font sizingengine.block.setWidthMode(headline, 'Absolute');engine.block.setHeightMode(headline, 'Absolute');engine.block.setWidth(headline, 960);engine.block.setHeight(headline, 300);engine.block.setBool(headline, 'text/automaticFontSizeEnabled', true);Range-based Text Styling#
Apply different styles to specific character ranges within a single text block:
// Style "in hours," - purple and italic (characters 0-9)engine.block.setTextColor(  tagline,  { r: 0.2, g: 0.2, b: 0.8, a: 1.0 },  0,  9);if (engine.block.canToggleItalicFont(tagline, 0, 9)) {  engine.block.toggleItalicFont(tagline, 0, 9);}
// Style "not months." - black and bold (characters 10-21)engine.block.setTextColor(  tagline,  { r: 0.0, g: 0.0, b: 0.0, a: 1.0 },  10,  21);if (engine.block.canToggleBoldFont(tagline, 10, 21)) {  engine.block.toggleBoldFont(tagline, 10, 21);}
The range-based APIs accept start and end character indices:
setTextColor(id, color, from, to)- Apply color to a specific character rangetoggleBoldFont(id, from, to)- Toggle bold styling for a rangetoggleItalicFont(id, from, to)- Toggle italic styling for a range
Fixed Font Size#
Set an explicit font size instead of using auto-sizing:
// Add CTA text "Start a Free Trial" with bold fontconst ctaTitle = engine.block.create('text');engine.block.replaceText(ctaTitle, 'Start a Free Trial');engine.block.setFont( ctaTitle, ROBOTO_TYPEFACE.fonts[0].uri, ROBOTO_TYPEFACE);engine.block.setFloat(ctaTitle, 'text/fontSize', 80);engine.block.setFloat(ctaTitle, 'text/lineHeight', 1.0);Add Shapes#
We create shapes using graphic blocks. CE.SDK supports rect, line, ellipse, polygon, star, and vector_path shapes.
Create a Shape Block#
Create a graphic block and assign a shape to it:
// Add horizontal divider lineconst dividerLine = engine.block.create('graphic');const lineShape = engine.block.createShape('line');engine.block.setShape(dividerLine, lineShape);Apply Fill to Shape#
Create a color fill and apply it to the shape:
const lineFill = engine.block.createFill('color');engine.block.setColor(lineFill, 'fill/color/value', { r: 0.0, g: 0.0, b: 0.0, a: 1.0});engine.block.setFill(dividerLine, lineFill);Add Images#
We add images using graphic blocks with image fills.
Create an Image Block#
Create a graphic block with a rect shape and an image fill:
// Add IMG.LY logo imageconst logo = engine.block.create('graphic');const logoShape = engine.block.createShape('rect');engine.block.setShape(logo, logoShape);
const logoFill = engine.block.createFill('image');engine.block.setString(  logoFill,  'fill/image/imageFileURI',  'https://img.ly/static/ubq_samples/imgly_logo.jpg');engine.block.setFill(logo, logoFill);
We set the image URL via setString() with the fill/image/imageFileURI property.
Position and Size Blocks#
All blocks use the same positioning and sizing APIs:
engine.block.setContentFillMode(logo, 'Contain');engine.block.setWidth(logo, 200);engine.block.setHeight(logo, 65);engine.block.setPositionX(logo, 820);engine.block.setPositionY(logo, 960);engine.block.appendChild(page, logo);setWidth()/setHeight()- Set block dimensionssetPositionX()/setPositionY()- Set block positionsetContentFillMode()- Control how content fills the block (Contain,Cover,Crop)appendChild()- Add the block to the page hierarchy
Export the Composition#
CE.SDK provides two approaches for exporting compositions in browser environments.
Export Using the Engine API#
The engine.block.export() method exports a block as a blob that you can use programmatically:
// Export the composition to PNGconst blob = await engine.block.export(page, {  mimeType: 'image/png',  targetWidth: 1080,  targetHeight: 1080});
// In browser, create a download linkconst url = URL.createObjectURL(blob);console.log('Export complete. Download URL:', url);
In browser environments, you can create a download URL from the blob using URL.createObjectURL().
Export Using Built-in Actions#
Alternatively, use the built-in export panel or actions for a complete export dialog:
await cesdk.actions.run('exportDesign', { mimeType: 'image/png'});The export panel lets users choose format and settings interactively, while cesdk.actions.run('export.page', options) triggers export directly with specified options.
Troubleshooting#
- Blocks not appearing: Verify that
appendChild()attaches blocks to the page. Blocks must be part of the scene hierarchy to render. - Text styling not applied: Verify character indices are correct for range-based APIs. The indices are UTF-16 based.
- Image stretched: Use
setContentFillMode(block, 'Contain')to maintain the image’s aspect ratio. - Export fails: Verify that page dimensions are set before export. The export requires valid dimensions.
Next Steps#
- Layer Management - Control block stacking and organization
- Positioning and Alignment - Precise block placement
- Group and Ungroup - Group blocks for unified transforms
- Blend Modes - Control how blocks interact visually
- Export - Export options and formats