Add AI image generation actions to your Android editor so users can create new images from prompts or replace selected image content.
Install the Plugin#
Add the AI image generation plugin package to the module that hosts CE.SDK.
dependencies { implementation("ly.img:plugin-ai-image-generation:1.78.0")}Use the Plugin#
Start from the editor configuration you already use, then compose AIImageGenerationPlugin. The plugin adds a dock action for creating images and an inspector bar action for replacing selected image fills.
Editor( license = license, configuration = { EditorConfiguration .remember(::DesignConfigurationBuilder) .then(::AIImageGenerationPlugin) { // Required configuration aiGatewayConfig = AIGatewayConfig( apiKey = aiGatewayApiKey, ) // Optional configurations here. } }, onClose = onClose,)- The sample starts from the default Design Editor configuration.
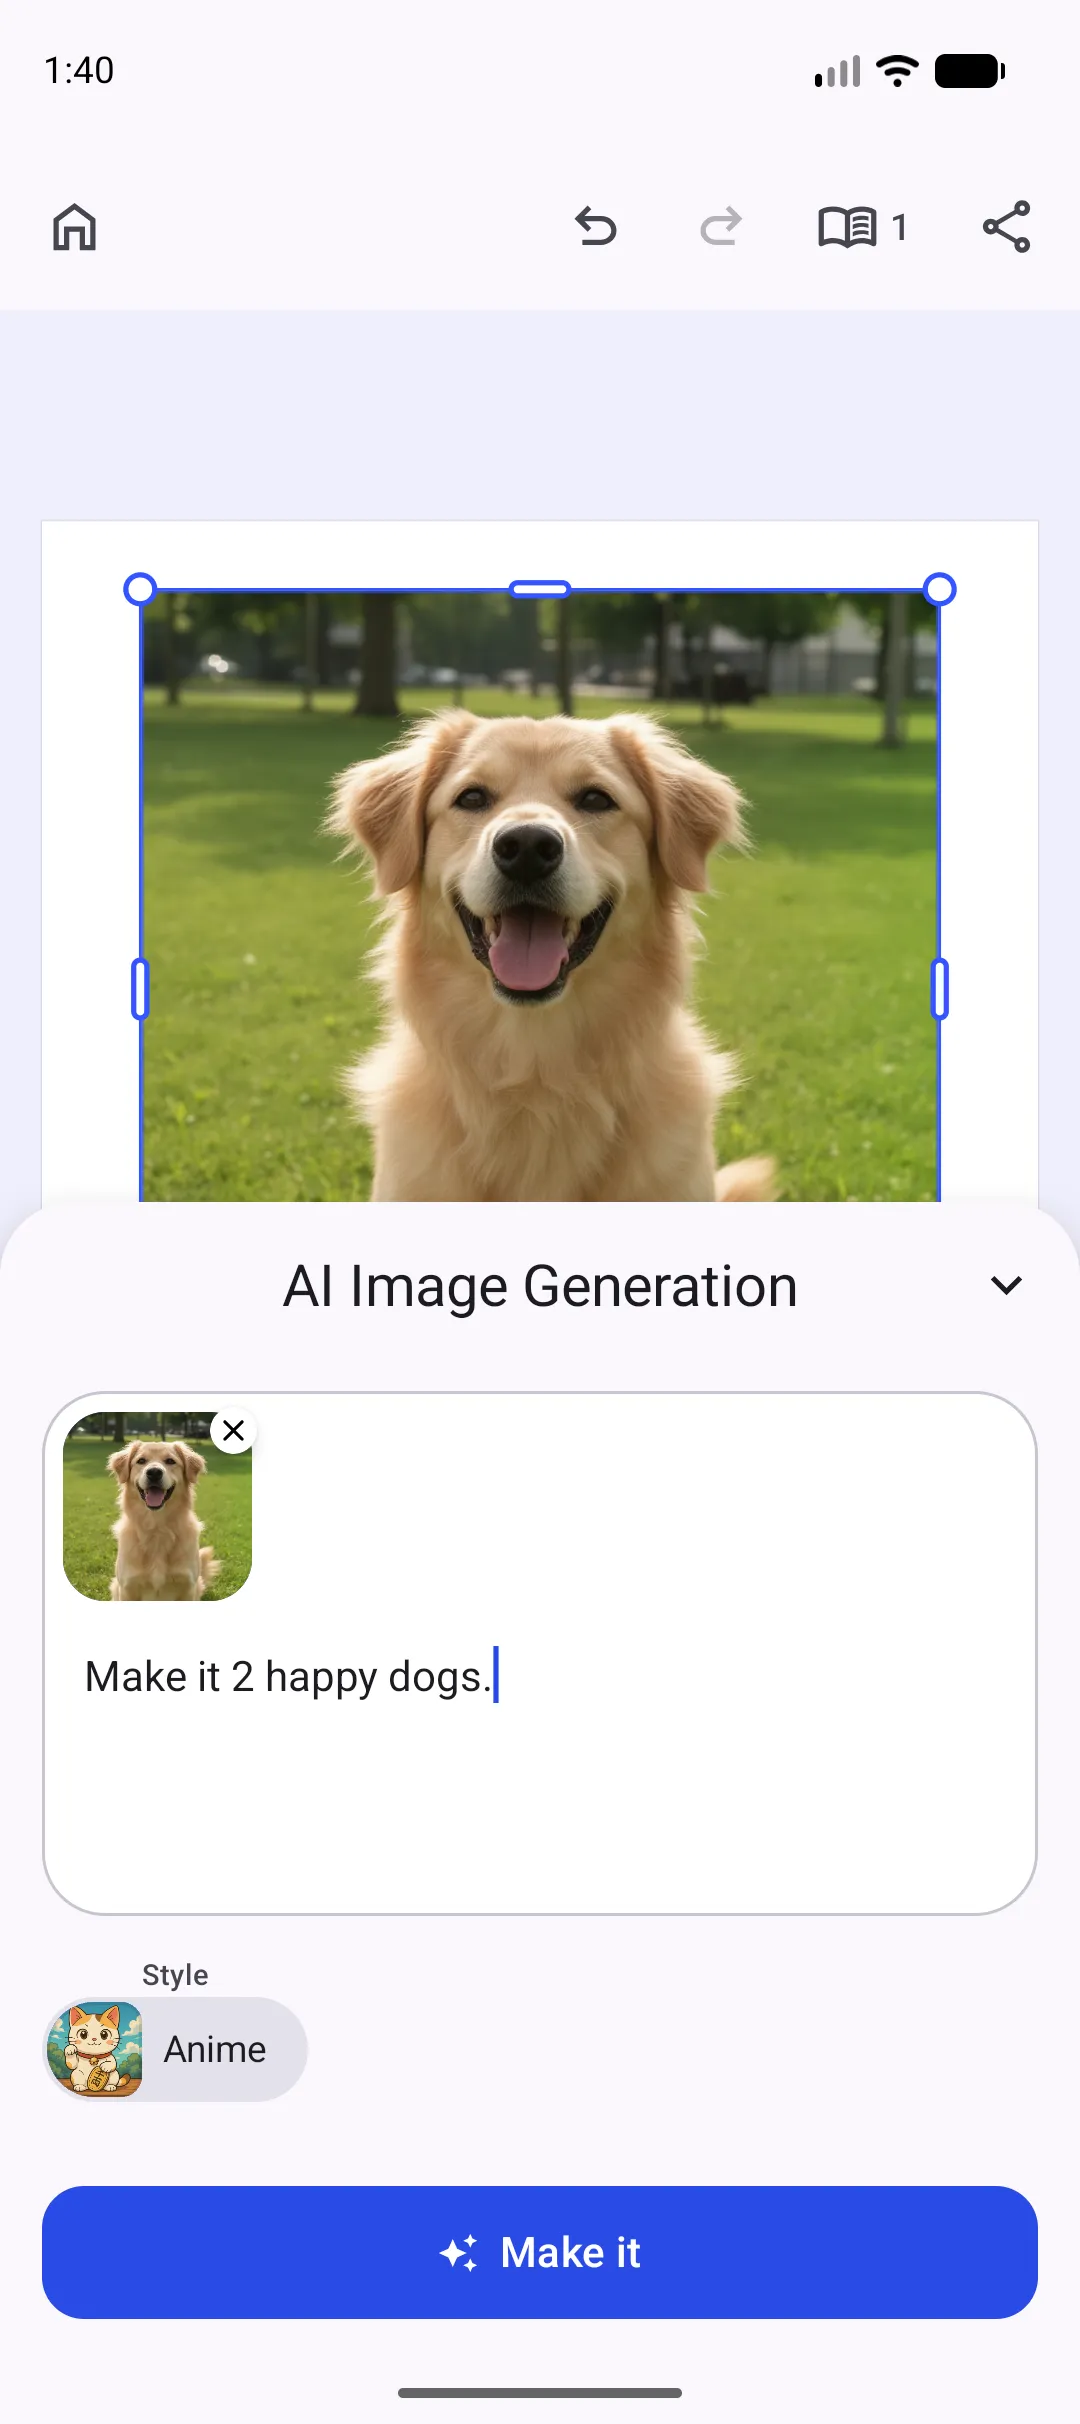
- The dock action opens the generation sheet for prompt, style, output type, and format.
- The inspector action appears when the current selection has an image fill.
For a complete Design Editor setup, see the Design Editor starter kit.
Configure the Plugin#
Configure the plugin when you need to set the IMG.LY Gateway connection or control where the generation actions appear. The following sections show each public configuration option.
Gateway Configuration#
Use AIGatewayConfig to provide the API key, model, Gateway URL, and HTTP client used by generation requests.
aiGatewayConfig = AIGatewayConfig( apiKey = aiGatewayApiKey, model = AIGatewayImageModel.FluxV2, gatewayUrl = "https://gateway.img.ly", httpClient = OkHttpClient.Builder() .connectTimeout(15, TimeUnit.SECONDS) .readTimeout(120, TimeUnit.SECONDS) .writeTimeout(120, TimeUnit.SECONDS) .build(),)The default model is AIGatewayImageModel.FluxV2, and the default Gateway URL is https://gateway.img.ly. Provide a custom OkHttpClient if your app already uses one.
Dock Button#
Use dockModifier to control where the create action appears in the dock. By default, the plugin adds Dock.Button.rememberAIImageGeneration(aiGatewayConfig = it) as the first dock item.
dockModifier = { addFirst { Dock.Button.rememberAIImageGeneration(aiGatewayConfig = it) }}Inspector Bar Button#
Use inspectorBarModifier to control where the edit action appears for selected images. By default, the plugin adds InspectorBar.Button.rememberAIImageGeneration(aiGatewayConfig = it) as the first inspector bar item.
inspectorBarModifier = { addFirst { InspectorBar.Button.rememberAIImageGeneration(aiGatewayConfig = it) }}Use the same list builder operations you use for other dock and inspector bar customizations.
Troubleshooting#
- If the buttons are missing, verify that
AIImageGenerationPluginis composed with the editor configuration. - If the inspector action is hidden, select a non-sticker block with an image fill.
- If generation fails, verify network access, the configured
AIGatewayConfig, and the Gateway balance for the API key.
API Reference#
| API | Purpose |
|---|---|
AIImageGenerationPlugin |
Adds AI image generation actions to an editor configuration. |
AIImageGenerationPlugin.aiGatewayConfig |
Sets the IMG.LY Gateway configuration used by generation requests. |
AIGatewayConfig |
Configures the API key, model, Gateway URL, and HTTP client for generation requests. |
AIImageGenerationPlugin.dockModifier |
Changes where the plugin inserts its dock button. Default adds the button first. |
AIImageGenerationPlugin.inspectorBarModifier |
Changes where the plugin inserts its inspector bar button. Default adds it first. |
Dock.Button.rememberAIImageGeneration(aiGatewayConfig = _) |
Creates the reusable dock button for creating images from prompts. |
InspectorBar.Button.rememberAIImageGeneration(aiGatewayConfig = _) |
Creates the reusable inspector bar button for editing the selected image block. |
EditorConfiguration.remember() |
Creates the base editor configuration. |
EditorConfiguration.then() |
Composes the plugin with the base configuration. |
DesignConfigurationBuilder |
Uses the Design Editor configuration for the runnable example. |
Next Steps#
- Configuration - Configure the editor for your app.
- Design Editor - Start from the Design Editor starter kit.
- Dock - Customize dock items and ordering.
- Inspector Bar - Customize inspector bar actions and ordering.