Headless Mode lets you use the CreativeEditor SDK’s Engine directly. No prebuilt editor UI required. You initialize the Engine, load or build scenes programmatically, and export to images/PDF/video entirely in code. This is ideal for custom UIs, automation, server-triggered rendering, or batch exports.
What You’ll Learn#
- What “Headless / Engine-only” means and how it differs from the UI editor.
- When to choose Headless Mode (and when not to).
- How to initialize the Engine for headless use in Kotlin.
- How to load/build a scene and modify blocks programmatically.
- How to export (PNG/JPEG/PDF, and notes on video) without launching the UI.
When to Use It#
Pick Headless Mode when you need:
- A fully custom UI: You’re building your own editing interface or integrating into an existing app layout.
- Programmatic rendering: Generate images/PDFs from templates or data—no user interaction.
- Automation & batch work: Merge data at scale, pre-render previews, or run background exports.
- Export-only flows: Quickly render a scene without ever opening the editor.
Avoid Headless Mode when:
- You want turnkey editing UX out of the box (use the standard Editor for that).
- You don’t want to create selection, gestures, or tool panels yourself.
Quick Comparison#
| Scenario | Headless (Engine-only) | Standard UI Editor |
|---|---|---|
| Automate design generation from code | ✅ | ❌ |
| Export scenes without user interaction | ✅ | ❌ |
| Let users visually edit with ready-made panels | ❌ | ✅ |
| Build a custom editor interface | ✅ | ⭘ (extend via config) |
How Headless Mode Works#
With the prebuilt editors, user actions call the Engine API through the UI. In Headless Mode, you start the Engine and work entirely in Kotlin to:
- Scene management: create/load scenes; add pages; read/write properties
- Blocks: create text/graphics/shapes; set fills, sizes, transforms; append to parents
- Assets: register sources, resolve URIs, add media programmatically
- Templates & data: load scene archives/JSON, update text variables, swap images
- Export: render blocks or pages to PNG/JPEG/PDF (and trigger video exports where appropriate)
Initialize the Engine in Headless Mode (Kotlin)#
import kotlinx.coroutines.CoroutineScopeimport kotlinx.coroutines.Dispatchersimport kotlinx.coroutines.launchimport ly.img.engine.Engine
class HeadlessRenderer {    private lateinit var engine: Engine
    fun startEngine(license: String, userId: String) = CoroutineScope(Dispatchers.Main).launch {        engine = Engine.getInstance(id = "ly.img.engine.example")        engine.start(            license = license,            userId = userId        )        // Bind offscreen for headless rendering (no UI needed)        engine.bindOffscreen(width = 1080, height = 1920)    }}
This is “headless” because you never instantiate or present the editor UI. You only create an Engine and use its APIs. The bindOffscreen method creates an offscreen rendering surface—perfect for headless scenarios where no visible View is needed.
Create and Export a Scene (Kotlin)#
Below is a minimal, end-to-end example that works with the preceding class to:
- Create a scene with a single page.
- Add a rectangle filled with a remote image.
- Add a text block.
- Export the page as PNG data.
import kotlinx.coroutines.Dispatchersimport kotlinx.coroutines.withContextimport ly.img.engine.DesignBlockTypeimport ly.img.engine.FillTypeimport ly.img.engine.MimeTypeimport ly.img.engine.ShapeTypeimport ly.img.engine.SizeModeimport java.nio.ByteBuffer
data class ExportResult(    val pngData: ByteBuffer,    val suggestedFilename: String)
suspend fun HeadlessRenderer.buildAndExport(): ExportResult = withContext(Dispatchers.Main) {    // 1) Create an empty scene and a page    val scene = engine.scene.create()    val page = engine.block.create(DesignBlockType.Page)
    // Set page size    engine.block.setWidth(page, value = 800f)    engine.block.setHeight(page, value = 600f)
    // Attach page to scene root    engine.block.appendChild(parent = scene, child = page)
    // 2) Add an image rectangle    val rect = engine.block.create(DesignBlockType.Graphic)    val shape = engine.block.createShape(ShapeType.Rect)    engine.block.setShape(rect, shape = shape)
    val imageFill = engine.block.createFill(FillType.Image)    engine.block.setString(        block = imageFill,        property = "fill/image/imageFileURI",        // Use your own asset URL or registered source URI        value = "https://img.ly/static/ubq_samples/sample_1.jpg"    )    engine.block.setFill(rect, fill = imageFill)
    // Position & size the rect    engine.block.setPositionX(rect, value = 100f)    engine.block.setPositionY(rect, value = 100f)    engine.block.setWidth(rect, value = 400f)    engine.block.setHeight(rect, value = 300f)
    engine.block.appendChild(parent = page, child = rect)
    // 3) Add text    val text = engine.block.create(DesignBlockType.Text)    engine.block.replaceText(text, text = "Hello, From Headless Mode!")    engine.block.setPositionX(text, value = 100f)    engine.block.setPositionY(text, value = 450f)    engine.block.setWidthMode(text, mode = SizeMode.AUTO)
    engine.block.appendChild(parent = page, child = text)
    // 4) Export the page to PNG    val pngData = engine.block.export(page, mimeType = MimeType.PNG)
    ExportResult(pngData = pngData, suggestedFilename = "headless-output.png")}
Saving the File (optional)#
After creating the image, you may want to save it. Here is a minimal code example to save the file to the app’s files directory and return the file path.
import android.content.Contextimport kotlinx.coroutines.Dispatchersimport kotlinx.coroutines.withContextimport java.io.File
suspend fun savePNG(context: Context, result: ExportResult): File = withContext(Dispatchers.IO) {    val outputDir = context.filesDir    val destinationFile = File(outputDir, result.suggestedFilename)
    destinationFile.outputStream().channel.use { channel ->        channel.write(result.pngData)    }
    destinationFile}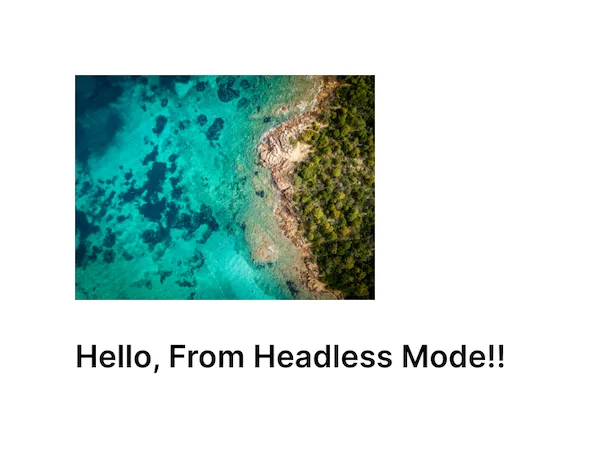
The example code creates this .png image.
Some variations to the preceding code depending on your workflow might be:
- Export as different file format such as
.jpegor.pdfby changing themimeTypeargument. - Export a sub-tree instead of the entire page. Passing a block’s ID exports just that block and its children.
Working with Assets (Headless)#
- Default sources:
engine.addDefaultAssetSources()wires up built-in sources so URIs like"fill/image/imageFileURI"can resolve to remote/local assets. - Your own sources: In production, you’ll typically register a custom source (from your server, local storage, or device gallery) and then set block properties to URIs your source resolves.
- Local files: Use
file://URLs or Android content URIs that your asset source understands. - Fonts: Bundle or register your fonts the same way. The Engine needs them available for text layout before export.
Templates & Data-Driven Generation#
Headless Mode pairs well with:
- Scene templates (ZIP/JSON): load and then swap images or set text (update
text/textor variable placeholders). - Text variables / placeholders: bind your app’s data model to text fields and render many variants in a loop.
- Batching: loop through data rows → set properties → export → repeat.
Troubleshooting#
❌ I’m getting nothing on export (empty data or errors):
- Verify you export a renderable block (the page or scene root’s child).
- Ensure remote image URIs are reachable and network permissions are set in AndroidManifest.xml.
- For debugging, try a known good URL, then swap.
❌ Images don’t load or are missing in output:
- Confirm your asset source can resolve the URI you set.
- If using remote URLs, ensure INTERNET permission is declared in AndroidManifest.xml.
- Check CORS/network security configuration if using custom domains.
❌ Text looks wrong or uses fallback fonts:
- The Engine needs the exact font used by the text style. Register/bundle the font and ensure it’s discoverable before export.
❌ Memory spikes on big batches:
- Reuse a single Engine instance when possible.
- Export, write to disk, and release large buffers before rendering the next item.
- Call
engine.stop()when completely done to free resources.
Next Steps#
Now that you understand the basics of headless mode, below are some topics to help you expand your knowledge:
- Templates & Variables – Design tokenized templates and drive them from data.
- Exporting – PNG/JPEG/PDF exports, plus format options and best practices.
- Standard Editor vs Headless – If you need turnkey UI, start here and decide whether to drop to headless for specific flows.