In this article, you will learn how to resize an image in JavaScript, without using any external library. Thanks to the HTML <canvas> element, this is a reasonably easy task to accomplish.
Resizing an image has become increasingly important. That is because the quality of the images and their file sizes have been increasing for years.
For example, when letting users upload an image, you should always consider resizing it before uploading it. Uploading large photos is time-consuming and may cost money in bandwidth. As we have previously explained you might also want to compress such images. As you can imagine, both of these consequences fall on end-users – we want to avoid this.
Let’s see how to resize an image with Vanilla JavaScript. Follow this step-by-step tutorial to achieve the following result on CodeSandbox:
Resizing Images Using <canvas>
You can clone the GitHub repository that supports this article by launching the following command:
git clone https://github.com/Tonel/resize-image-javascript-imglyOtherwise, you can continue following this tutorial and build the demo application step by step.
1. Implementing the Resizing Logic
While in a React context we used a library to do the heavy lifting for us, knowing the HTML [<canvas>](https://developer.mozilla.org/en-US/docs/Web/API/Canvas_API) API is the only prerequisites for this approach. Although typically used for animation, game graphics, data visualization, and real-time video processing, you can also employ it as an image manipulation tool. Specifically, it provides everything required to resize an image. Let’s see how:
function resizeImage(imgToResize, resizingFactor = 0.5) {
  const canvas = document.createElement('canvas');
  const context = canvas.getContext('2d');

  const originalWidth = imgToResize.width;
  const originalHeight = imgToResize.height;

  const canvasWidth = originalWidth * resizingFactor;
  const canvasHeight = originalHeight * resizingFactor;

  canvas.width = canvasWidth;
  canvas.height = canvasHeight;

  context.drawImage(
    imgToResize,
    0,
    0,
    originalWidth * resizingFactor,
    originalHeight * resizingFactor
  );

  return canvas.toDataURL();
}- Initialize an in-memory
<canvas>with a 2D rendering context for the drawing surface. - Set height and width depending on the size of the original image to resize and the resizing factor.
- Then, the resized image is drawn according to the resizing factor passed by harnessing the
drawImage()function. - Finally, the resized image is returned.
Et voilà! As you can see, resizing an image in Vanilla JavaScript takes only a few lines of code.
2. Resizing in Action
Now, it is time to see the resizeImage() function in action through a simple example.
index.html
<!DOCTYPE html>
<html>
  <body>
    <h1>Image Resizer</h1>
    <p>
      Please, upload an image and it will be shown both original and resized by
      50%
    </p>
    <input id="upload" type="file" accept="image/*" required />
    <div id="images">
      <h2>Original image</h2>
      <img id="imgToResize" />
      <h2>Resized image</h2>
      <img id="resizedImage" />
    </div>
    <script src="src/index.js"></script>
  </body>
</html>
src/index.js
// hiding the div that will contain the images
const imagesDiv = document.querySelector('#images');
imagesDiv.style.visibility = 'hidden';

const fileInput = document.querySelector('#upload');
fileInput.addEventListener('change', async (e) => {
  const [file] = fileInput.files;

  // displaying the uploaded image
  const imageToResize = document.querySelector('#imgToResize');
  imageToResize.src = await fileToDataUri(file);

  // resizing the image and displaying it
  const resizedImage = document.querySelector('#resizedImage');
  resizedImage.src = resizeImage(imageToResize, this);

  // making the div containing the image visible
  imagesDiv.style.visibility = 'visible';
});

function fileToDataUri(field) {
  return new Promise((resolve) => {
    const reader = new FileReader();
    reader.addEventListener('load', () => {
      resolve(reader.result);
    });
    reader.readAsDataURL(field);
  });
}

function resizeImage(imgToResize, resizingFactor = 0.5) {
  const canvas = document.createElement('canvas');
  const context = canvas.getContext('2d');

  const originalWidth = imgToResize.width;
  const originalHeight = imgToResize.height;

  const canvasWidth = originalWidth * resizingFactor;
  const canvasHeight = originalHeight * resizingFactor;

  canvas.width = canvasWidth;
  canvas.height = canvasHeight;

  context.drawImage(
    imgToResize,
    0,
    0,
    originalWidth * resizingFactor,
    originalHeight * resizingFactor
  );

  return canvas.toDataURL();
}
The <input> element allows users to upload an image, then passed to the resizeImage() function. This is in charge of generating the resized image, which is finally shown below the original image. Please, note that this example is the same presented in the fiddle placed at the beginning of the article.
Final Considerations
Resizing an image in Vanilla JavaScript is definitely an easy task. No external libraries are required, and you can achieve your goal with just a few lines of code. This is great! On the other hand, every browser applies a different image interpolation algorithm behind the scenes. This leads to results depending on the user’s preferred browser. Not only might this be a problem in terms of consistency, but also a source of quality issues. Plus, such a simple task can turn into a nightmare if you wanted to implement a proper UI, allowing users to resize an image graphically.
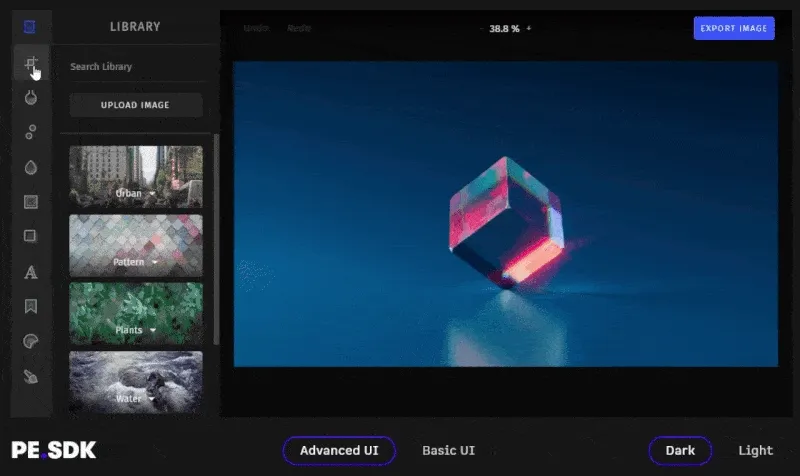
In that case, a commercial and comprehensive solution like [PhotoEditorSDK](https://img.ly/products/photo-sdk/) is a more beneficial approach. In fact, you should no longer have to worry about inconsistencies or quality issues. Moreover, with only one library, you get several tools to treat images without having to implement the application’s UI. Also, whenever you need help, you can ask for support from the IMG.LY developers who built the SDK.
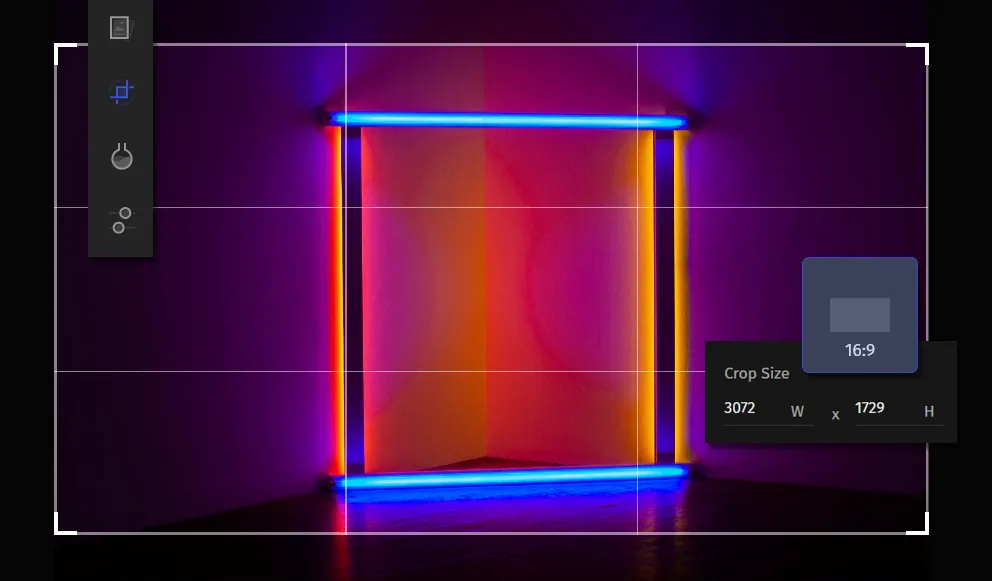
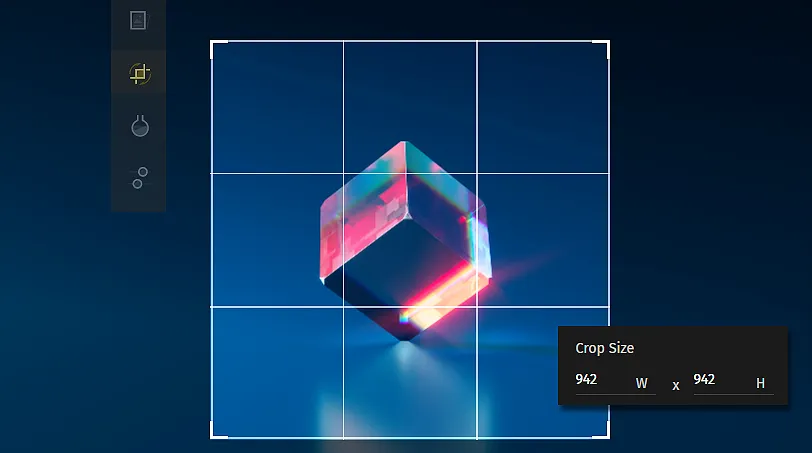
Resizing an Image with PhotoEditor SDK
First, you should read this article from the official documentation on how to get started with PhotoEditorSDK in HTML and JavaScript. Then, by using the transform tool you can perform cropping, resizing, flipping, and rotation operations with just one feature. This way, you should be able to achieve the desired result:
Conclusion
In this article, we looked at how to resize an image with JavaScript. Resizing an image by using <canvas> is not a complex task, although this solution might introduce quality issues. As we have seen, you can resize an image effortlessly and with only a handful of lines of code. On the other hand, every browser applies a different resizing algorithm, leading to inconsistent results. For consistent and reliable results, you should take advantage of a more advanced and complete solution – such as PhotoEditorSDK.
Thanks for reading! We hope that you found this article helpful. Feel free to reach out to us on Twitter with any questions, comments, or suggestions.