
In this article, you will learn to crop an image in JavaScript. Specifically, you will see how to achieve this goal with the react-image-crop React library.
Over the last few years, providing users with features to deal with images has become more and more common. This is why every developer should know how to deal with basic operations on images, such as cropping. This gives them the possibility to choose only the areas they are interested in.
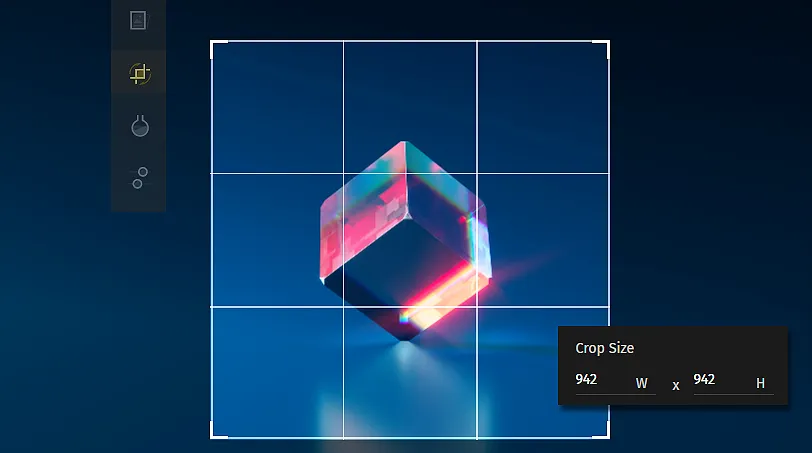
So, let’s see how to crop an image in React with react-image-crop. Follow this step-by-step tutorial to achieve the following result:
Prerequisites
This is the list of all the prerequisites for the demo application you are going to build:
- Node.js and npm 5.2+ and higher
react-image-crop>= 8.6.12
Cropping an Image with react-image-crop
You can clone the GitHub repository that supports this article and try the demo application by launching the following commands:
git clone https://github.com/imgly/Blog-How-To-Crop-an-Image-in-React-with-React-Crop-Image.git
cd Blog-How-To-Crop-an-Image-in-React-with-React-Crop-Image
npm i
npm start
Otherwise, you can continue following this tutorial and build the demo application step by step.
1. Creating a React Project
The easiest way to create an empty working project in React is by using Create React App, the officially supported way to create single-page React applications. You can create a new project called react-image-cropper-demo with the following command:
npx create-react-app react-image-cropper-demoYou will now have a demo project located in the react-image-cropper-demo folder with this file structure:
react-image-cropper-demo
├── README.md
├── node_modules
├── package.json
├── .gitignore
├── public
│   ├── favicon.ico
│   ├── index.html
│   ├── logo192.png
│   ├── logo512.png
│   ├── manifest.json
│   └── robots.txt
└── src
    ├── App.css
    ├── App.js
    ├── App.test.js
    ├── index.css
    ├── index.js
    ├── logo.svg
    ├── reportWebVitals.js
    └── setupTests.js
Move into the react-image-cropper-demo folder and launch a local server by running:
cd react-image-cropper-demo
npm start
Visit http://localhost:3000/ in your browser, and you should be able to see the default Create React App screen.

2. Installing react-image-crop
Add the react-image-crop library to your project’s dependencies by running the following command:
npm install --save react-image-cropYour package.json file will be updated accordingly, and you should now be able to see react-image-crop as a dependency.
Now, you have everything required to start developing your image cropper component.
3. Building the Image Cropper Component
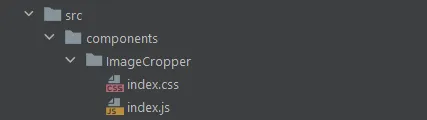
First of all, create a components folder inside src. Then, make an ImageCropper folder containing index.js and index.css. These two files will contain the cropper component definition and style respectively.
Initialize index.js with the following lines of code:
import React from 'react';

function ImageCropper() {
  return <div>{/*TODO*/}</div>;
}

export default ImageCropper;
This way, you have just created an empty ImageCropper component.
Now, you need to import ReactCrop, which is part of the react-image-crop library. Add it to the ImageCropper imports:
import ReactCrop from 'react-image-crop';Plus, do not forget to import dist/ReactCrop.css or ReactCrop.scss as follows:
import 'react-image-crop/dist/ReactCrop.css';
// or scss:
import 'react-image-crop/lib/ReactCrop.scss';
This is what the final ImageCropper will look like:
import React, { useState } from 'react';
import ReactCrop from 'react-image-crop';
import 'react-image-crop/dist/ReactCrop.css';
import demoImage from './demo-image.jpg';

function ImageCropper(props) {
  const { imageToCrop, onImageCropped } = props;

  const [cropConfig, setCropConfig] = useState(
    // default crop config
    {
      unit: '%',
      width: 30,
      aspect: 16 / 9,
    }
  );

  const [imageRef, setImageRef] = useState();

  async function cropImage(crop) {
    if (imageRef && crop.width && crop.height) {
      const croppedImage = await getCroppedImage(
        imageRef,
        crop,
        'croppedImage.jpeg' // destination filename
      );

      // calling the props function to expose
      // croppedImage to the parent component
      onImageCropped(croppedImage);
    }
  }

  function getCroppedImage(sourceImage, cropConfig, fileName) {
    // creating the cropped image from the source image
    const canvas = document.createElement('canvas');
    const scaleX = sourceImage.naturalWidth / sourceImage.width;
    const scaleY = sourceImage.naturalHeight / sourceImage.height;
    canvas.width = cropConfig.width;
    canvas.height = cropConfig.height;
    const ctx = canvas.getContext('2d');

    ctx.drawImage(
      sourceImage,
      cropConfig.x * scaleX,
      cropConfig.y * scaleY,
      cropConfig.width * scaleX,
      cropConfig.height * scaleY,
      0,
      0,
      cropConfig.width,
      cropConfig.height
    );

    return new Promise((resolve, reject) => {
      canvas.toBlob((blob) => {
        // returning an error
        if (!blob) {
          reject(new Error('Canvas is empty'));
          return;
        }

        blob.name = fileName;
        // creating a Object URL representing the Blob object given
        const croppedImageUrl = window.URL.createObjectURL(blob);

        resolve(croppedImageUrl);
      }, 'image/jpeg');
    });
  }

  return (
    <ReactCrop
      src={imageToCrop || demoImage}
      crop={cropConfig}
      ruleOfThirds
      onImageLoaded={(imageRef) => setImageRef(imageRef)}
      onComplete={(cropConfig) => cropImage(cropConfig)}
      onChange={(cropConfig) => setCropConfig(cropConfig)}
      crossorigin="anonymous" // to avoid CORS-related problems
    />
  );
}

ImageCropper.defaultProps = {
  onImageCropped: () => {},
};

export default ImageCropper;
imageToCrop is the source image received from the props. The or statement used when assigning the ReactCrop’s src props assures that either imageToCrop or a default demo image is shown. After being loaded, a reference to the image is saved and then used when performing the cropping operation. Then, whenever a user uses the component to try to crop an image, the cropConfig object containing the crop settings is updated accordingly. Finally, when the user stops selecting the area to crop, cropImage is called. This function is in charge of producing the cropped image and passing it to the onImageCropped function received from the props.
4. Putting It All Together
Now it is time to see the ImageCropper component in action. All you need to do, is change the App.js file as follows:
import React, { useState } from 'react';
import './App.css';
import ImageCropper from './components/ImageCropper';

function App() {
  const [imageToCrop, setImageToCrop] = useState(undefined);
  const [croppedImage, setCroppedImage] = useState(undefined);

  const onUploadFile = (event) => {
    if (event.target.files && event.target.files.length > 0) {
      const reader = new FileReader();

      reader.addEventListener('load', () => setImageToCrop(reader.result));

      reader.readAsDataURL(event.target.files[0]);
    }
  };

  return (
    <div className="app">
      <input type="file" accept="image/*" onChange={onUploadFile} />
      <div>
        <ImageCropper
          imageToCrop={imageToCrop}
          onImageCropped={(croppedImage) => setCroppedImage(croppedImage)}
        />
      </div>
      {croppedImage && (
        <div>
          <h2>Cropped Image</h2>
          <img alt="Cropped Image" src={croppedImage} />
        </div>
      )}
    </div>
  );
}

export default App;
The input element allows users to upload an image, then stored it in imageToCrop and passed to ImageCropper. Each time a user crops it, the resulting image is saved thanks to the setCroppedImage function. Then, it is finally displayed in the Cropped Image section as presented in the fiddle at the beginning of the article.
Final Considerations on react-image-crop
Cropping an image from scratch is not an easy task. This is why using a library like react-image-crop is the recommended approach. As you have just seen, you can achieve your goal with just a few lines of code. This is great! On the other hand, these libraries are designed to achieve specific goals, like cropping an image. What if you need to perform or get users the possibility to do other image-related operations? You may be ending up with as many libraries as operations required.
Not only might they have very different UIs, but it may also be complicated to integrate them all in the same project. This is why in such a circumstance, a commercial and wider solution like PhotoEditorSDK should be the preferred approach. In fact, with only one library you get several tools to treat images as you want, while preserving the consistency of your application’s UI. Also, whenever you need help, you can ask for support from the img.ly developers who built the SDK or visit one of the myriad snappy integration guides written by the developers on the blog.
Cropping an Image with PhotoEditorSDK
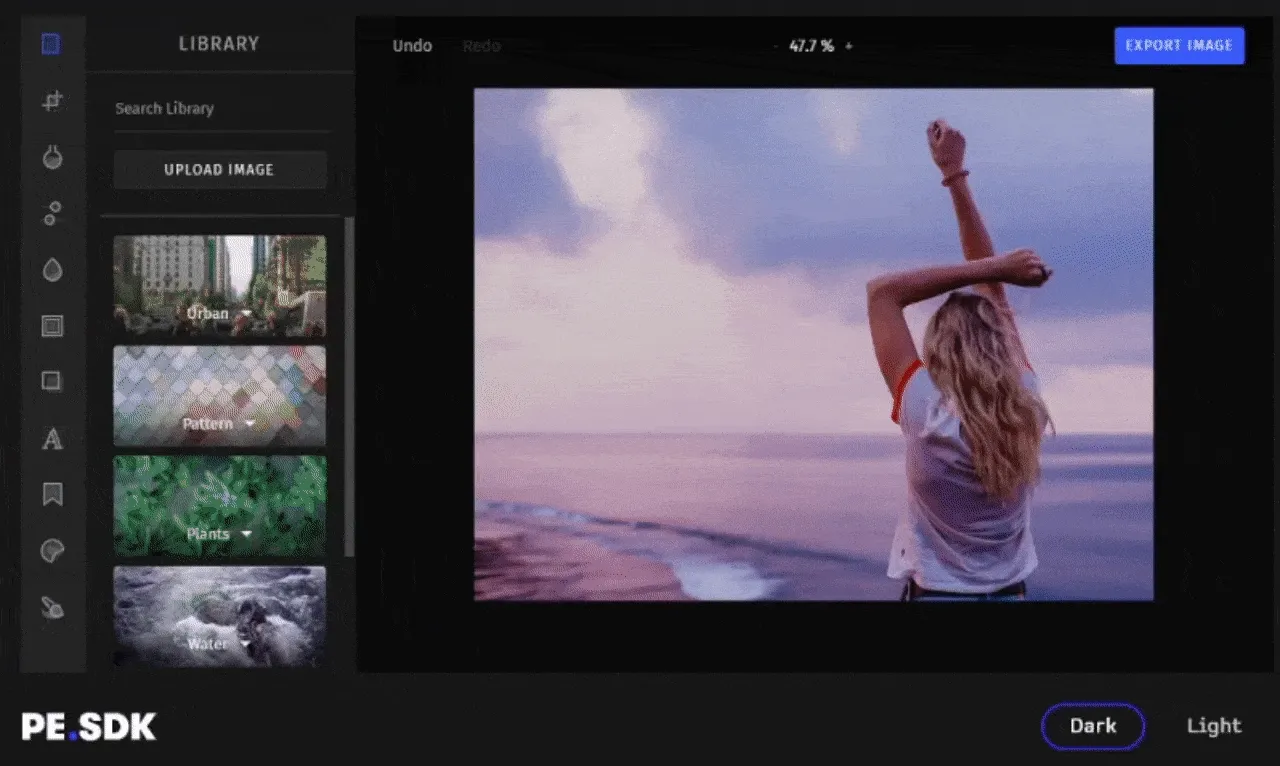
First, you should read this article from the official documentation on how to get started with PhotoEditorSDK in React. Then, by using the transform tool you can perform cropping, resizing, flipping, and rotation operations with just one feature. This way, you should be able to achieve the desired result:
Conclusion
In this article, we looked at how to crop an image in React. Cropping an image can turn into a complex task and this is using a library should be the preferred approach. In particular, react-image-crop allows you to crop an image easily and with only a handful of lines of code, as we have seen. On the other hand, it is a library with a very specific purpose. So, if you needed to perform more than one operation on your images, you might need a more advanced and complete solution like PhotoEditorSDK.
Thanks for reading! We hope that you found this article helpful. Feel free to reach out to us on Twitter with any questions, comments, or suggestions.