Now that TikTok is facing a ban in the US any day now, we better wait in the wings with an alternative ready to go and scoop up those millions of hobby dancers, micro bloggers, and would-be influencers.
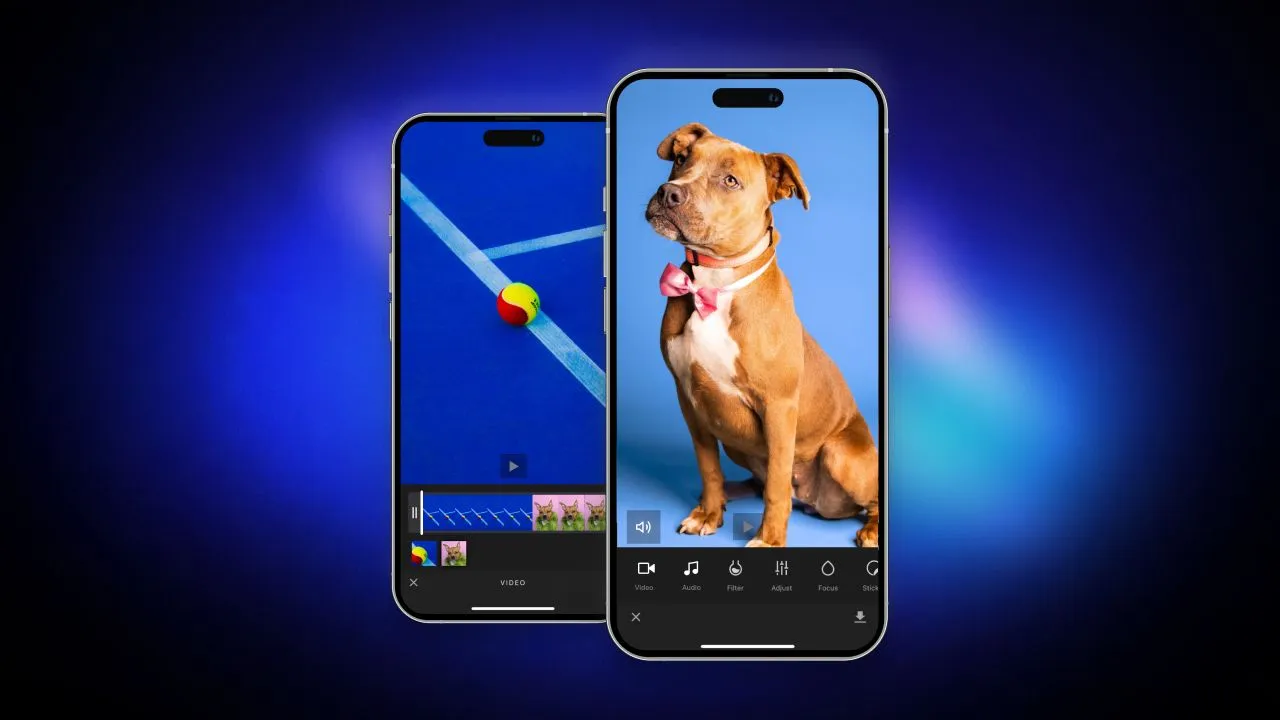
In this article, you’ll learn how to use Swift, SwiftUI, and the IMG.LY CreativeEditor SDK to build a simple iOS app for recording, editing, and viewing short videos. This app features views providing core functionalities similar to making a post in a video-sharing platform like TikTok.
The editing controller is the central hub. It allows users to capture video clips and enhance their videos by adding filters, stickers, music, and other effects. CreativeEditor SDK calls the overall project a “scene” and the parts (clips, stickers, text, etc.) “blocks”. Once the scene is ready, the user can compose it into a standard video file and export it. Finally, the playback controller showcases the finished projects using Apple’s standard VideoPlayer struct. For recording and editing, the CreativeEditor SDK’s Camera and Video Editor handle the heavy lifting, enabling swift development of a robust app. You can easily extend its features, filters, and creative options as your users demand.
Follow along to see how to capture video, enhance it, and export the finished product as a polished movie file.
Setting Up Your Project
You can try out the TikTok clone by cloning the GitHub repository supporting the article. Otherwise, follow this step-by-step tutorial and learn how to build the TikTok clone with CreativeEditor SDK by yourself.
To add the CreativeEditor SDK to an Xcode project, include it with your other package dependencies. Use the URL below to add the package, either to your Package.swift file or using File > Add Packages...
https://github.com/imgly/IMGLYUI-swiftThe package includes a number of different frameworks:
- IMGLYUI, an umbrella framework of all of the different editors and a camera.
- IMGLYCamera, a standalone camera View. This is the same camera as the editors use.
- IMGLYApparelEditor, IMGLYDesignEditor, IMGLYPostcardEditor, and IMGLYVideoEditor which are four different configurations to support different use cases.
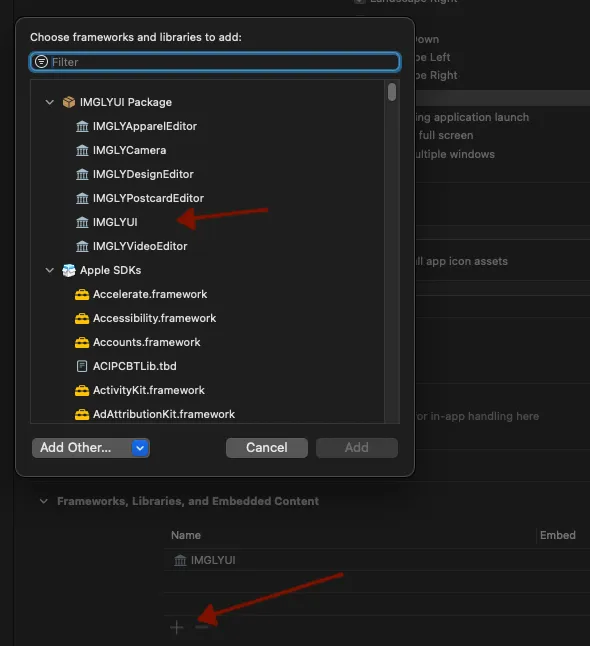
Each of these frameworks uses the IMG.LY Engine for image processing. To include them in your project, navigate to the ‘Frameworks, Libraries, and Embedded Content’ section in your app’s General settings. Click the ’+’ button and select the desired frameworks. Initially, consider adding the IMGLYUI package, as it encompasses all other packages. Before releasing your app, review and include only the necessary components to minimize app size and avoid unused code.
Once Xcode downloads and resolves the packages, you just need to include IMGLYVideoEditor in any of the files that will reference the editor in your app. When you’re working with the underlying engine directly you’ll also want to include IMGLYEngine. You’ll only work with the engine as you start to customize the workflow.
Asking for Permissions
Before any app can access the phone’s microphone, camera, documents or photo library, the user must specifically give permission to record audio or video as well as access the user’s Photo library. If your app doesn’t secure these permissions properly before trying to use the camera the app will crash and also probably won’t get through Apple’s app review. In earlier versions of iOS you could develop an app on the Simulator without asking permissions, but always on the device the app will crash. In current versions of iOS the app crashes regardless of platform. The dialogue requesting permissions is a system dialog and looks like this:
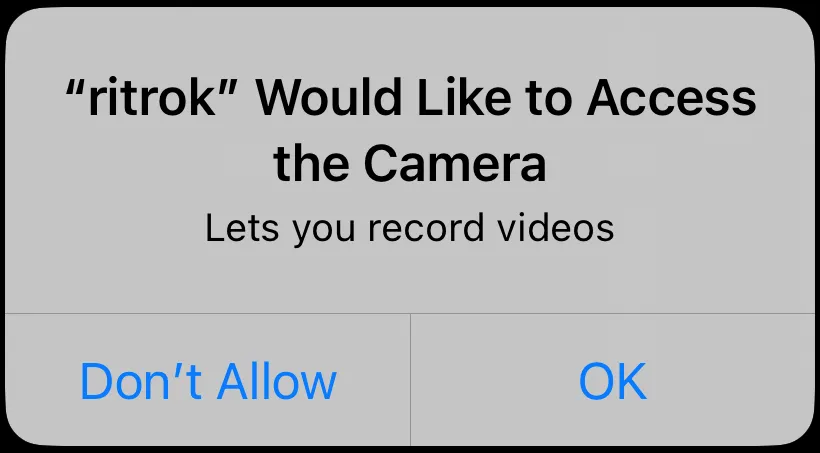
You do not have the ability to change this dialog. You can supply the reason you are asking for the permission using a key in the info.plist file in the Xcode project. In the example above “Lets you record videos” is in the info.plist. For the video camera you will have to ask for video and audio permission. The first step is to add a short message to the user in the info.plist.

For video the key to add is NSCameraUsageDescription and for the microphone you need to add NSMicrophoneUsageDescription. Whenever your app attempts to use the camera, iOS will first check to see if the user has already granted access. If not, it will then display the dialogs using your entries in the info.plist or crash if you have not provided entries. The user might be surprised by these dialog boxes and may accidentally tap Don't Allow if they are trying to quickly launch the camera. It is better practice to set up some kind of onboarding view and secure the permissions before you need them. You might have a view that explains what you are going to ask for and then displays the permission dialog.
switch AVCaptureDevice.authorizationStatus(for: .video) {
  case .authorized:
    //the user has authroized permission!
    break
  case .denied:
    //the user has previously denied permission!
    //perhaps we should ask them again
    break
  case .restricted:
    //the user cannot grant permission!
    break
  case .notDetermined:
    //the user has never been asked for permission
    //so let's ask them now
    AVCaptureDevice.requestAccess(for: .video) { accessGranted in
      if accessGranted {
        //the user has authorized permission!
      } else {
        //the user has denied permission!
      }
    }
  @unknown default:
    break
}
The snippet above lets your app read the permission status for the video camera and ask for permission if it has not been granted. To request access to the microphone pass .audio to the AVCaptureDevice.authorizationStatus(for:) and AVCaptureDevice.requestAccess(for:) functions. The AVCaptureDevice.requestAccess(for:) command is what displays the system dialog actually requesting access. The accessGranted variable reports back to your app what the user chose. You can take care of getting the permissions any time but when the CreativeEditor SDK first launches it will attempt to access the camera, so the dialog will appear if the user has not already granted permission.
The .restricted case is fairly new. In this case, there are policies on the phone that prohibit the user from granting permission to your app. In addition to asking permissions during onboarding, it is good practice to check for permission every time before you attempt to run any code that uses the camera. The user can change permissions using the Settings app on their phone at any time. If the user has denied permissions and you present the video camera anyway, your app will record black video frames and silence on audio tracks.
In addition to asking for camera and microphone permissions, your app will probably want to access the photos on the user’s phone. You will need to add an entry to the info.plist for NSPhotoLibraryUsageDescription. As with the camera and the microphone, the dialog will appear when the Video Editor first attempts access, but you can give your user some ability to grant permission during onboarding. For the user’s photos, you can check the authorization status using
let status = PHPhotoLibrary.authroizationStatus(for: .readWrite)As with the camera, the photo library has PHPhotoLibrary.requestAuthroization(for: .readWrite) but instead of just returning a “granted” or “denied” status, this command returns the actual new status. In addition to the status values for the camera, the photo library may return a .limited status meaning that the user has granted permission to only some of the photos. If the user has chosen to share only some of their photos, Apple provides some views you can present so that the user can manage the photos. Any videos that your app saves to the user’s photo library will always be available when the user has chosen .limited. You can read more about how to work with permissions and the user’s photo library by reading this Apple article Delivering an Enhanced Privacy Experience in Your Photos App.
Making Video Recordings
The start of a great TikTok is the camera. When our user wants to make a new video clip with our app, they tap on the button at the bottom of the initial screen to start the creation workflow.
Here there is a decision to make. TikTok and the CreativeEditor SDK can each start with the creation controls and a video preview. When using the CreativeEditor SDK though, you can also start with some video that came from somewhere else. So if you already have some camera code you like, or if you want to start with some video clip from somewhere else, you can insert that into the editor when it launches. You can do that by leveraging the onCreate modifier of the editor.
let engine = EngineSettings(license: "<your license code>",
                              userID: "<your unique user id>")

VideoEditor(engine)
  .imgly.onCreate({ engine in
    try await engine.scene.create(fromVideo: Bundle.main.url(forResource: "dog_water", withExtension: "mov")!)

    //set other defaults
  }
In the code above, the app initializes an instance of the Video Editor view and then reads the dog_water.mov file from the app bundle. launches the editor with that.
Whether starting with a video or starting with a blank canvas a user can add video clips to their creation using the embedded camera.
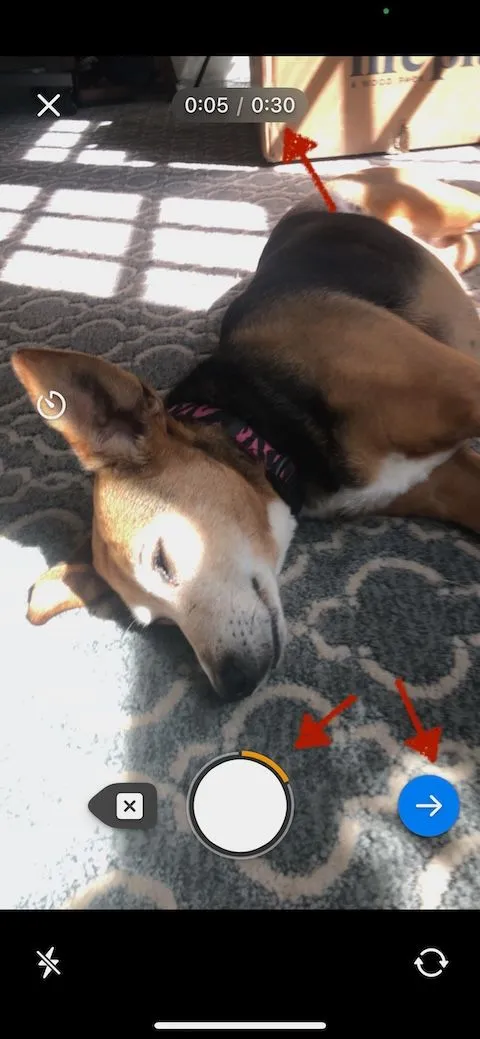
The image above compares two different camera controllers: the left one from the TikTok app and the right showing the default settings of the MobileCamera, either standalone or within a Video Editor scene. Key controls in each are marked with blue numbers:
1 - Flip camera button
2 - Flash button
3 - Recording time indicator
4 - Add video and finish buttons
5 - Cancel button
While the TikTok camera integrates several editing functions during video capture, the Video Editor separates these tasks, focusing the camera purely on recording. Both systems allow users to start and stop video recording to compile a series of clips before moving to the editing phase.
Configuring the Camera
The camera used inside of the Video Editor UI isn’t customizable. You have limited options to customize when you use the standalone camera though. You can set the colors of the buttons, helpful if you have a preferred color scheme, and you can set a maximum duration for the video recording allowed.
let config = CameraConfiguration(
  recordingColor: .orange,
  highlightColor: .blue,
  maxTotalDuration: 30,
  allowExceedingMaxDuration: false)

Camera(engine, config: config) { result in
 //handle the recorded video collection
}
The code above sets the record button to orange while recording and the clip view to orange. There is a maximum duration of 30 seconds for all videos in the collection and the button to save the clips highlighted in blue.
If your app requires further customization, you’ll probably want to make your own camera view and work with the IMG.LY Creative Engine directly.
The documentation website is a great resource for understanding how much you can add to and customize the IMGLYUI resources and when you’ll need to drop down to the level of the engine.
Presenting the Controller
As demonstrated above, both the Video Editor and the Camera are View structures that can be presented directly or through overlays such as overlay or fullScreenCover. However, they are typically enclosed in a NavigationView to utilize the navigation bar for displaying export and other buttons. Therefore, when triggering the Video Editor from a button, it’s crucial to embed it within a NavigationView.
Button("Edit the Video") {
  isPresented = true
}
 .fullScreenCover(isPresented: $isPresented) {
   NavigationView {
     VideoEditor(engine)
      //any setup modifiers
   }
Building Your Creation

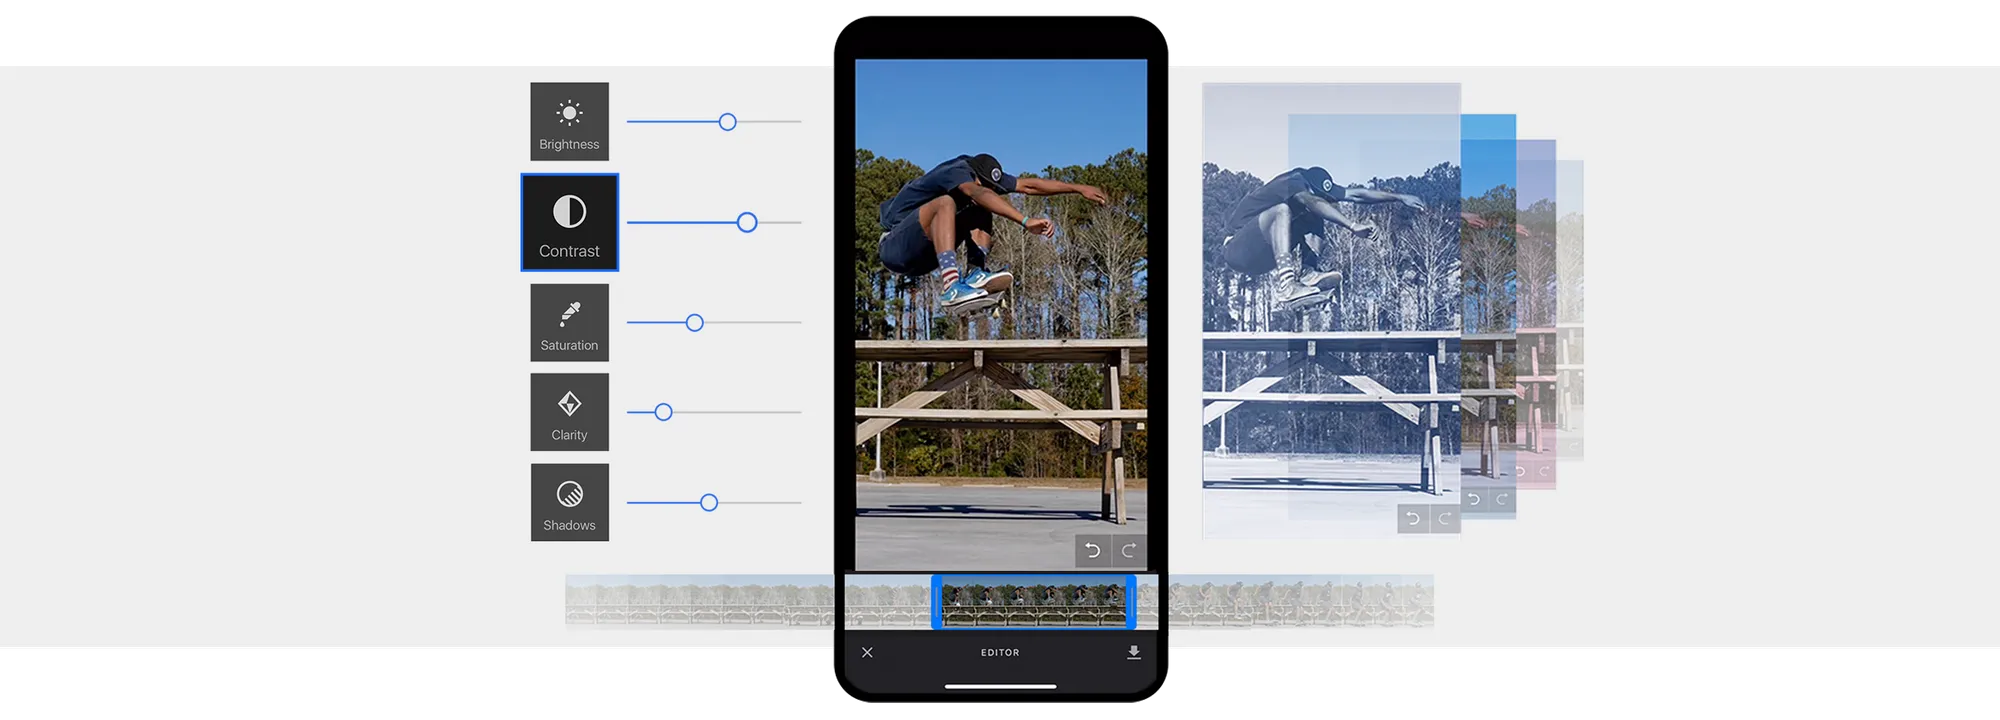
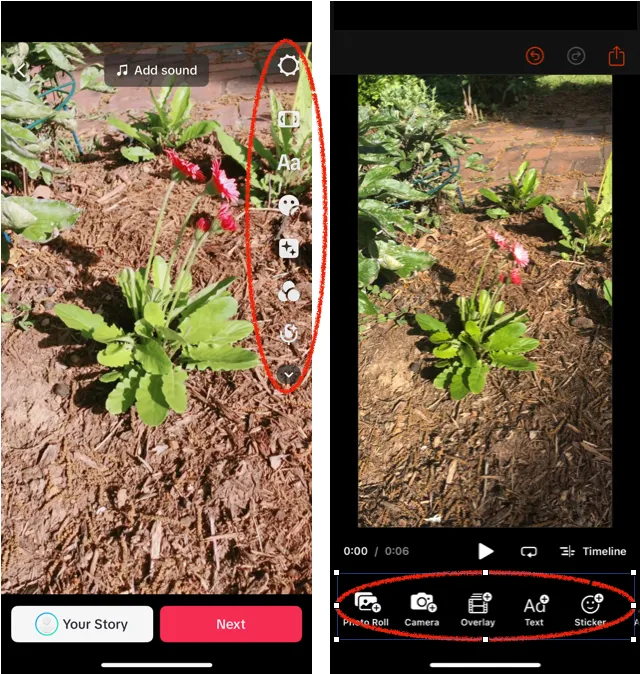
After capturing a video, the app displays an editor to complete the creation. The editing tools are in the red circles. TikTok provides about ten different tools on the editing screen. Additionally, TikTok provided some editing tools on the capture screen. The CreativeEditor SDK apps provide a scrolling set of asset libraries along the bottom for items to add to the scene. But when any of the elements of the scene, like your video or an audio clip, are highlighted, the bottom row becomes tools to manipulate that element. The basic Asset Library types are uploads, videos, audio, images, text, shapes, and stickers.
How to configure and customize each of these tools is beyond the scope of this tutorial. But, a lot of the customization of the assets, fonts, blurs and even filters can be done without code. By design, the CreativeEditor SDK downloads assets from a central server. This is a great way for you to be able to push updated filters, stickers, and other assets to your users without going through the app update process. In the next section, we’ll walk through that and provide some links for further research.
Configuring the Editors Assets
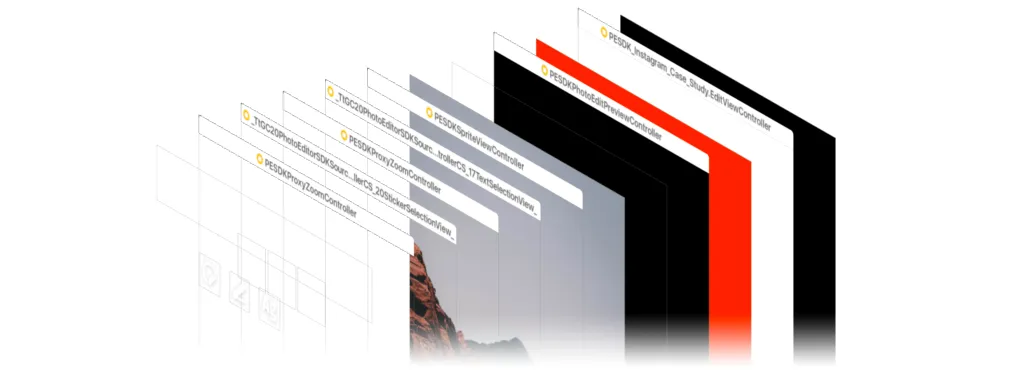
The IMG.LY Engine looks for assets for stickers, vector shapes, LUT filters, color filters, color palettes, blurs, and fonts using a URL by default. The design of the system is that you would have your own server supporting your app. However, assets in the app bundle are also accessible by URL, so as long as the assets are in the folder format that the engine expects, it doesn’t matter whether they are local or remote.
In the documentation for this process you can find a URL to the default asset bundle. Once you download that bundle you can add it to your app. The bundle is structured much like a regular iOS Assets.catalog with some JSON containing metadata about the asset and a file that provides the actual asset. For some of the assets like filters and vectors, no file is needed as everything can be defined in the JSON.
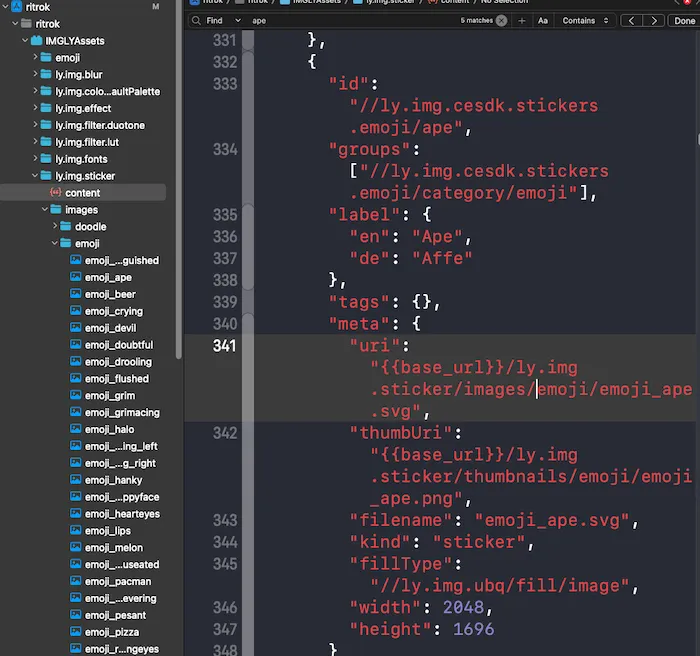
In the image above, you can see the JSON to describe the ape sticker and the emoji_ape image file after the IMGLYAssets bundle has been added to our app. You can edit these assets and add your own.
Once you’re done editing the asset bundle, you can use it instead of the default bundle during the onCreate modifier like this:
VideoEditor(engine)
  .imgly.onCreate({ engine in
     try await engine.scene.load(from: VideoEditor.defaultScene)
              // Add asset sources
     let bundleURL = Bundle.main.url(forResource: "IMGLYAssets", withExtension: "bundle")!
     try await engine.addDefaultAssetSources(baseURL: bundleURL)
     try await engine.addDemoAssetSources(sceneMode: engine.scene.getMode(),
       withUploadAssetSources: true)
     try await engine.asset.addSource(TextAssetSource(engine: engine))
  })
In the code above, we create a blank scene using VideoEditor.defaultScene static method. Then set a URL to point to the bundle in the app instead of a remote bundle and make that the source of addDefaultAssetSources. Now our app will use the assets from the bundle.
Exporting the Finished Video
Once the user has finished with their creation, they tap the share button and the Video Editor composes all of the video, audio, filters, and static items into a single .mp4 file. Then it displays a share sheet. If you’d rather do something different, like save the creation locally so you can play it back, you can override this default behavior.
In your app, after the .onCreate modifier, you can define a .onExport modifier. When the user taps on the share button you can export the video and then save it to the documents directory to playback later.
In the documentation for modifiers you can find the source code for the Video Editor’s default behavior. Instead of duplicating it in detail here, we can just summarize and provide a little snippet for our change.
First, the .onCreate handler takes an engine and a eventHandler parameter. The engine is the underlying IMG.LY Engine object we’ve been using. The eventHandler lets us send information back to the Video Editor UI about the progress or any errors.
In the documentation, there is a helper function to export the video. After it runs it returns the data of the exported video and a mimeType, which will be .mp4.
let data: Date, mimeType: MIMEType
let mode = try mainEngine.scene.getMode()
guard mode == .video else { throw CallbackError.unknownSceneMode; return }
(data, mimeType) = try await exportVideo()
The code in the documentation handles static files from the DesignEditor as well as videos from the VideoEditor. The above code makes it so that only video can be exported, since our app only works with video.
In the exportVideo function, the code first checks to make sure it has a properly formed scene object to work with. Then it starts the export using mainEngine.block.exportVideo(_, mimeType:). This begins an async throwing stream during the export. The VideoExport objects in the stream are either .progress or .finished. When a .progress object arrives, the exportVideo function sends an update to the eventHandler to display in the UI. When the .finished object arrives, it has an associated object that is the data for the video.
Now instead of opening the share sheet, we can write the video to the documents directory for the app.
do {
      guard let documentDirectory = try? FileManager.default.url(for: .documentDirectory, in: .userDomainMask, appropriateFor: nil, create: true)
        else {
          logger.error("Documents directory not found"); return
        }

  let filePath = documentDirectory.appending(component: UUID().uuidString)
  try data.write(to: filePath)
} catch (let error as NSError) {
  logger.error("could not write finished file: \(error.localizedDescription)")
}

eventHandler.send(.exportCompleted {})
The code above takes the data from the exportVideo function and writes it to the app’s documents directory, giving it a UUID string value as a filename. Then it updates the UI to let it know the export is done but sends an empty action block.
Setting Up a Playback Controller
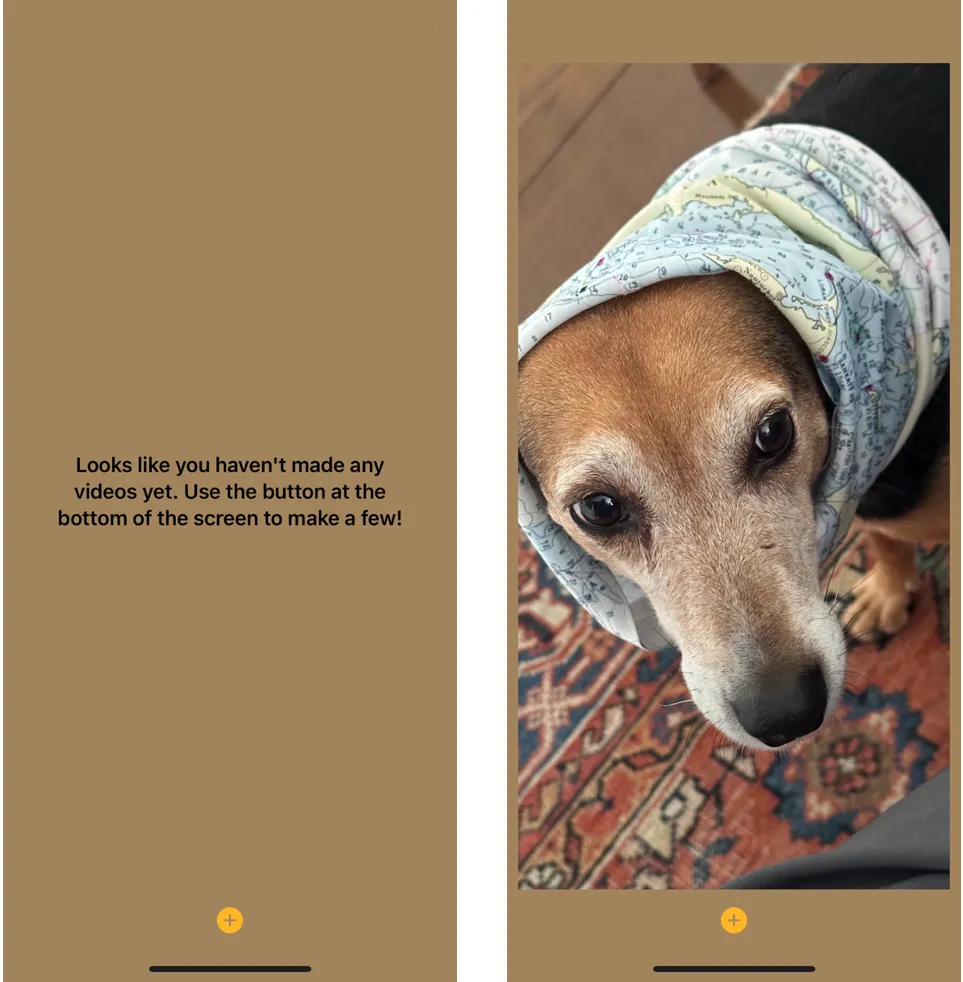
For this example app, the playback controller will play any clips in the app’s Documents directory. Each clip plays on a loop. The user can swipe up to get the next clip and tap to pause or restart the clip. If there are no clips, the user will be encouraged to make a new one.
When the video player view appears, the first task is to see if there are any videos to load. Any video files in the Documents directory are assumed to be ready to play.
func loadVideos() {
  //get a handle to the documents directory for this app
  guard let documentDirectory = try? FileManager.default.url(for: .documentDirectory, in: .userDomainMask, appropriateFor: nil, create: true) else { logger.error("Documents directory not found"); return}

  if let files = try? FileManager.default.contentsOfDirectory(at: documentDirectory, includingPropertiesForKeys: nil) {
    videos = files
  }
}
The code above reads all of the filenames from the documents directory into a files array and then assigns that array to a videos variable.
Each time the app is launched or the VideoEditor view is dismissed, the video player view will get the onAppear message. This is a good place to check for videos using the loadVideos function. After the videos are loaded, the app can start to play the first one.
func setupVideoPlayer() {
  guard let currentVideo = videos.first else {logger.error("No videos to play"); return}

  self.shouldHideEmptyDirectoryText = true

       let endMonitor = NotificationCenter.default.publisher(for: NSNotification.Name.AVPlayerItemDidPlayToEndTime)

  self.player = AVPlayerItem(url: currentVideo)
  self.currentVideo = currentVideo

}
In the code above, we first check to see if there are any video files. If there are, then hide the message about videos and create a new AVPlayerItem using the URL of the first video. The endMonitor, shouldHideEmptyDirectoryText, and player are both being watched by the View. The AVPlayer gets rendered in a regular SwiftUI View.
VideoPlayer(player: player)
  .frame(width: 640, height: 360)
  .onAppear {
    player.play()
  }
  .onReceive(endMonitor) { _ in
    player.seek(to: .zero)
    player.play()
}
When the video reaches the end, it will seek(to: .zero) which rewinds the video and loops it.
In the TikTok app, you can advance to the next video by swiping up. Additionally, you can start and stop any video by tapping on the screen. We can add both of those features using gesture recognizers.
The code for play and pause is attached to a Tap Gesture modifier we can append to the player.
.onTapGesture {
  if player.rate > 0.0 {
    player.rate = 0.0
  } else {
    player.rate = 1.0
  }
}
We can just adjust the playback rate. A value of 1.0 is a normal speed and 0.0 is paused. The player also has a .pause and .play methods, but sometimes these seem buggy.
Swipe is a little more difficult since SwiftUI only has swiping on List items. So we can use a drag gesture and then evaluate the translations when it’s complete.
.gesture(
    DragGesture(minimumDistance: 3.0, coordinateSpace: .local)
        .onEnded { value in
            // Check for a vertical, upward swipe with minimal horizontal deviation
          if abs(value.translation.width) < 100 &&
             value.translation.height < 0 {
                // It was an up swipe!
		viewModel.advanceVideo()
            }
        }
)
Then advancing the video is a simple matter of refreshing the player
func advanceVideo() {
  guard let currentVideo = self.currentVideo else { logger.error("No current video."); return}

  let currentIndex = videos.firstIndex(of: currentVideo)
  var nextVideo = videos.index(after: currentIndex!)
  if nextVideo == videos.count {
    nextVideo = 0
  }

  self.currentvideo = videos[nextVideo]
  self.player = AVPlayer(url: self.currentVideo!)

}
This code will get the next file URL from the array of videos. When it reaches the end, it will loop back and get the file at index 0. Then it creates a new player. Because the view is observing that player variable, it will update with the new video.
With this view, the user can create new videos by tapping the creation button and swipe to view all of their created videos.
Where to Go From Here
This tutorial has focused on how the CreativeEditor SDK can help you quickly make a video creation app like TikTok. Good next steps would be to further customize the editing tools and build out the network for sharing and tagging videos. Something that is important to consider is the data structure for each video. The iOS system is optimized to read only as much of a video file off of disk as is needed at any moment. Your app should use those optimizations to run faster. So, don’t load the whole video into memory as a Data object. Your data structures should keep the large video files somehow separate from the much smaller metadata (likes, comments, etc.). Consider storing the URL or filename of the video in the same object as the likes and comments. This will also allow you to cache video files after they have been downloaded so that you don’t need to redownload them when other data such as comments or number of likes changes.
Thanks for reading! We hope that you’ve gotten a better understanding for how a tool like the CreativeEditor SDK can bring your ideas to market faster. Feel free to reach out to us with any questions, comments, or suggestions.
Looking for more video capabilities? Check out our solutions for Short Video Creation, and Camera SDK!
To stay in the loop, subscribe to our Newsletter or follow us on LinkedIn and Twitter.