Introduction
When it comes to working with video and audio files, FFmpeg is one of the most powerful and widely used tools available. It’s an open-source command-line utility capable of handling almost any kind of media conversion, compression, and processing task. Whether you need to convert a video from MP4 to WebM, extract audio from a movie, or resize a large video for the web, FFmpeg is often the go-to solution for developers and media professionals alike. For an in‑depth overview of FFmpeg commands and features, read our Ultimate Guide to FFmpeg.
While you can install and run FFmpeg locally on your computer, there are limitations. Processing large video files on a personal machine can be slow, resource-intensive, and impractical if you need to handle multiple files or larger workloads.
This is where Google Cloud Platform (GCP) comes in. By running FFmpeg on GCP, you gain access to scalable cloud infrastructure that can process media files much faster than most local setups. You can choose the right machine size for your task, scale up when handling heavy jobs, and only pay for the resources you use. If you prefer Amazon Web Services, our guide to running FFmpeg on AWS Spot Instances covers a similar setup.
By the end of this guide, you’ll know how to set up a Google Cloud project, run FFmpeg on a virtual machine, and process videos efficiently in the cloud. This tutorial is designed with beginners in mind, so even if you’re new to cloud platforms or FFmpeg, you’ll be able to follow along step by step.
Set Up a Google Cloud Project
Before you can run FFmpeg on Google Cloud, you’ll need to create a project where all your resources, such as virtual machines and storage, will live. Think of a Google Cloud project as a workspace that keeps everything organized and secure. Each project has its own settings, billing, and resources, so you can keep experiments separate from production work.
1. Create a New Project
Start by going to the Google Cloud Console. In the top menu, click on the project selector and choose New Project. Give your project a name (for example, ffmpeg-demo) and, if prompted, select an organization. Once created, this project will serve as the container for all the steps that follow.
2. Enable Billing
Google Cloud requires billing to be enabled in order to use most services. If you haven’t set this up yet, you’ll be asked to link your project to a billing account. Don’t worry, Google Cloud offers a free tier with credits for new users, which is more than enough to complete this tutorial and experiment with small workloads.
3. Set Up Google Cloud Storage
Next, you’ll need a place to store your media files. Google Cloud Storage (GCS) works like a highly reliable online hard drive. You can upload your videos there, process them with FFmpeg on a virtual machine, and then save the results back to the same bucket.
- In the Google Cloud Console, navigate to Cloud Storage → Buckets.
- Click Create Bucket and choose a unique name (e.g., my-ffmpeg-videos).
- Select the default storage class and location that best matches your region.
- After the bucket is created, click Upload Files and add a small test video, this will be the file you process later in the tutorial.
At this point, you have a project set up with billing enabled and a storage bucket containing your test video. Need to crop or trim your videos before uploading? Our Flutter guide demonstrates how to crop and trim videos in Flutter using FFmpeg. You’re now ready to create a virtual machine that will run FFmpeg.
Note: Not all services are enabled when you start working with GCP. If you are prompted to enable a service while working on this setup, please do enable it and keep track on it in API & Services.
Start a Compute Engine VM
With your project and storage bucket ready, the next step is to create a Compute Engine Virtual Machine (VM). A VM is essentially a computer in the cloud, you decide how powerful it should be, and you only pay for the time it’s running.
1. Choose a Machine Type
Head over to the Compute Engine section in the Google Cloud Console and click Create Instance. You’ll need to configure a few options:
- Name: Pick something descriptive like ffmpeg-vm.
- Region & Zone: Choose a region close to you or your users for faster upload/download speeds.
- Machine type:
- For testing and small videos, a smaller instance like e2-medium (2 vCPUs, 4 GB memory) is usually enough.
- For larger video processing jobs, choose something more powerful such as n2-standard-4 (4 vCPUs, 16 GB memory) or higher. The more CPU and memory you assign, the faster FFmpeg can handle big files.
💡 Tip: You can always resize or recreate the VM with a larger machine later if you find it’s too slow.
To automate large numbers of FFmpeg jobs using REST APIs and worker queues, refer to our batch video processing server guide.
2. Configure Boot Disk
By default, Google Cloud gives you a Debian or Ubuntu Linux image, which works perfectly for FFmpeg. You don’t need to change anything here unless you prefer another distribution.
3. Configure Access Scopes
By default, the instances can only read from a bucket, but we need to upload the output back to the bucket, so in Security tab set the Access Scopes to Set access for each API and set Storage to “Read Write”.
3. Create and Launch the VM
Click Create and wait a moment, Google Cloud will provision your VM. Once it’s ready, you’ll see it listed under VM Instances in the Compute Engine dashboard.
4. Connect via SSH
To start using the VM, click the SSH button next to your instance in the console. This opens a secure terminal session directly in your browser. You’re now logged into your VM and ready to install software, just as if you were sitting in front of a fresh Linux machine.
At this stage, you have a working VM connected to your project. Alternatively, you can run FFmpeg inside a Docker container for a reproducible environment - our Docker guide shows how. In the next section, you’ll install FFmpeg on this machine and run your first test command.
Install FFmpeg
FFmpeg is available in the default Debian/Ubuntu repositories that Google Cloud’s standard Linux images use, so installation is just a couple of terminal commands. For more information on FFmpeg for Linux distros, see here.
1) Install via APT (recommended)
# Update package lists
sudo apt update

# Install FFmpeg and ffprobe
sudo apt -y install ffmpeg

# Verify installation
ffmpeg -hide_banner -version
ffprobe -hide_banner -version
If you prefer the very latest FFmpeg, you can also download a prebuilt Linux static build from the official FFmpeg downloads page (no extra system libraries required).
2) Quick sanity checks
# See available encoders/decoders in your build
ffmpeg -hide_banner -encoders | head -n 20
ffmpeg -hide_banner -decoders | head -n 20
Refer to the official command reference if you want to understand what each option means.
Test FFmpeg with sample commands
You can test FFmpeg without any input file by generating a short test pattern using the built-in testsrc video source filter:
# Generate a 3-second 1280x720 MP4 test video
ffmpeg -f lavfi -i "testsrc=duration=3:size=1280x720:rate=30" \\
  -c:v libx264 -pix_fmt yuv420p ~/test.mp4
The testsrc filter creates a color bars pattern with a timestamp—perfect for verifying your install.
Tip: If you encounter “Unknown encoder” for a codec, either switch to another codec available in your build or install a newer build (e.g., the official static builds mentioned above).
You're now ready to pull a real file from Cloud Storage and process it on your VM in the next section.
Process a Video
Now that FFmpeg is installed on your Compute Engine VM, let’s process a real video. The workflow looks like this: download a file from Google Cloud Storage → process it with FFmpeg → upload the result back to Google Cloud Storage.
Download Video from GCS to the VM
First, make sure the gcloud CLI is installed on your VM (it usually is on Google-provided images). Then, copy the test video from your storage bucket:
# Replace with your actual bucket and file names
gsutil cp gs://my-ffmpeg-videos/test.mp4 ~/test.mp4
This command uses gsutil to copy the file into your VM’s home directory.
Run a Conversion with FFmpeg
Let’s do a simple format conversion and resizing example:
# Convert MP4 to WebM, resized to 720p
ffmpeg -i ~/test.mp4 -vf "scale=1280:-2" \\
  -c:v libvpx-vp9 -b:v 1M -c:a libopus \\
  ~/output.webm
Here’s what this command does:
i ~/test.mp4→ input file.vf "scale=1280:-2"→ resizes video to 1280px wide while keeping aspect ratio.c:v libvpx-vp9 -b:v 1M→ encodes video with VP9 codec at ~1 Mbps.c:a libopus→ encodes audio with the Opus codec.~/output.webm→ output file.
When it finishes, you’ll have a new WebM file in your VM’s home directory.
Upload the Result Back to GCS
Finally, copy the processed file back into your storage bucket:
# Replace with your bucket name
gsutil cp ~/output.webm gs://my-ffmpeg-videos/
You can now view or download the processed video directly from your GCS bucket.
For a ready to use example of the above architecture, you can refer to this github repository.
Other Options on GCP
While running FFmpeg on a Compute Engine VM is the most straightforward way to get started, Google Cloud offers several other options that might better suit your needs depending on scale and workflow.
Cloud Run for Small Jobs
If you want a serverless option, Cloud Run lets you package FFmpeg into a container and run it on demand. This is a great fit for lightweight jobs or API-style services, where you don’t need to manage servers at all. You simply pay for the CPU and memory used during each request, making it cost-efficient for occasional media processing.
Transcoder API for a Managed Service
For teams who want to skip infrastructure entirely, Google offers the Transcoder API. It’s a fully managed video processing service where you just provide the input file and the desired output format, and Google handles the rest. It’s especially useful for production pipelines with predictable formats, but it’s less flexible than rolling your own FFmpeg setup.
Kubernetes for Large-Scale Workloads
If you’re dealing with a high volume of media jobs, consider deploying FFmpeg in a Google Kubernetes Engine (GKE) cluster. This allows you to scale horizontally, running multiple FFmpeg pods in parallel to process many videos at once. While it requires more setup, it provides the foundation for a production-grade, auto-scaling media processing system.
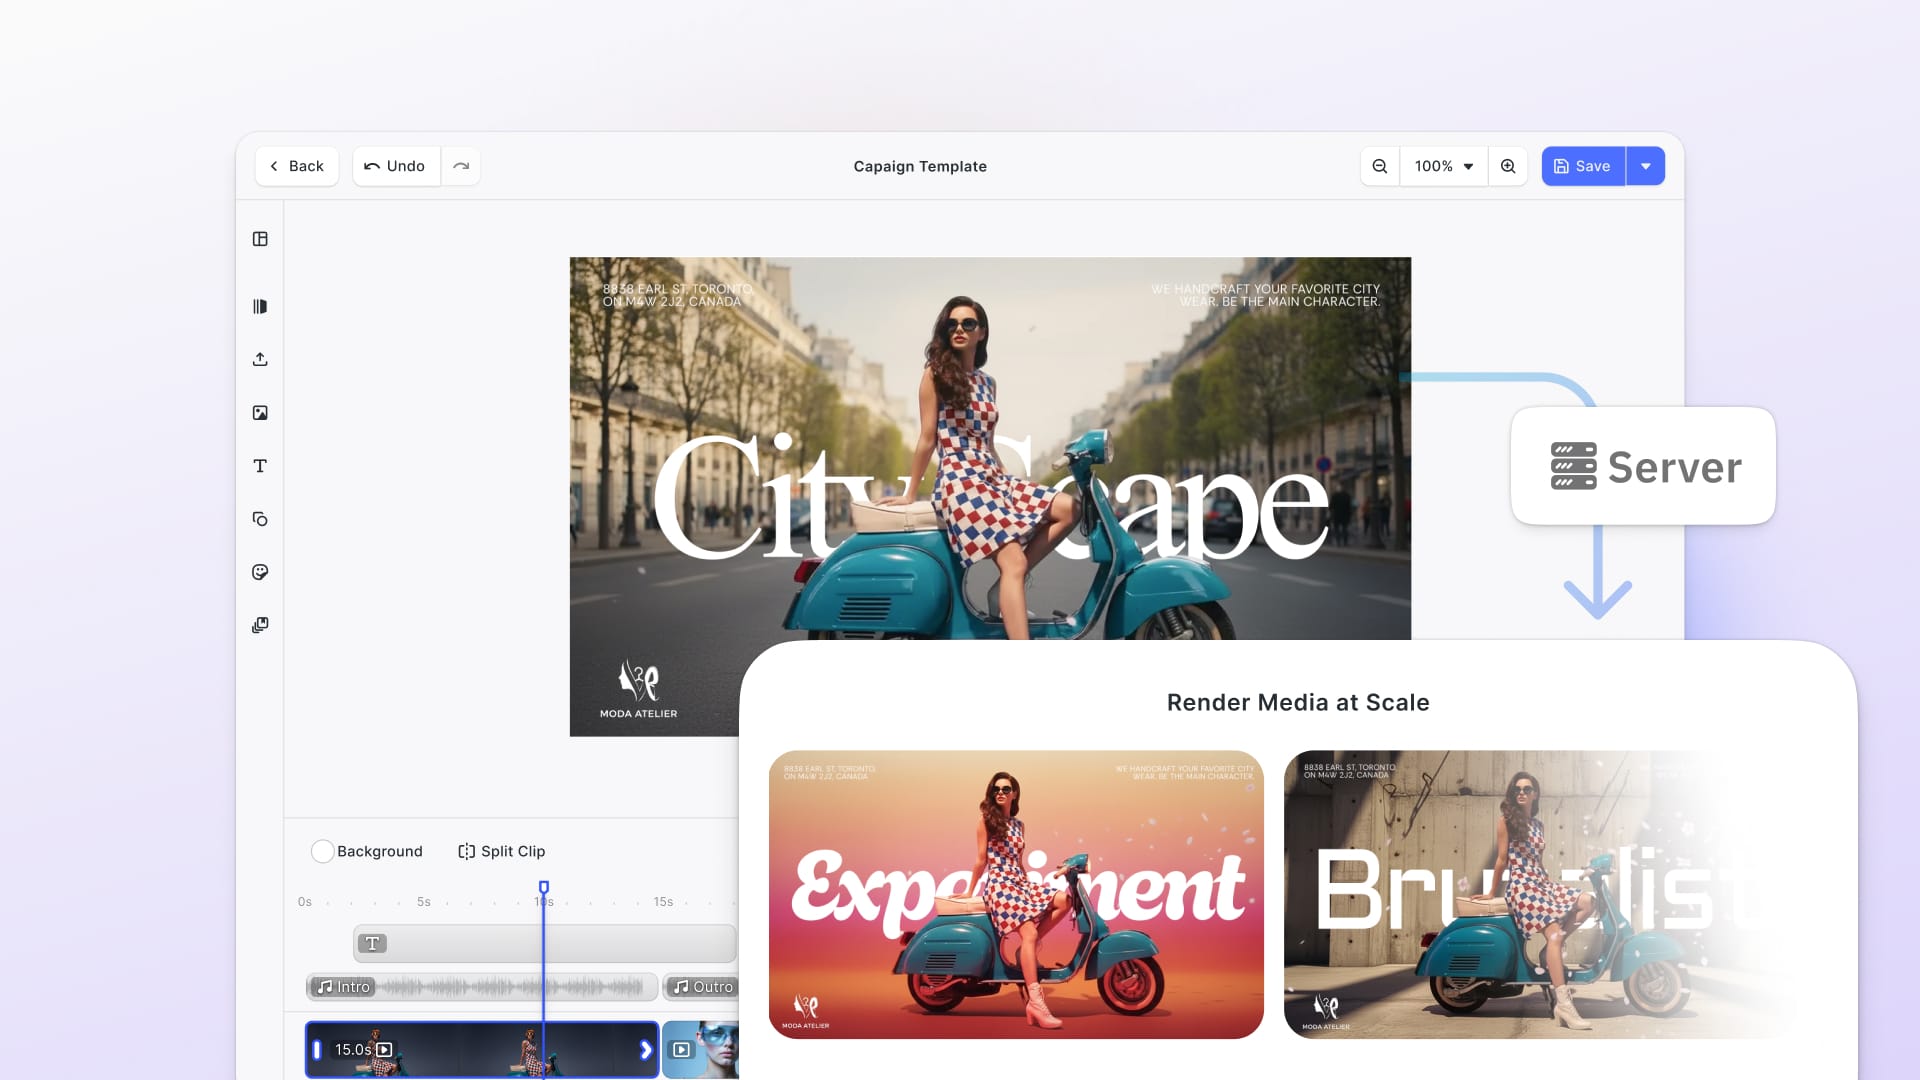
Beyond FFmpeg: A UI for Creative Editing
FFmpeg is excellent for batch conversions and automation, but what if you want to offer end-users a creative editing experience directly in the browser? This is where solutions like CE.SDK from IMG.LY come in. CE.SDK is a fully customizable editing SDK that you can integrate into your app, enabling Canva-grade photo, video, and design editing features on top of your processing pipeline. In fact, combining FFmpeg’s backend power on GCP with CE.SDK’s front-end UI gives you the best of both worlds: automated conversions plus user-driven creativity.
Conclusion
By now, you’ve seen how straightforward it is to run FFmpeg on Google Cloud Platform. With just a few steps—creating a project, setting up a Compute Engine VM, installing FFmpeg, and connecting it to Cloud Storage—you can process videos in the cloud as easily as on your local machine. The benefit is that your workflow is now backed by scalable infrastructure: you can choose a lightweight VM for simple conversions or a powerful instance when you need to process large files quickly.
This tutorial has given you a solid foundation, but it’s only the beginning. From here, you can explore automation by scripting your FFmpeg jobs and scheduling them with Cloud Functions or Cloud Scheduler. For scaling, you might package FFmpeg into containers and deploy it on Kubernetes to process thousands of files in parallel. And if you want to save time managing infrastructure altogether, managed services like the Transcoder API let Google handle the heavy lifting for you.
Whether you stick with Compute Engine for flexibility or move toward serverless and managed services for efficiency, running FFmpeg on GCP gives you the power to build media pipelines that grow with your needs.