Create and Edit Video using the CreativeEditor SDK
CE.SDK Video Mode allows your users to edit videos in a manner familiar from popular platforms such as TikTok or Instagram. The CE.SDK editor contains a full-featured video editor, complete with Video and Audio trimming, and composition capabilities. Get to know the core concepts in this guide.
To learn about the available API calls related to video editing, see the engine guide on video editing.
To learn about the Video Editor UI, skip to the UI overview.
A Note on Browser Support#
Video mode heavily relies on modern features like web codecs, and as such is currently only supported in the latest versions of Google Chrome, Microsoft Edge, or other Chromium-based browsers.
Editor Setup#
Configuring which library entries to use for background clips#
You can use the ui.elements.libraries.backgroundTrackLibraryEntries configuration option to specify library entries should be shown in insert panel for background clips
Add demo asset sources#
When adding demo asset sources using cesdk.addDemoAssetSources(), make sure to specify the correct scene mode. The installed demo asset sources vary between Design and Video modes.
If you don't specify a scene mode, addDemoAssetSources() will try to add the correct sources based on the current scene, and default to 'Design'. If you call addDemoAssetSources() without a scene mode, and before loading or creating a video scene, the audio and video asset sources will not be added.
Create or load a video scene#
To switch the editor to video mode, create an empty video scene using cesdk.createVideoScene(). If you already have a video scene, loading it with loadFromUrl() or loadFromString() will switch the editor to video mode as well.
And that's it!
UI Overview#
Timeline#
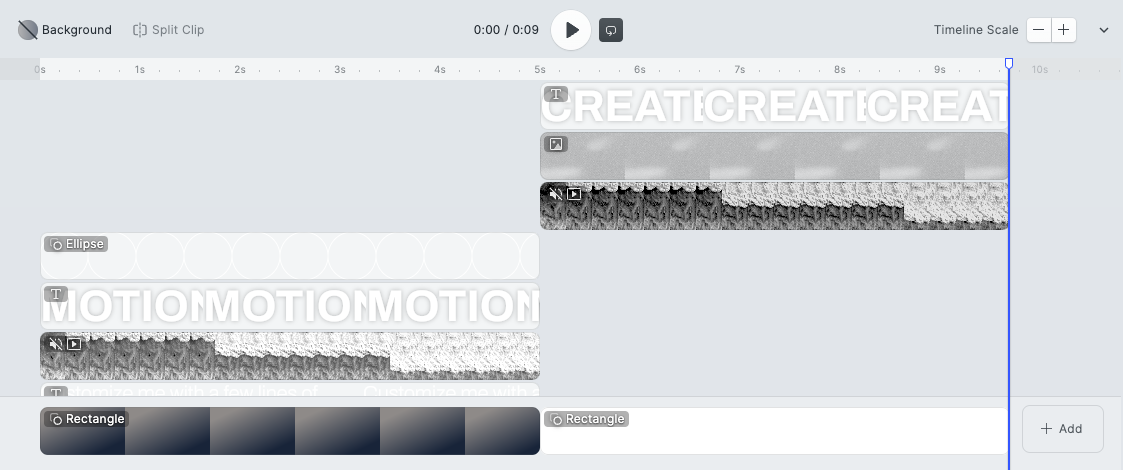
The timeline is the main control for video editing. It is here that clips and audio strips can be positioned in time. The timeline is divided into two main areas:
Foreground#
Clips run along the top of the foreground timeline, while audio strips run along the bottom. Click anywhere inside the timeline to set the playback time, or drag the seeker directly. Use the Split Clip button to split the clips into two at the position of the seeker. The zoom controls allow you to zoom the timeline in and out for better control. Finally, Use the Play and Loop buttons to view the final result.
- Drag either of the strip handles to adjust start and end time of a clip.
- Drag the center of the strip to position the clip.
- Drag the center of the strip to rearrange the clips.
- Use the context menu on the strip to perform specific actions on the clip.
Background#
Background clips go at the bottom of the timeline and define the length of the video. Background clips are typically videos and images, but can be configured to support other types of elements as well. They are packed against each other and can't have time gaps in between, and they define the length of the exported video.
- Drag either of the strip handles to adjust start and end time of a clip.
- Drag the center of the strip to rearrange the clips.
- Use the context menu on the strip to perform specific actions on the clip.
Video#
Videos are handled in a similar fashion to regular elements: You can add them via the Asset Library and position them anywhere on the page. You can select a specific section of video to play by trimming the clip on the timeline and/or using the trim controls (pictured below), accessible by pressing the trim button.
Trimming videos#

Trim controls will appear near the top of the editor window.
- While these controls are open, only the selected video is played during seeking or playback.
- You can adjust the start and end time by dragging the handles on either side of the strip.
- The grayed-out area indicates the parts of the video that won't be shown.
- The blue overlay indicates the end of the page duration - to show these parts of the video, extend the duration of the containing page.
Audio#
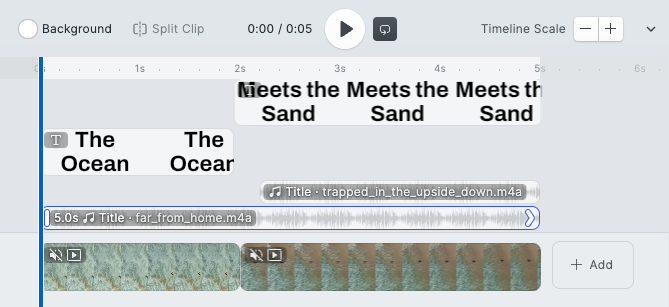
Unlike regular design elements, audio is not visible on the canvas. It is only shown in the timeline, as audio strips. Use the timeline to edit audio:
- Drag either of the strip handles to adjust start and end time of the audio strip.
- Drag the center of the strip to position the strip.
- Drag the center of the strip to rearrange the audio stipes.
- Use the context menu on the strip to perform specific actions on the audio strip.
Trimming audio#

Trimming audio works just like trimming video.